
By registering an official device to your account, you can manage the device from obniz cloud and use more features for free (Lite Plan).
The registration method depends on your device and how many devices you register. Choose one of the three methods below.
Authenticate and register with the number on the display (obniz Board only)
Register from the "+Add device" button at the top of the device list in Developer's console > Devices.
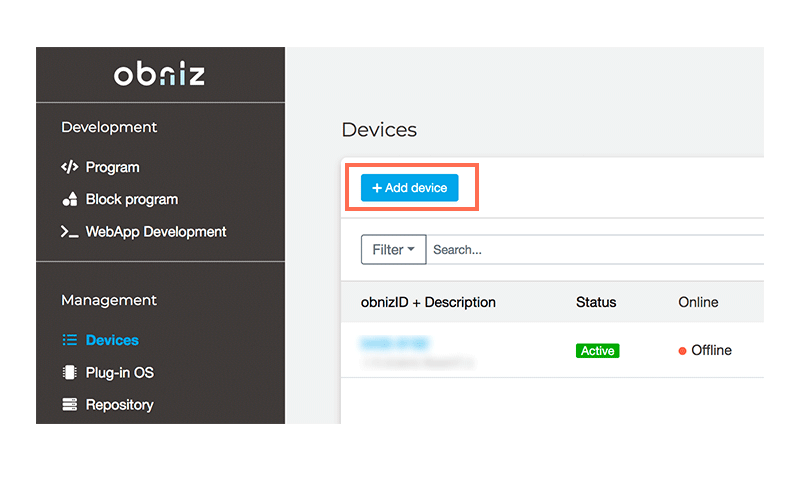
Click the "Add device" button, then click "obniz Board".
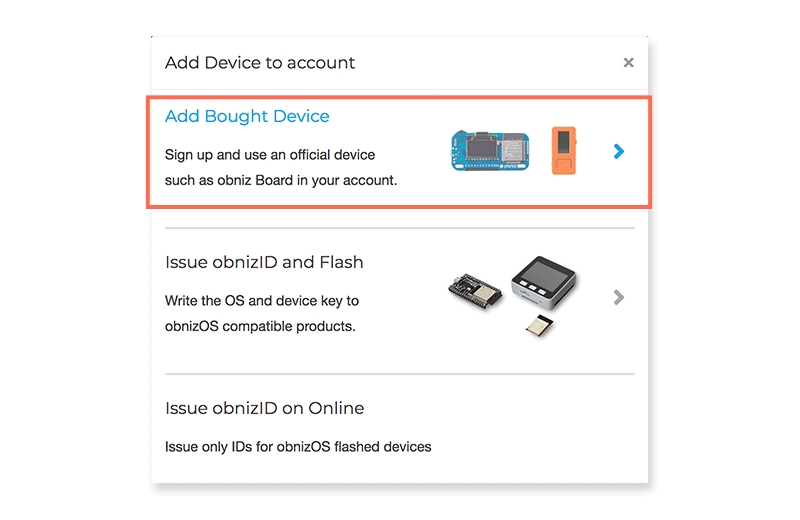
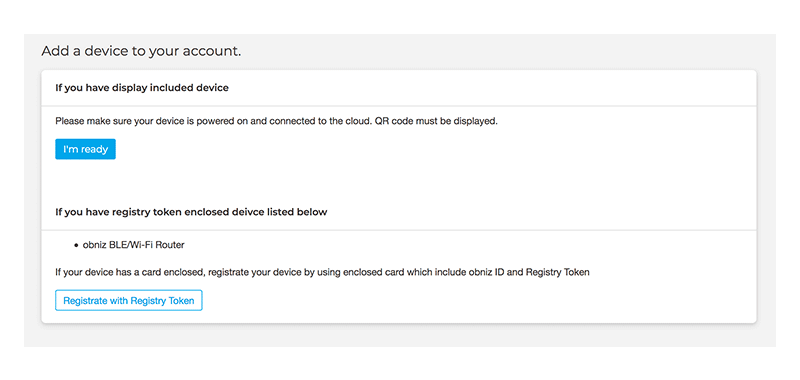
The "Add device to your account" page shows the steps you need to get started.
Please make sure the official device you want to register is powered on and connected to Wi-Fi. Once an 8-digit number (obnizID) appears on the display, the device is ready.
When the device is ready, click "Ready".
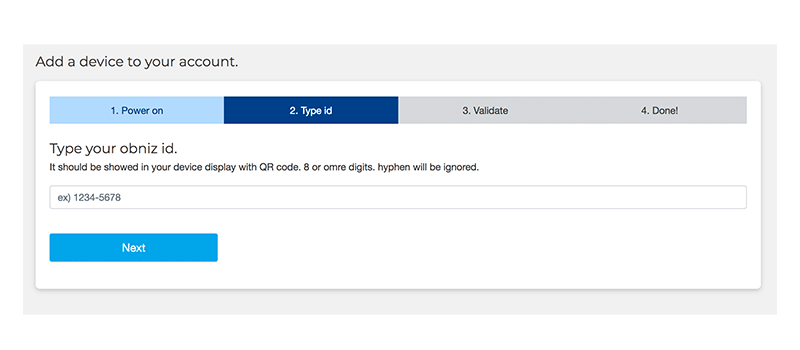
Entering the obnizID
Type the obnizID in single-byte alphanumeric characters (the 8-digit number shown on the device display is the obnizID). Hyphens (-) are optional.
After entering it, click "Next".
- If the ID does not exist, or is already owned by someone else, an error will be displayed.
Entering the confirmation number
Once you enter the obnizID correctly, a confirmation number of a few digits appears on the device screen. Type that number.
- The number becomes invalid after a certain time.
- If you mistype it once, a new number is issued.
After registration finishes, the device reboots once.
You can see the registered device as a registered device in the Device list of the Developer's console.
Register multiple devices at once on the registration page
This method registers many devices at once. Open Register multiple devices on a PC or smartphone with a camera. Scan QR codes one after another — like reading items at a checkout counter — to register multiple devices in sequence.
Beyond registering to your account, you can add descriptions and install apps in one continuous flow. Use this method when you register several devices or install apps, such as 10 or more devices.
Register from the "+Add device" button at the top of the device list in Developer's console > Devices.
Click the "Add device" button, then click "Other devices with a QR code".
The registration screen appears, and you can read QR codes from the web camera and register them in sequence.
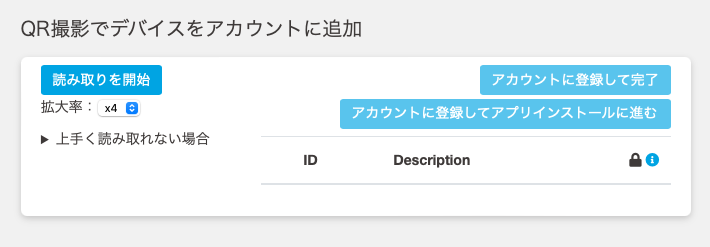
The steps are as follows.
- A camera permission dialog appears as soon as the screen opens, so please allow it. Alternatively, allow it from "Start scanning".
- A high-resolution camera is preferable. Switch cameras as needed.
- Scan the devices. If your speaker is set to make sound, a sound plays when a scan succeeds. (Devices are not registered at this stage yet.)
- Scanned devices are added to the list on the right, so name each device as needed.
- For the scanned list, you can choose "Register only" or "Register and install an app".
You can see the registered devices as registered devices in the Device list of the Developer's console.
Register one device at a time with a QR code
This method registers a device that has a QR code on its body, one at a time, with a smartphone. The device you scan with opens a dedicated URL, and only that device is registered.
- The Intelligent Edge series cannot be registered this way. Please use "Register multiple devices at once on the registration page" above.
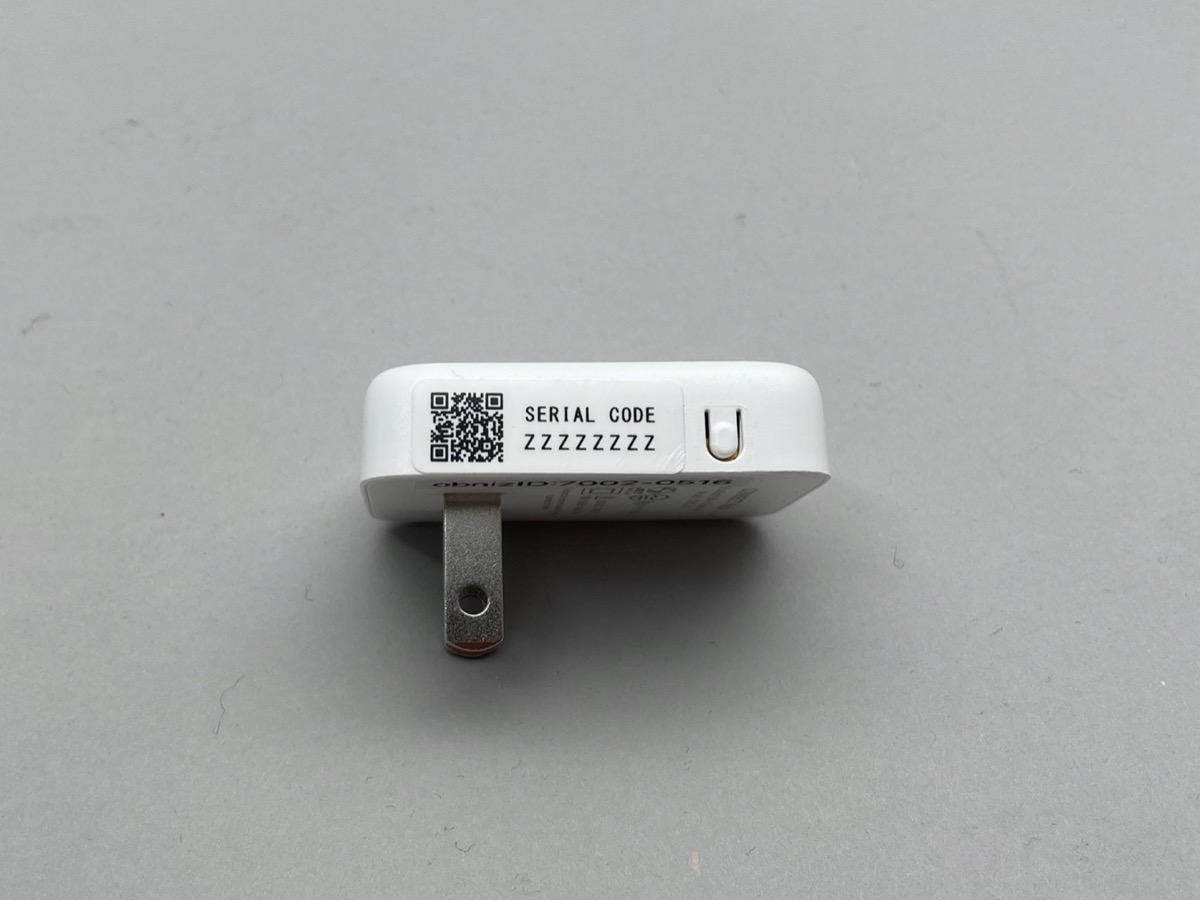
Scan the QR code to open the URL.
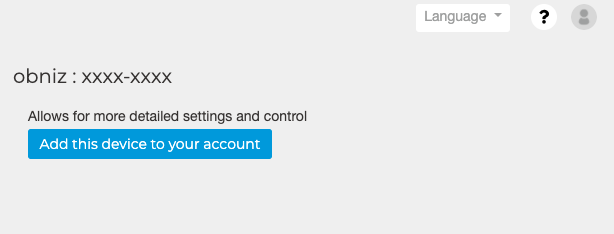
Press the "Add this device to your account" button.
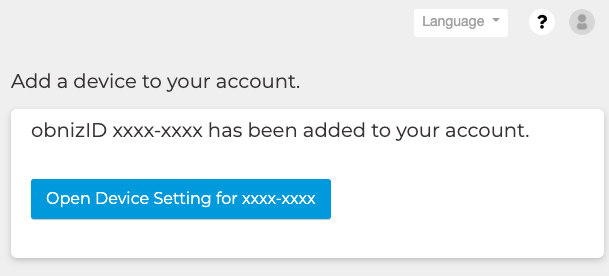
After registration finishes, the device reboots once.
You can see the registered device as a registered device in the Device list of the Developer's console.