First, connect the obniz Board to Wi-Fi.

Quick start for obniz
For instructions on how to start up the obniz board and set up a connection to Wi-Fi, please see Quick Start for obniz Board/obniz Board 1Y.
After setting up the wifi, let's try to run obniz with a simple program.
1. Program
Go to the online HTML editor at http://obniz.com/ja/console/program and enter the obniz id. Copy the following program in its entirety and paste it into your program screen.
<html>
  <head>
    <meta charset="utf-8">
    <meta name="viewport" content="width=device-width, initial-scale=1">
      <link rel="stylesheet" href="https://stackpath.bootstrapcdn.com/bootstrap/4.3.1/css/bootstrap.min.css">
    <script src="https://obniz.com/js/jquery-3.2.1.min.js"></script>
      <script src="https://unpkg.com/obniz@3.x/obniz.js"></script>
    </head>
  <body>

    <div id="obniz-debug"></div>

    <div class="wrap px-5 py-4">

      <h3 class="title mb-4">Connect From Your Browser</h3>

      <h5>LED</h5>

      <div class="btnBox d-flex mb-4">

        <div class="green_btn d-flex flex-column">
          <button class="btn btn-success m-1" id="green_on">ON</button>
          <button class="btn btn-success m-1" id="green_off">OFF</button>
        </div>

        <div class="yellow_btn d-flex flex-column">
          <button class="btn btn-warning m-1" id="yellow_on">ON</button>
          <button class="btn btn-warning m-1" id="yellow_off">OFF</button>
        </div>

      </div>

      <h5>TEXT</h5>

      <div>
        <input type="text" class="p-2" id="text" value="Hello World">
        <button class="btn btn-primary" id="showtime">Print on obniz</button>
      </div>

    </div>

    <script>
      var obniz = new Obniz("OBNIZ_ID_HERE");

      obniz.onconnect = async function () {

        var light = obniz.wired("Keyestudio_TrafficLight", {gnd:0, green:1, yellow:2, red:3});

        $('#green_on').click(function () {
          light.green.on();
        });

        $('#green_off').click(function () {
          light.green.off();
        });

        $('#yellow_on').click(function () {
          light.yellow.on();
        });

        $('#yellow_off').click(function () {
          light.yellow.off();
        });

        obniz.switch.onchange = function(state) {
          $('#print').text(state);
          obniz.display.clear();
          obniz.display.print(state);
        }

        $("#showtime").on("click", function(){
          obniz.display.clear();
          obniz.display.print($("#text").val());
        });

      }

    </script>
  </body>
</html>
2. Enter your obnizID
In the program
var obniz = new Obniz("OBNIZ_ID_HERE");
and set OBNIZ_ID_HERE to your own obniz id. For example, for 1234-5678, enter the following
var obniz = new Obniz("1234-5678");
3. Run the program
Click the\ [Run] button in the upper right corner to connect your browser to the obniz Board.
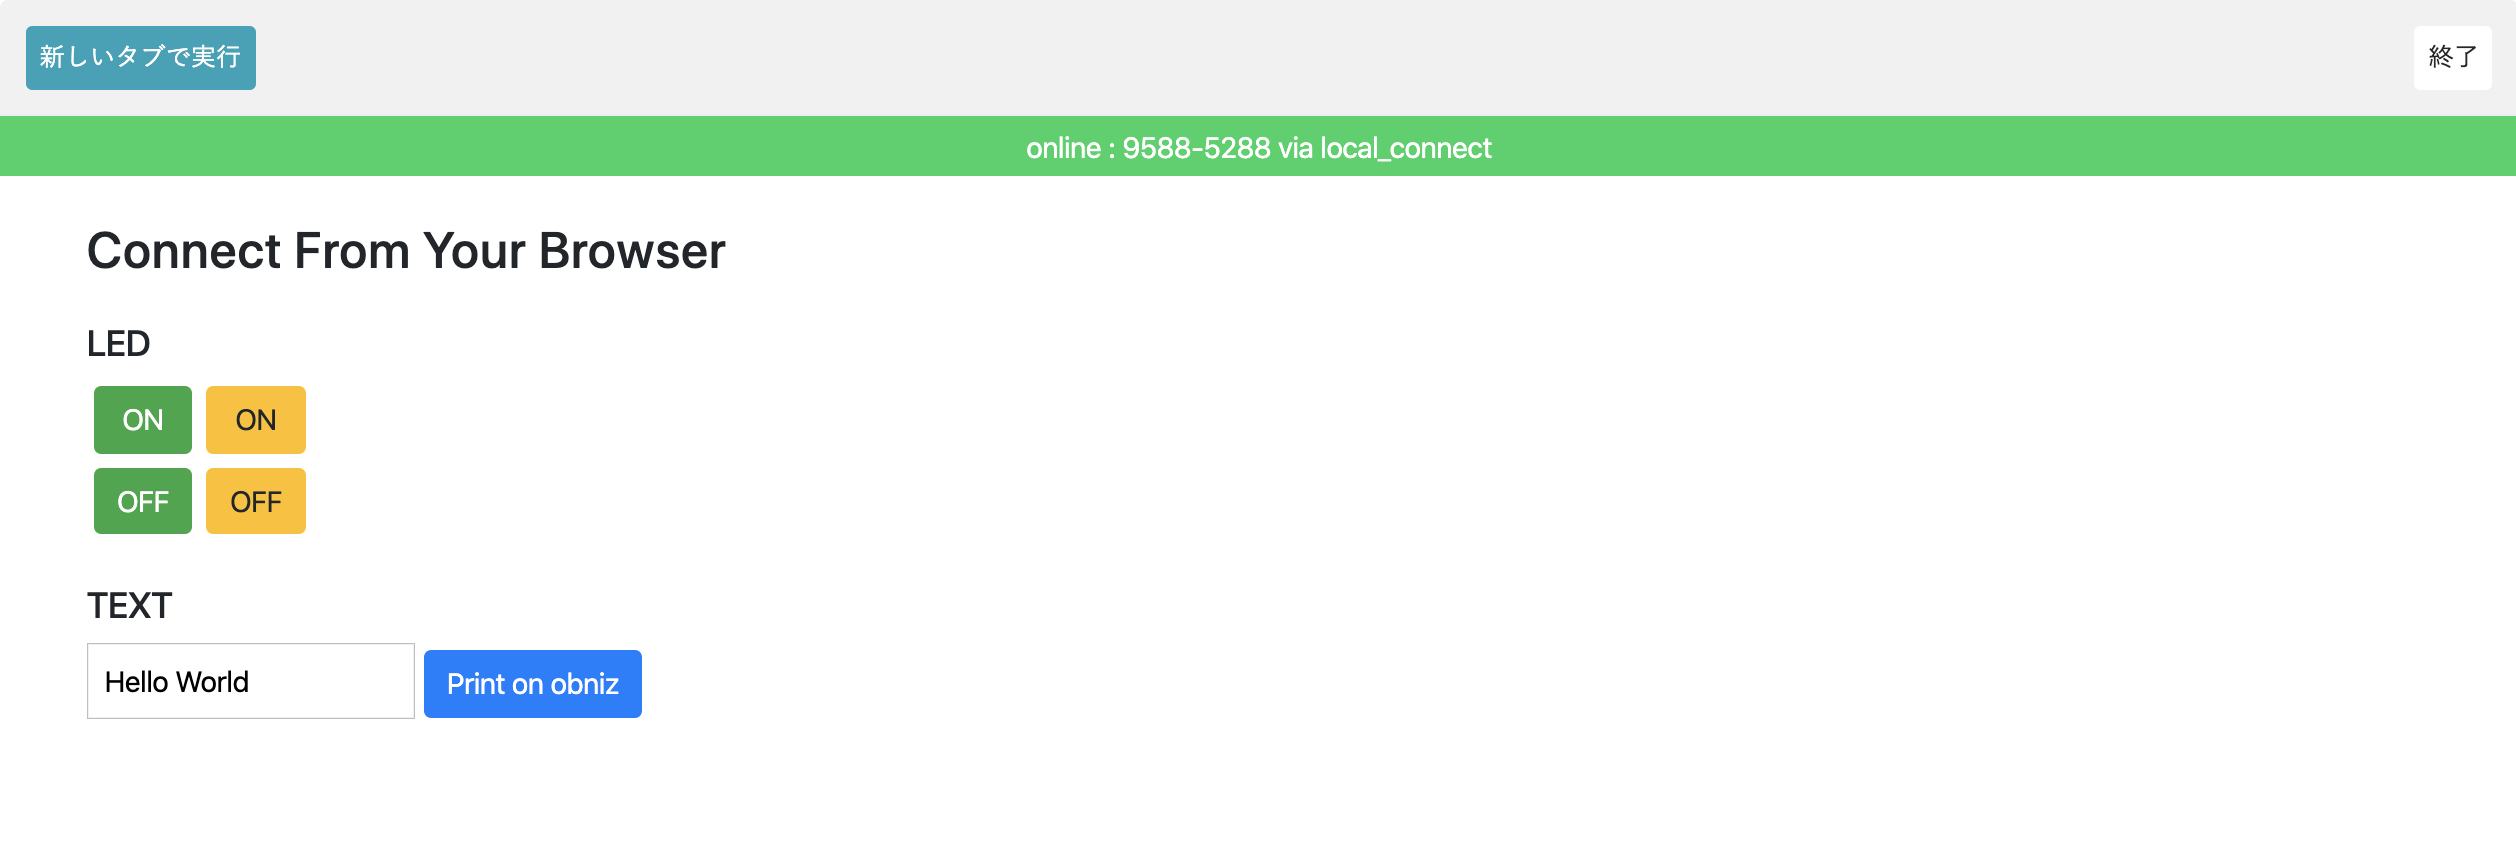
If you see the following screen in your browser, you have succeeded.

Move - LED ON / OFF-
You can turn the LED on and off by pressing the buttons displayed on the browser.
The green button controls the green LED and the yellow button controls the yellow LED.
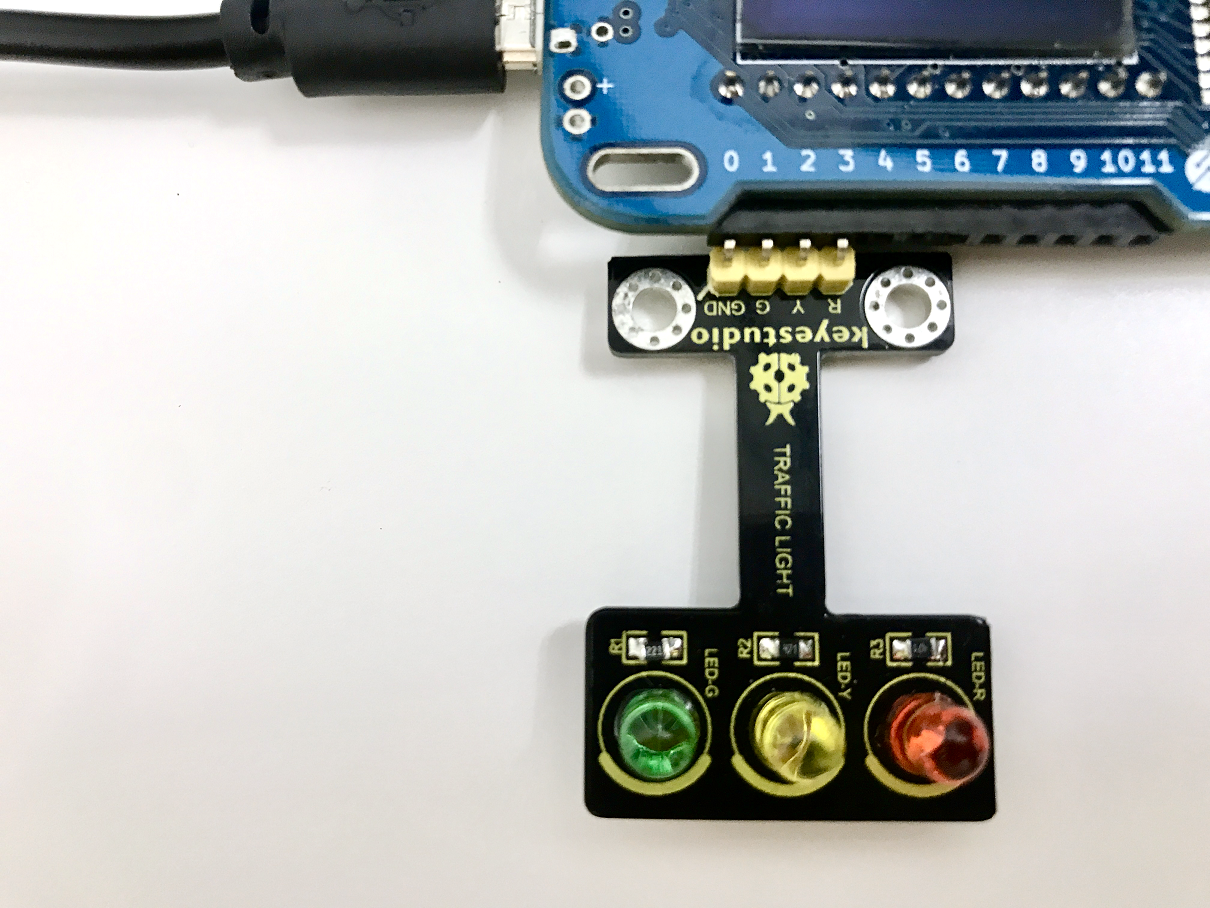
Connect the LED signal to the obniz as shown in the picture, and press the button to switch the green and yellow LEDs on and off.
GND, G, Y, and R are connected to 0, 1, 2, and 3 respectively.

Display text on the display
Display your favorite letters and messages on the Board's display.
Change the "Hello World" part to your favorite text or message and press the [Print on obniz] button.
The characters you enter on the obniz Board will appear on the Board display.
Let's try to run it on a smartphone.
Since obniz runs its program through the cloud, it can be easily operated from a smartphone.
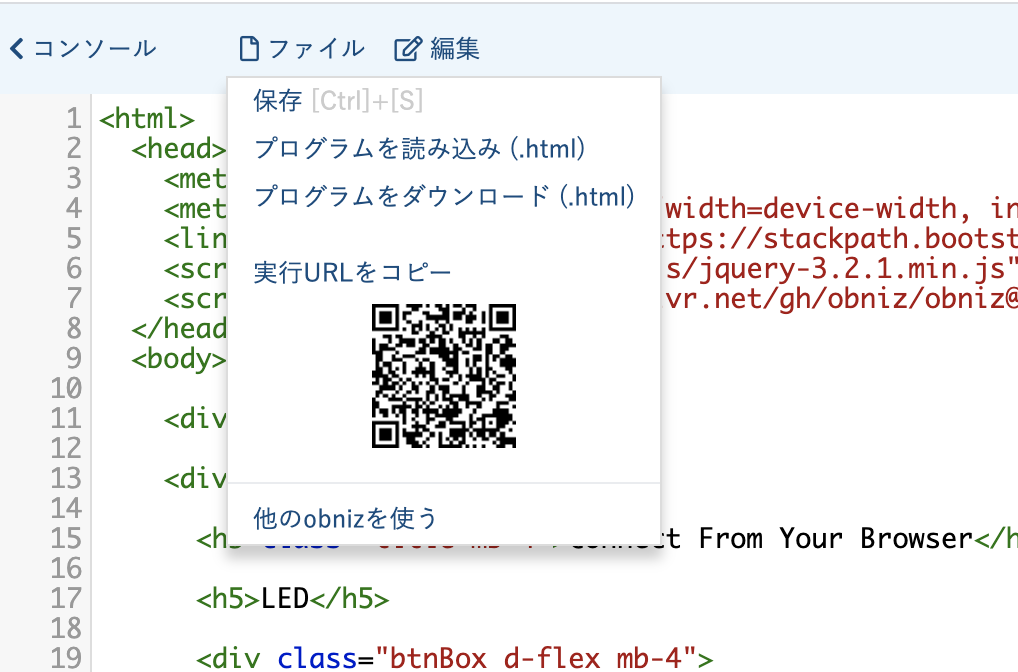
Go back to the editor screen, display the QR code from the file at the top, and scan it with your smartphone to make it work.
