Temperature record: Measure the temperature by running the app regularly and check the app status
In the previous lesson, we ran the app in the cloud every hour.
This time, we will create an app that displays the temperature acquired by the temperature sensor in the "app status" part where the timeout message was displayed last time.
What is app status?
App status is a mechanism for checking the status that can be used when executing in the cloud.
In Last lesson, the part where the timeout result was displayed is the app status.
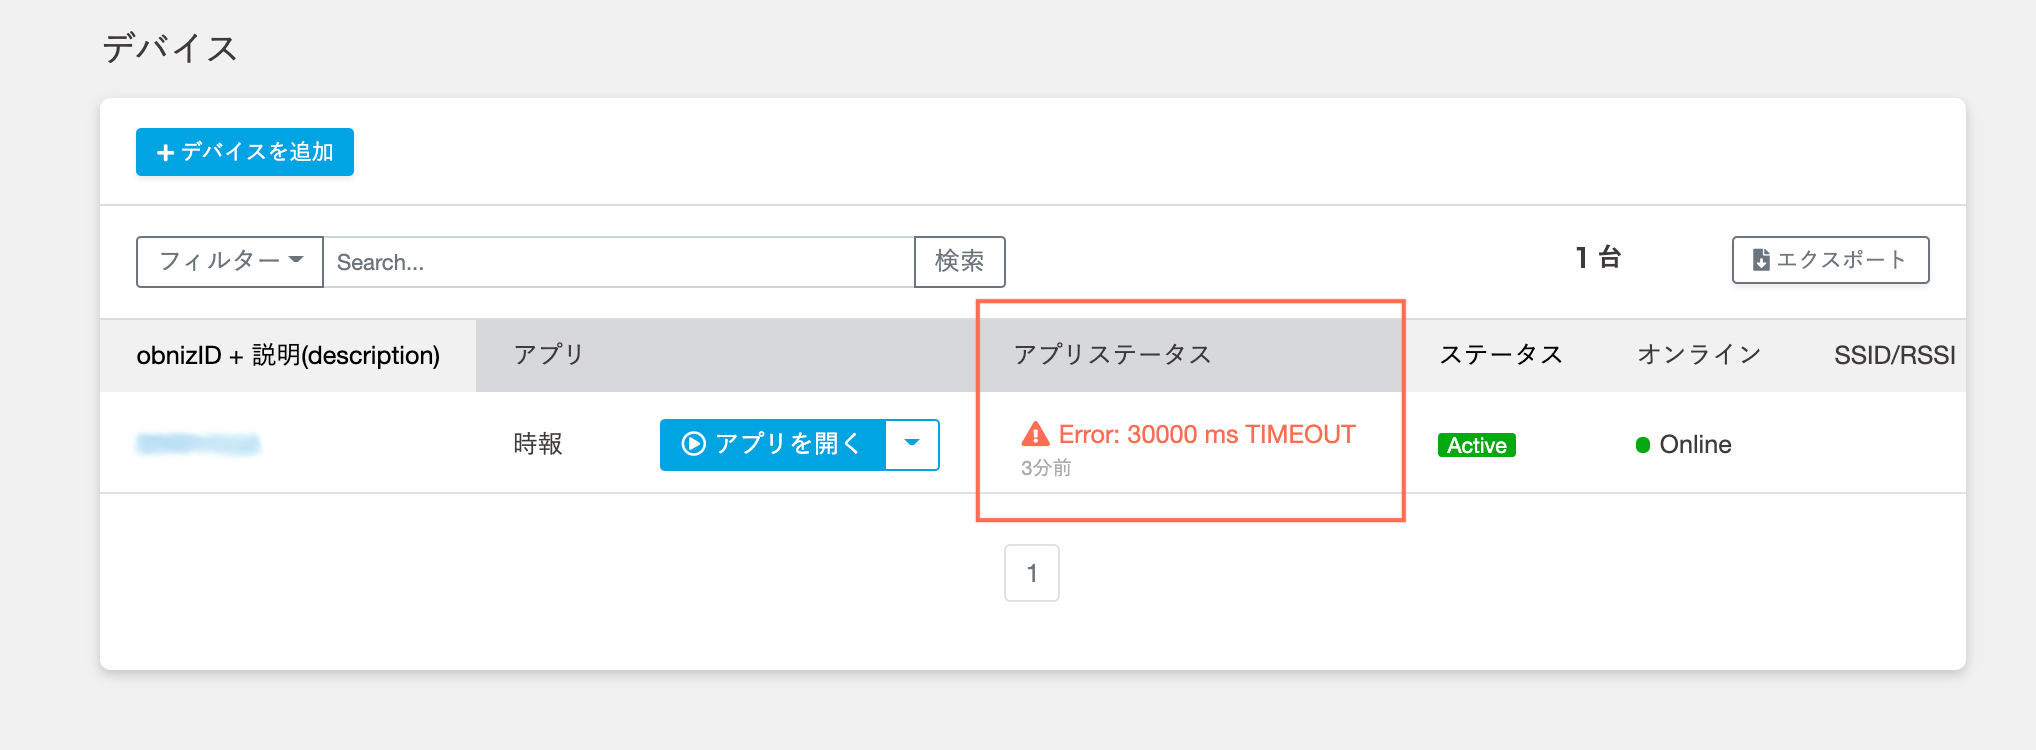
If you do not write anything in the program, the timeout will be recorded like this, but you can also display your favorite information in the application status part.
You can choose the status from "Success" and "Error", and the icon and color will change (success is displayed in green and error is displayed in orange).
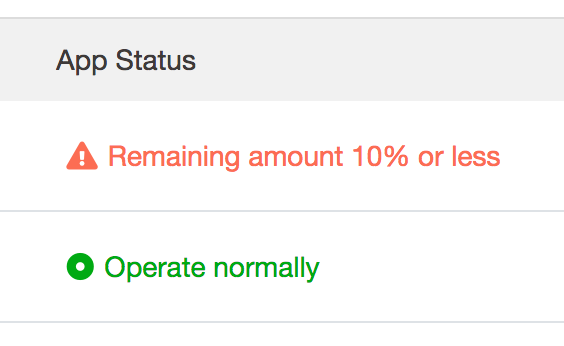
And you can display your favorite character string in the character part.
This time, let's set the status to "Success" so that the temperature is displayed in the text part.
Temperature sensor
First, let's check the parts to be used this time and prepare them. The part shown in the picture is the temperature sensor.

Since the temperature sensor is a sensor like the distance sensor, it is a device that detects external information and converts it into signals and data.
Among such sensors, the temperature sensor can measure the temperature.
Make an app
Let's make an app.
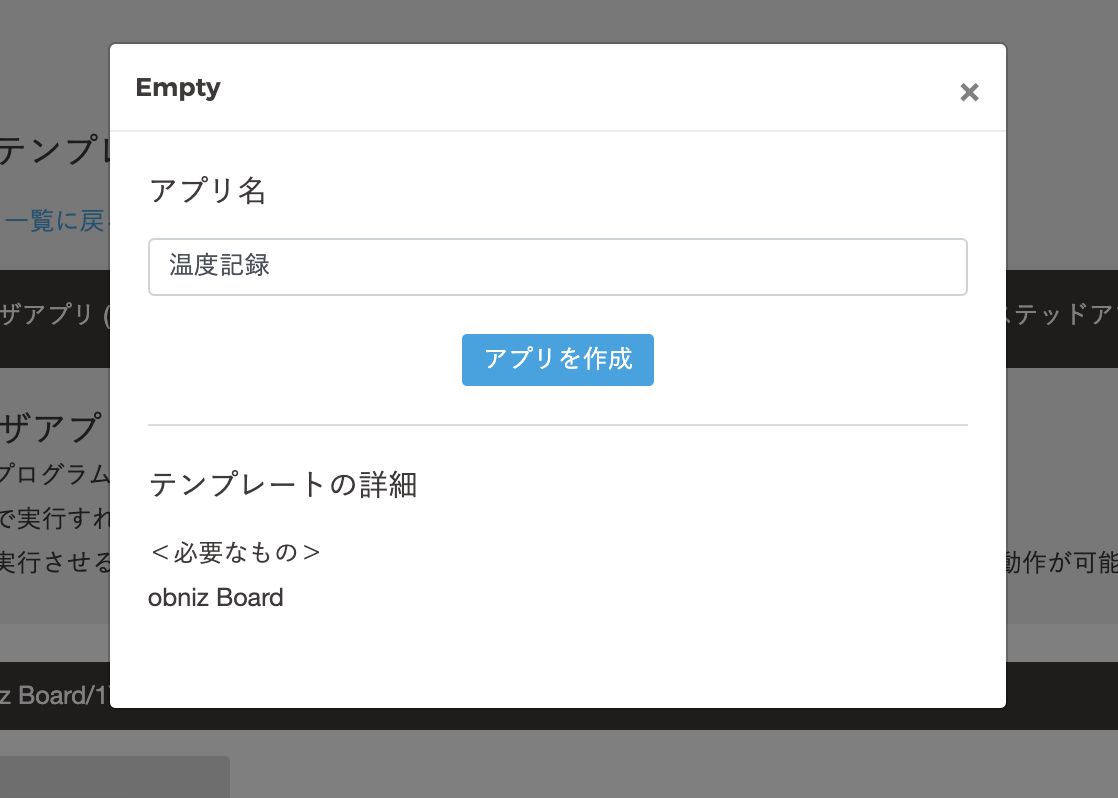
From the developer console, go to "App Development"-> "New"-> "Browser App (Block Program)" and select "Empty" in "Template using obniz Board / 1Y".
Enter your favorite app name (here, "Temperature Record") and press "Create App".
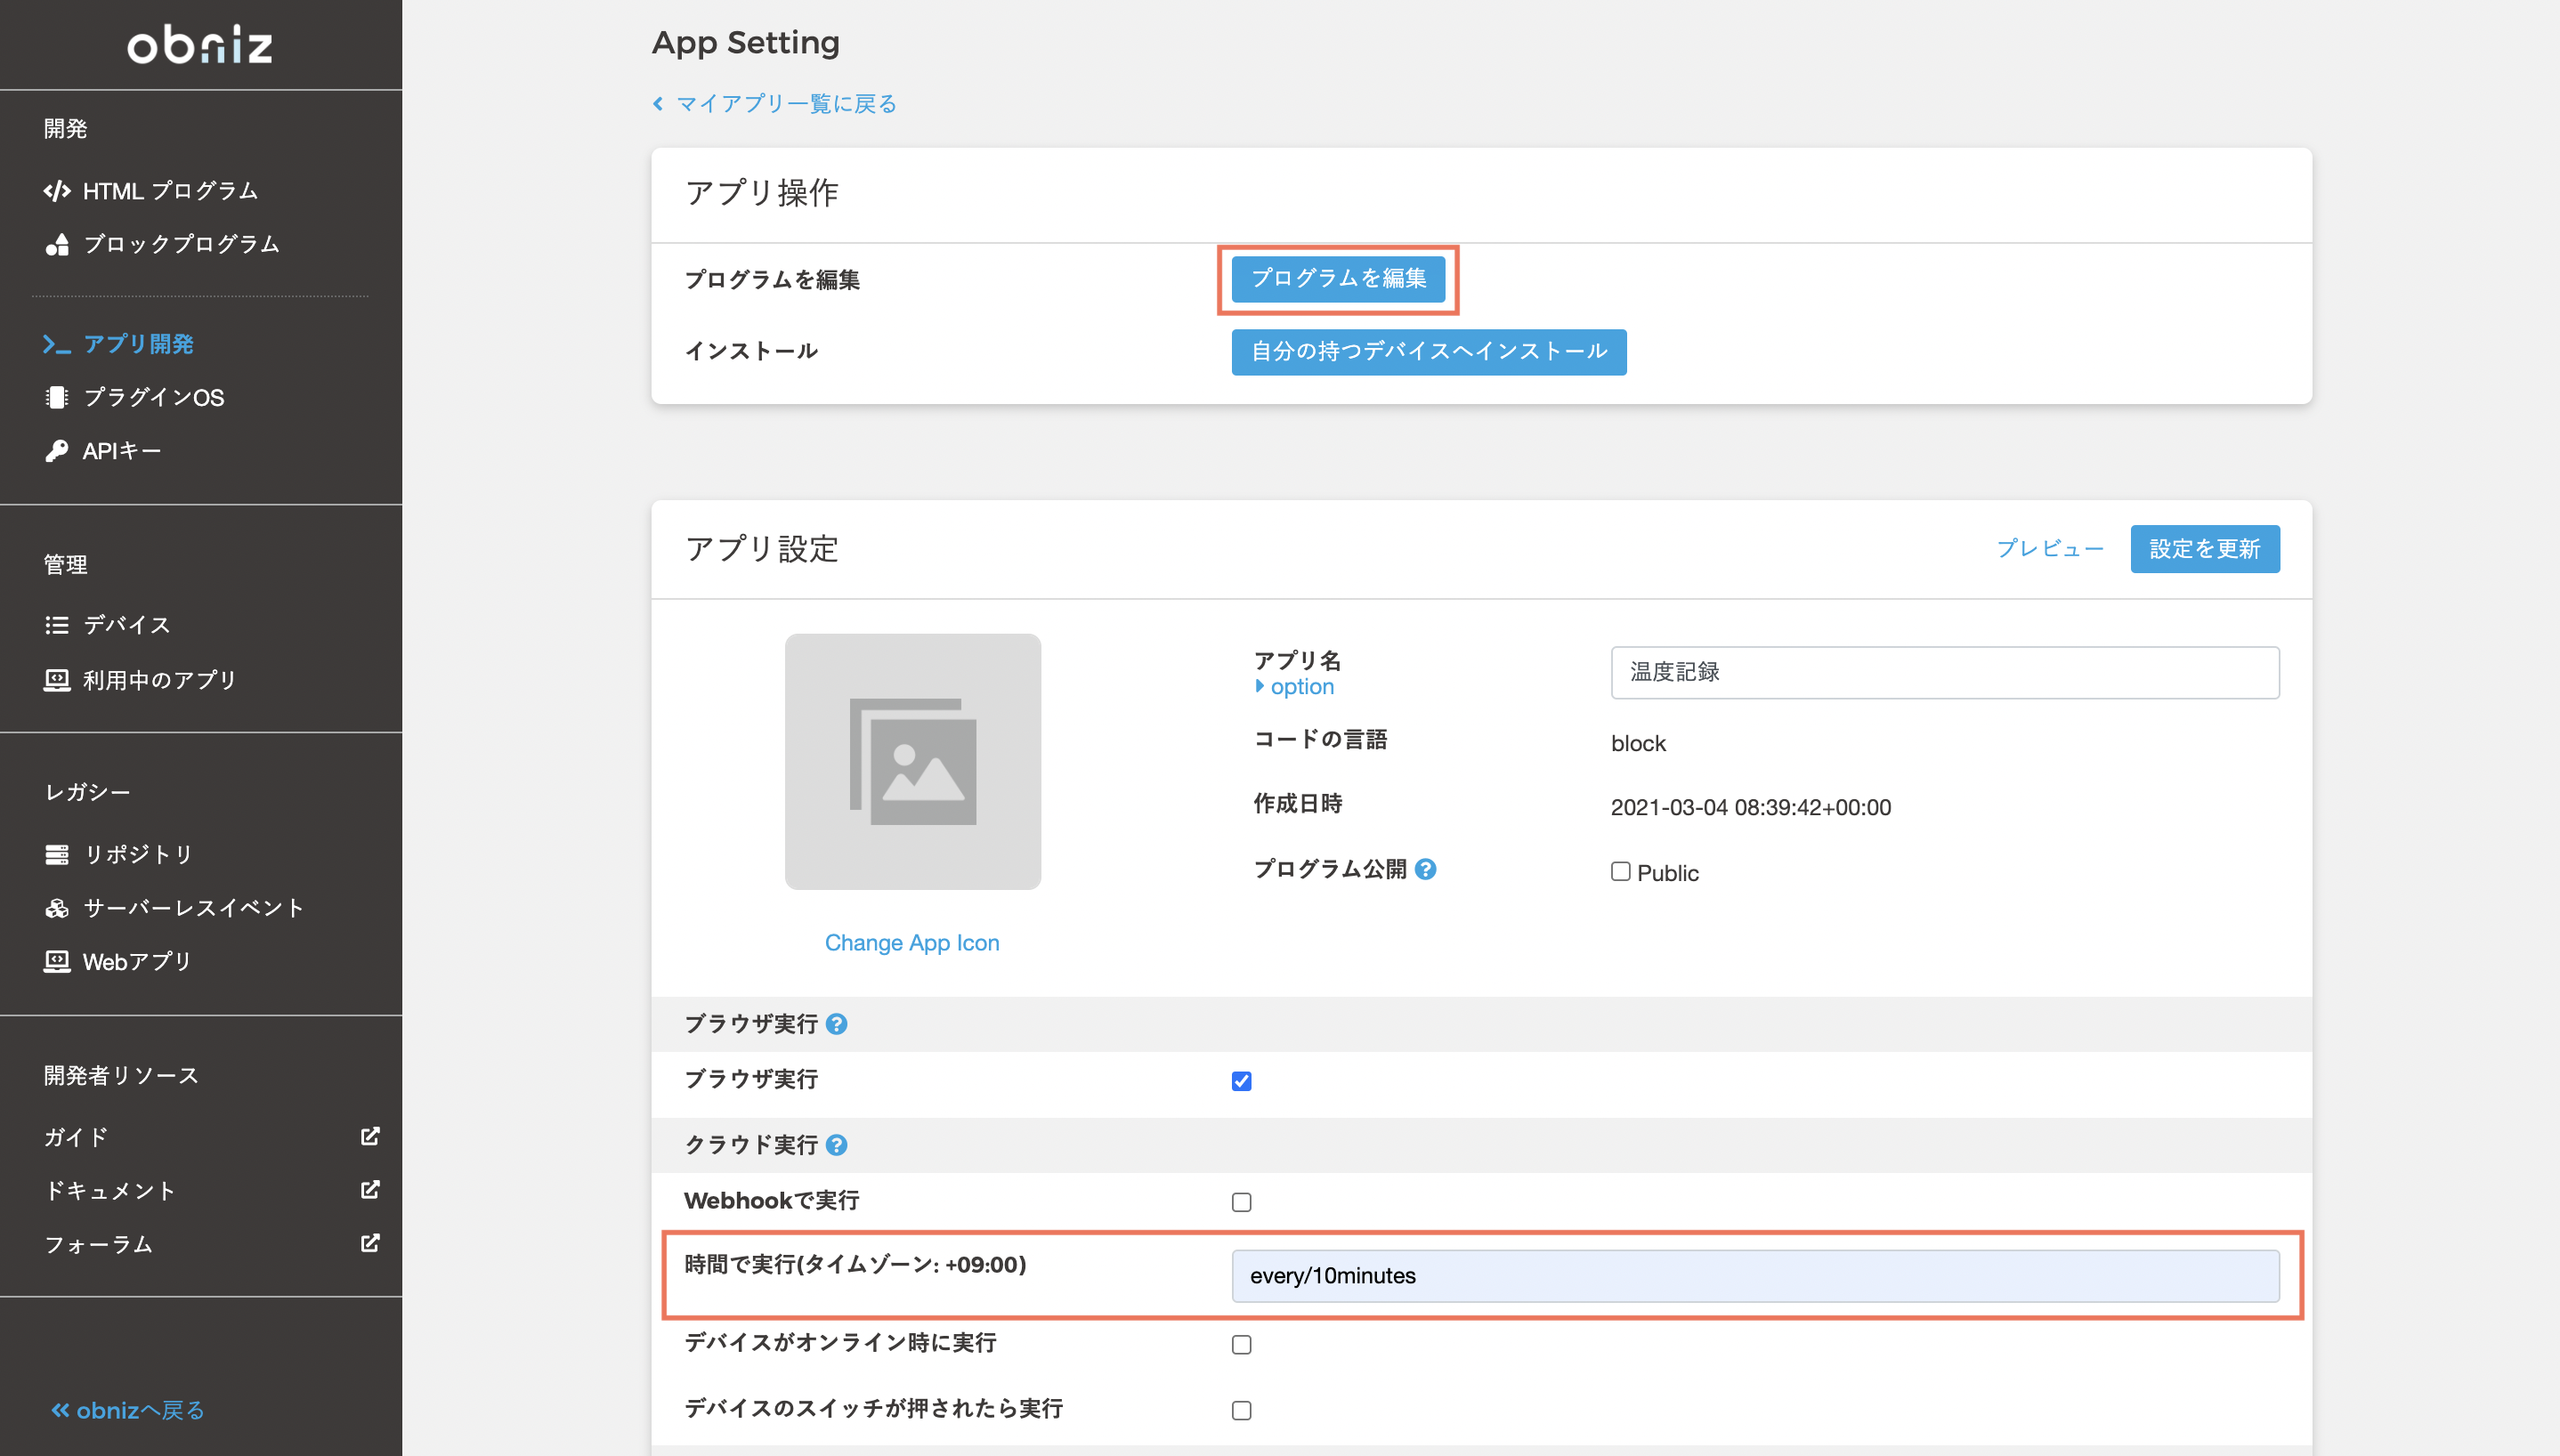
Last time, we skipped the application setting screen, but this time let's set the cloud execution first.
We want to measure the temperature on a regular basis, so enter every / 10 minutes in Run in Time under Cloud Run.
(It is recommended to check the operation in a short time of 10 minutes at first, but once you can check the operation, you can move it at your favorite time interval.)
After setting the cloud execution, press "Edit Program" to move on to creating the program.
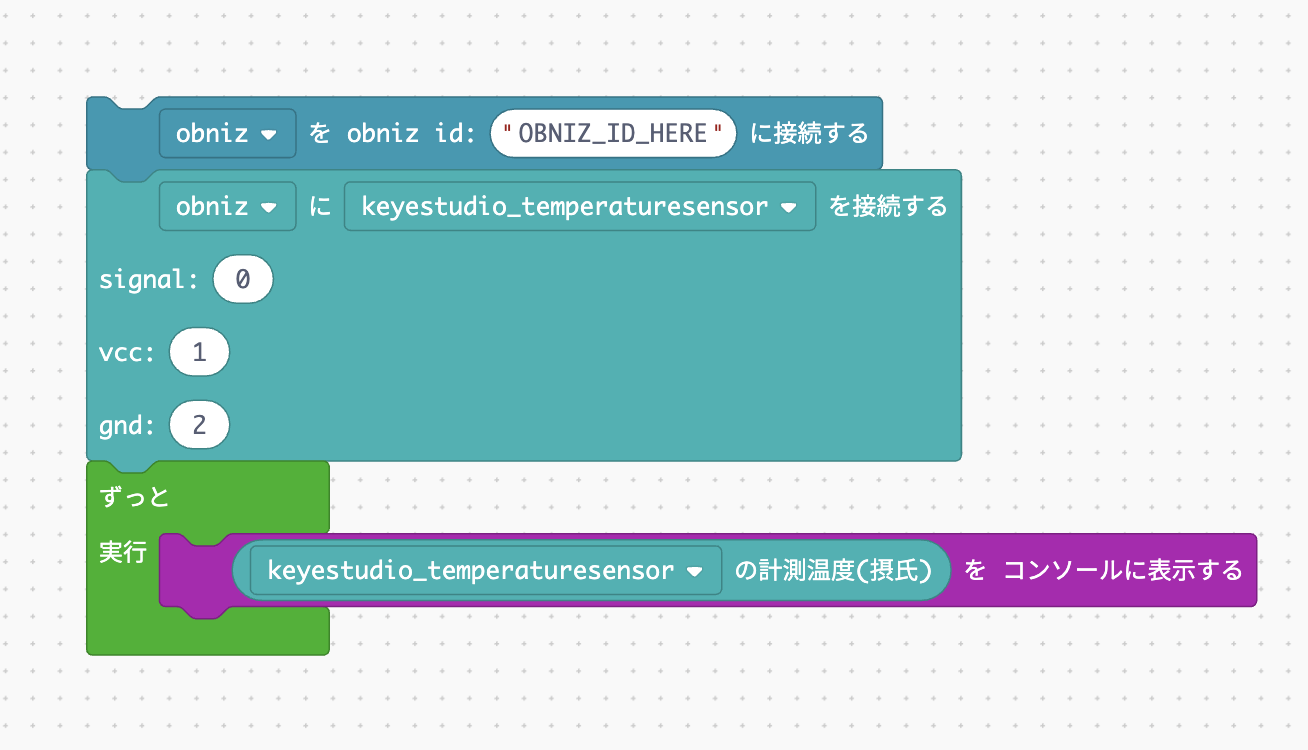
First, let's check the value of the temperature sensor by displaying it on the console.
Connect the temperature sensor to the correct pin, make a program like the one below, and press the execute button on the upper right.
You're getting used to the display on the console. Did you forget to loop it?
When runed, the values acquired by the temperature sensor will be displayed one after another on the console.There are some errors, but you can see the current temperature.
Now let's remake this program into a program that displays the temperature in the app status.
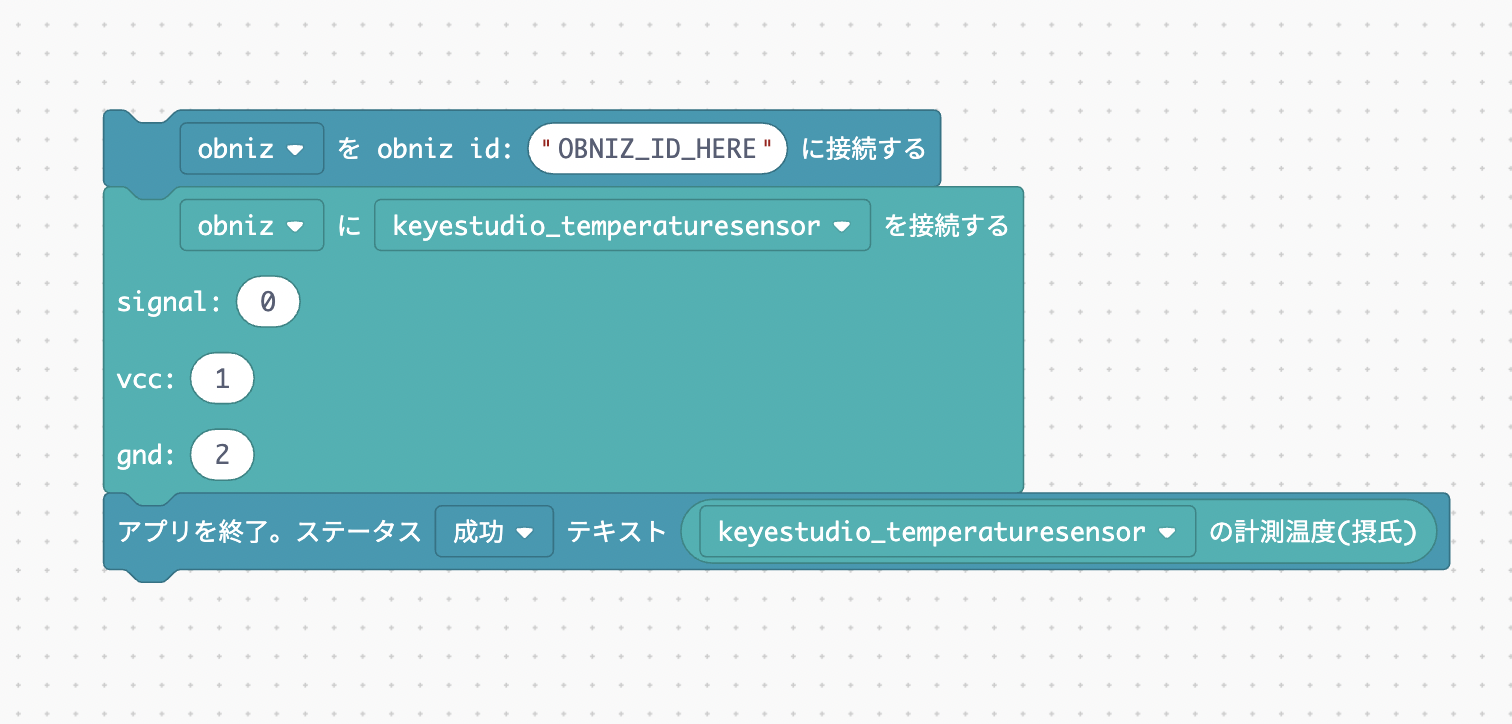
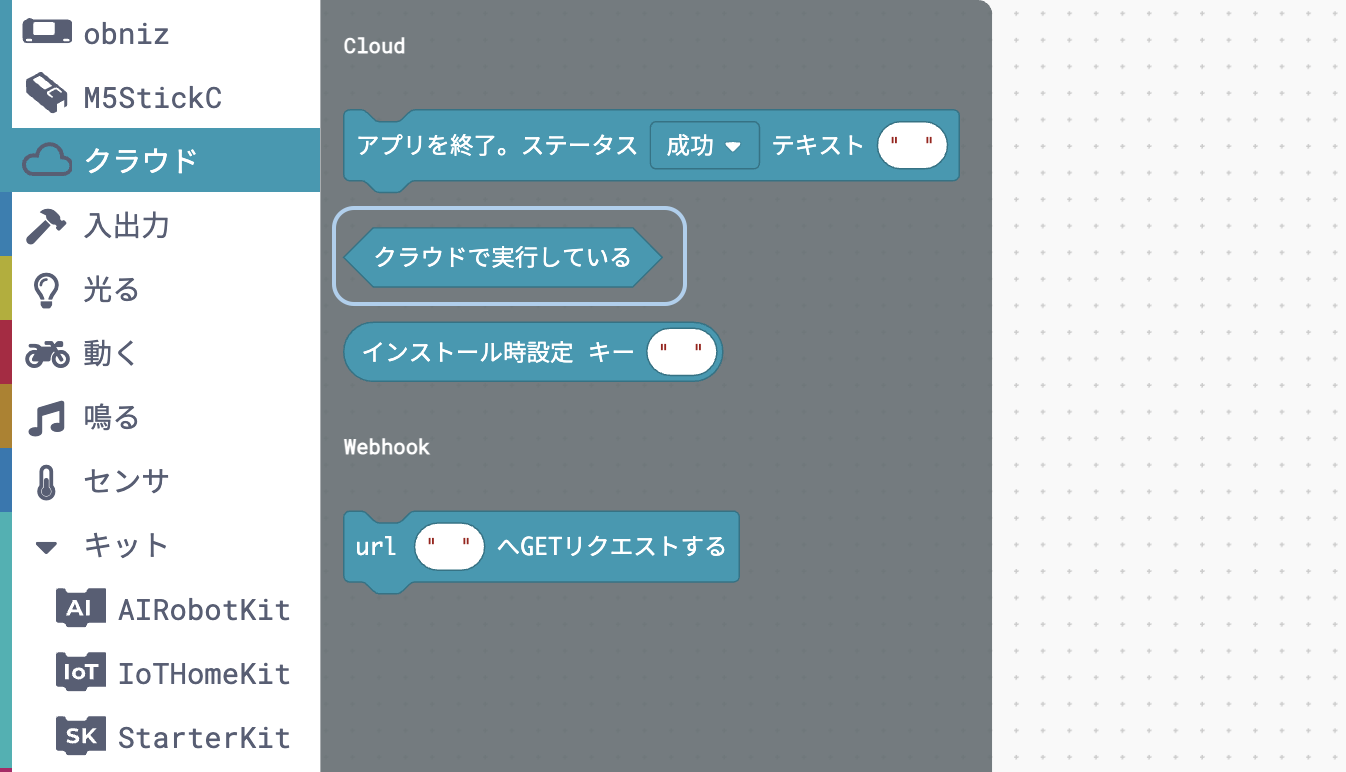
To display information in App Status, use the "Exit App. Status XX Text XX" block in the "Cloud" category.
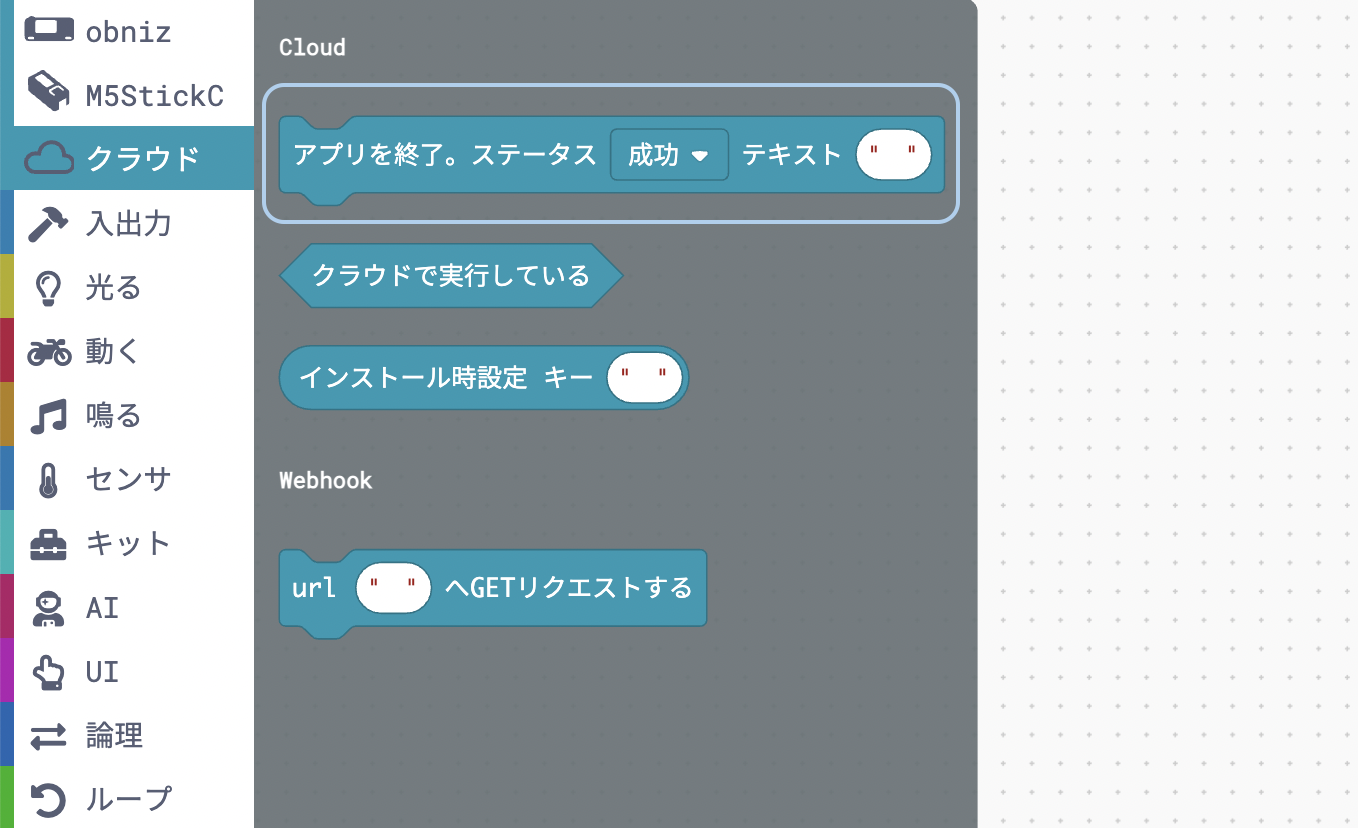
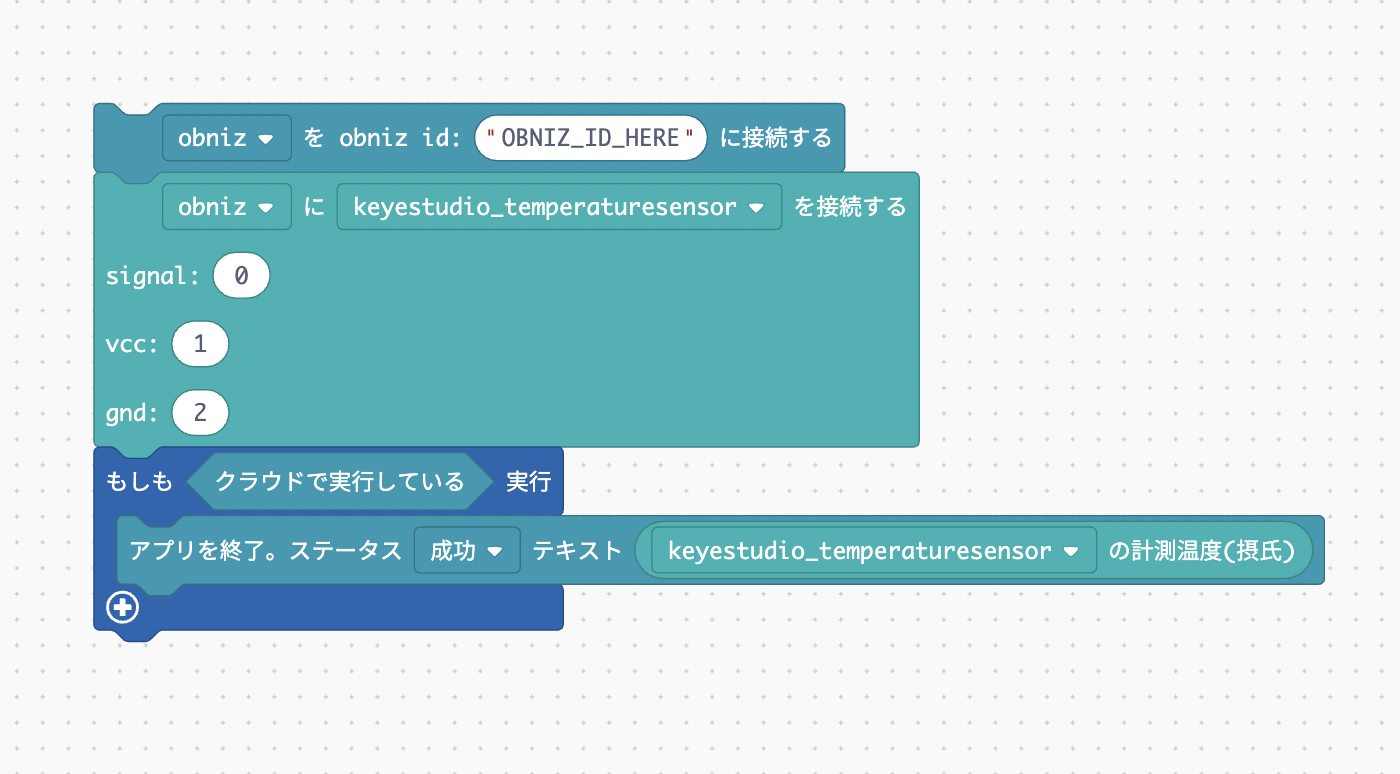
Let's set the status to "success", put the measured temperature of the temperature sensor in the text part, and make a program like the following.
Now you can see the temperature in the app status every 10 minutes. Wasn't it easier than you expected?
It's okay to complete it, but we'll improve the program a little more.
If you run this program in your browser by pressing the run button in the upper right corner, you will see an error message similar to the following on the console:
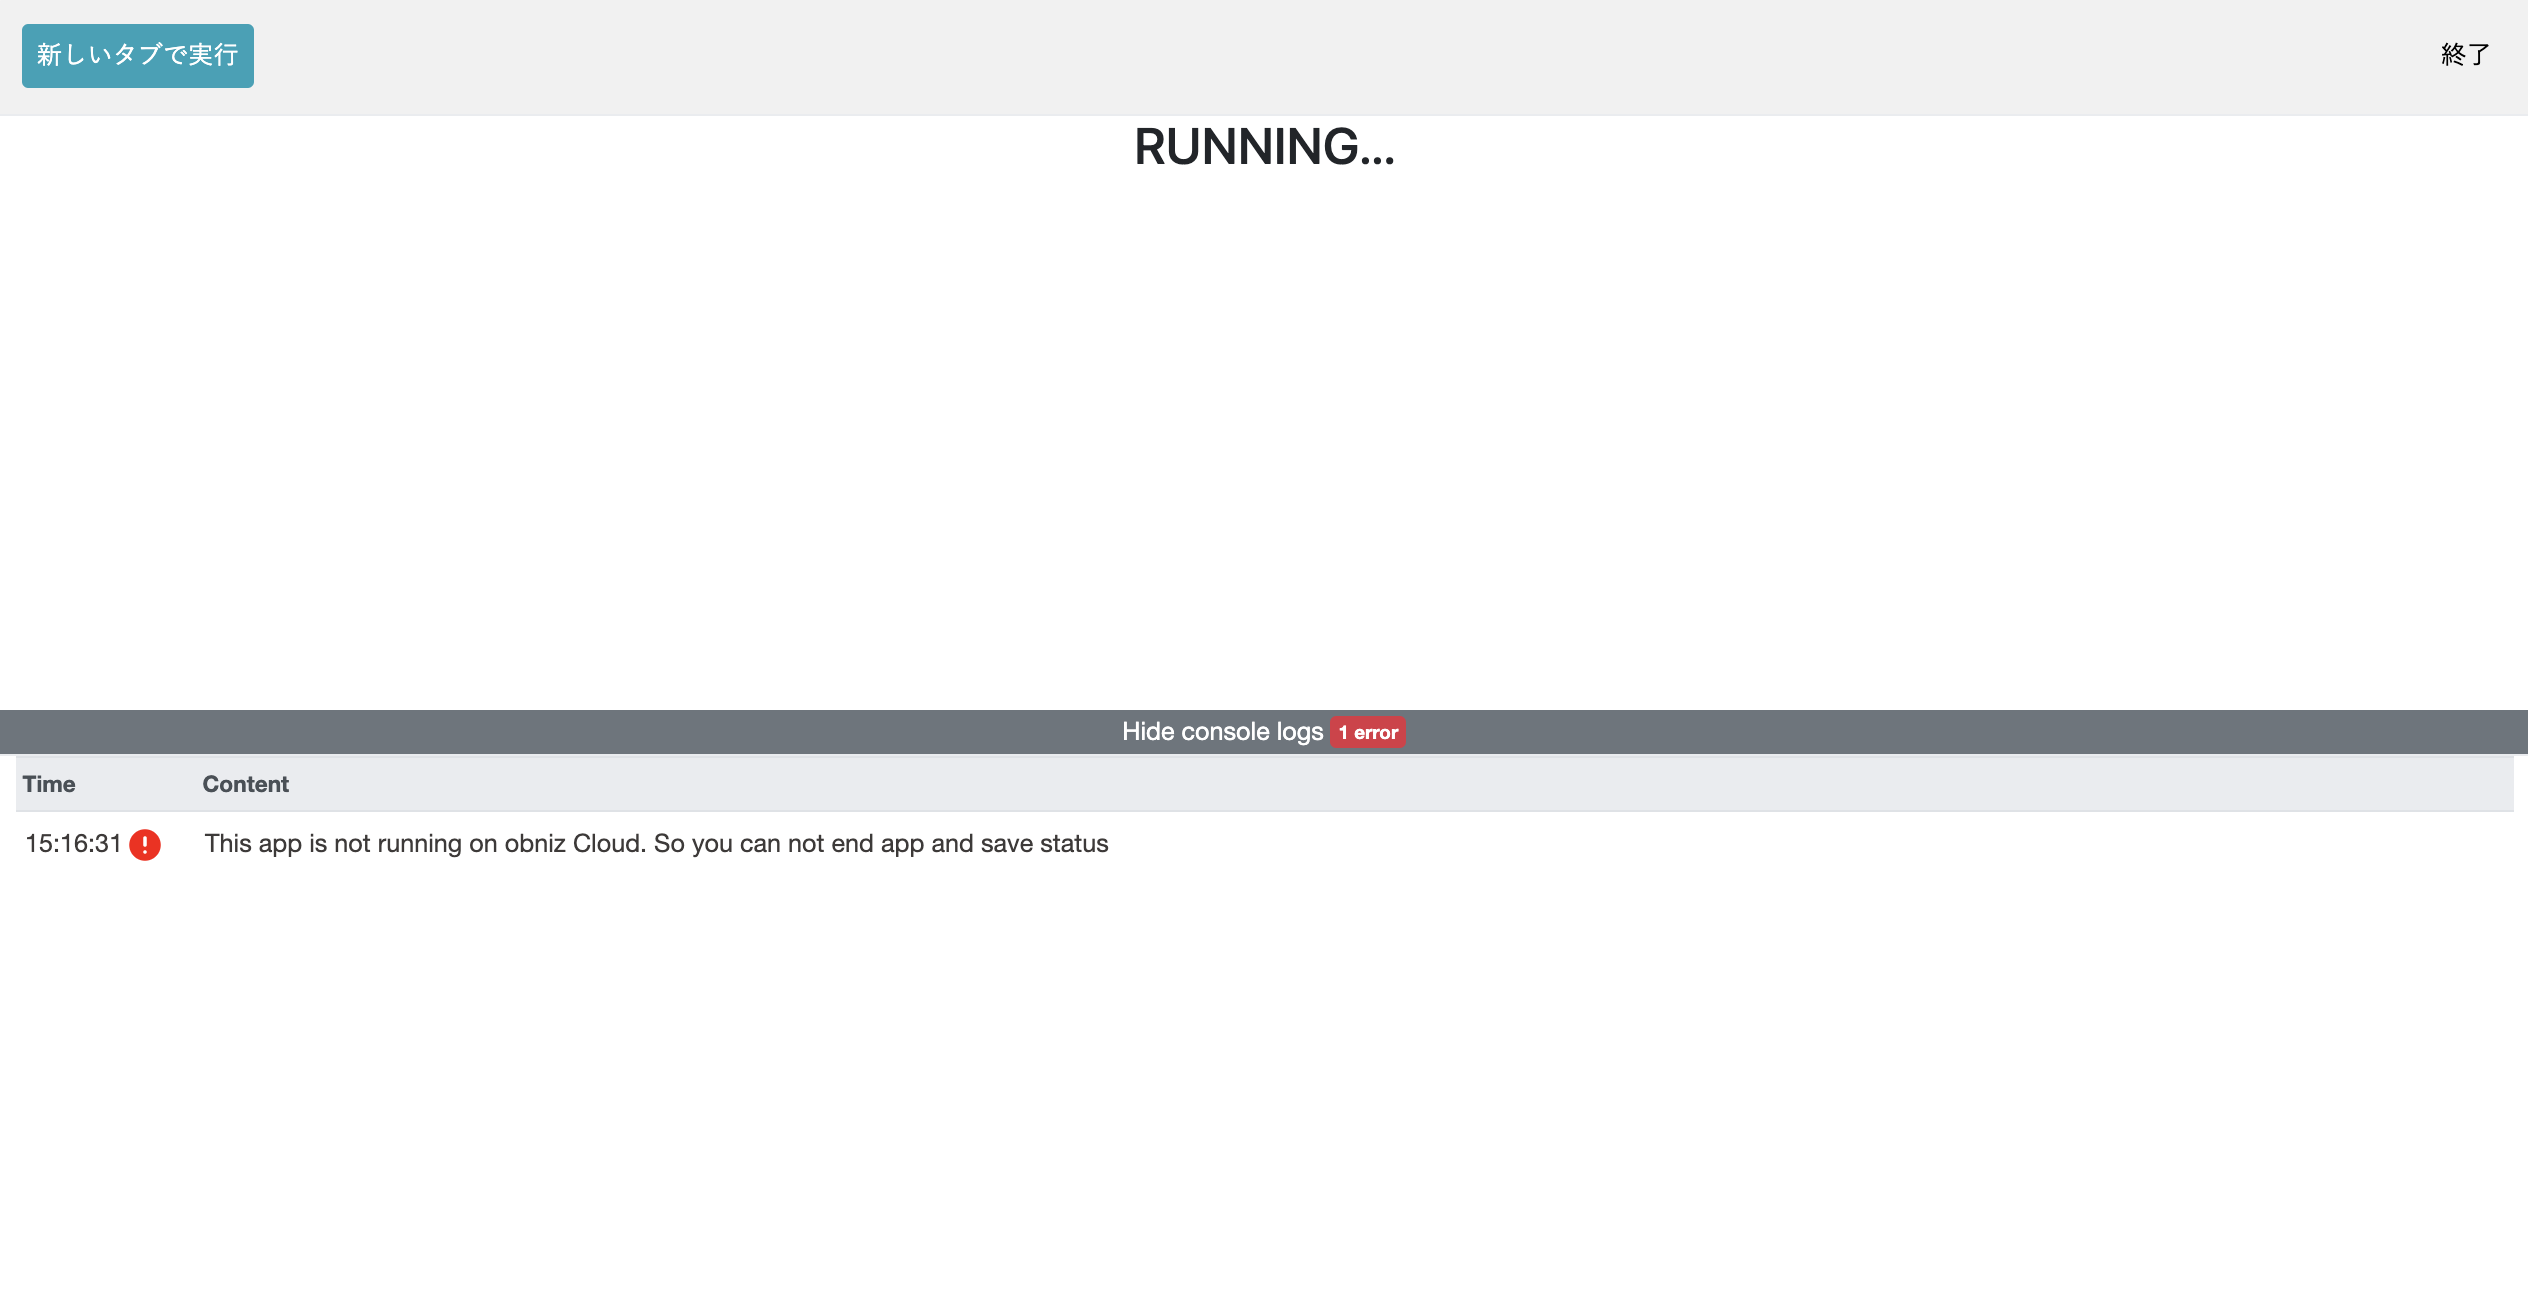
It's not running in the cloud, so you can't quit the app or display anything in the app status.
The "Exit app. Status 〇〇 Text XX" block is a block that can be used only when executing in the cloud, so when you execute it in the browser, such an error will occur.
It works fine in cloud execution, so you can leave it as it is, but let's prevent this error message from appearing in browser execution.
It's easy to do, put the condition block "Running in the cloud" in the "Cloud" category into the block and "Exit the app." Just insert the "Status XX Text XX" block.
Now when you run the browser, the error message is no longer displayed.
This is because the block made it a program that "if you're running in the cloud, quit the app and record the temperature in the app status".
When running the browser, the condition "If you are running in the cloud" does not apply, so the "Exit app. Status XX Text XX" block will not be executed and no error will occur.
Since there was no program to run in the browser this time, there was no problem with the first program, but if you want to use different programs for browser execution and cloud execution, you need to use the condition "if you are running in the cloud" Will come out.
It's a good idea to keep in mind that the part you want to run in the cloud should be inside the block, and the part you want to run in the browser should be outside the block.
Install the app and check the app status
Now that the app is complete, let's install it on your device and run it in the cloud.
Save the program and return to the developer console.
Maybe your device has the time signal app you created in the last lesson installed.
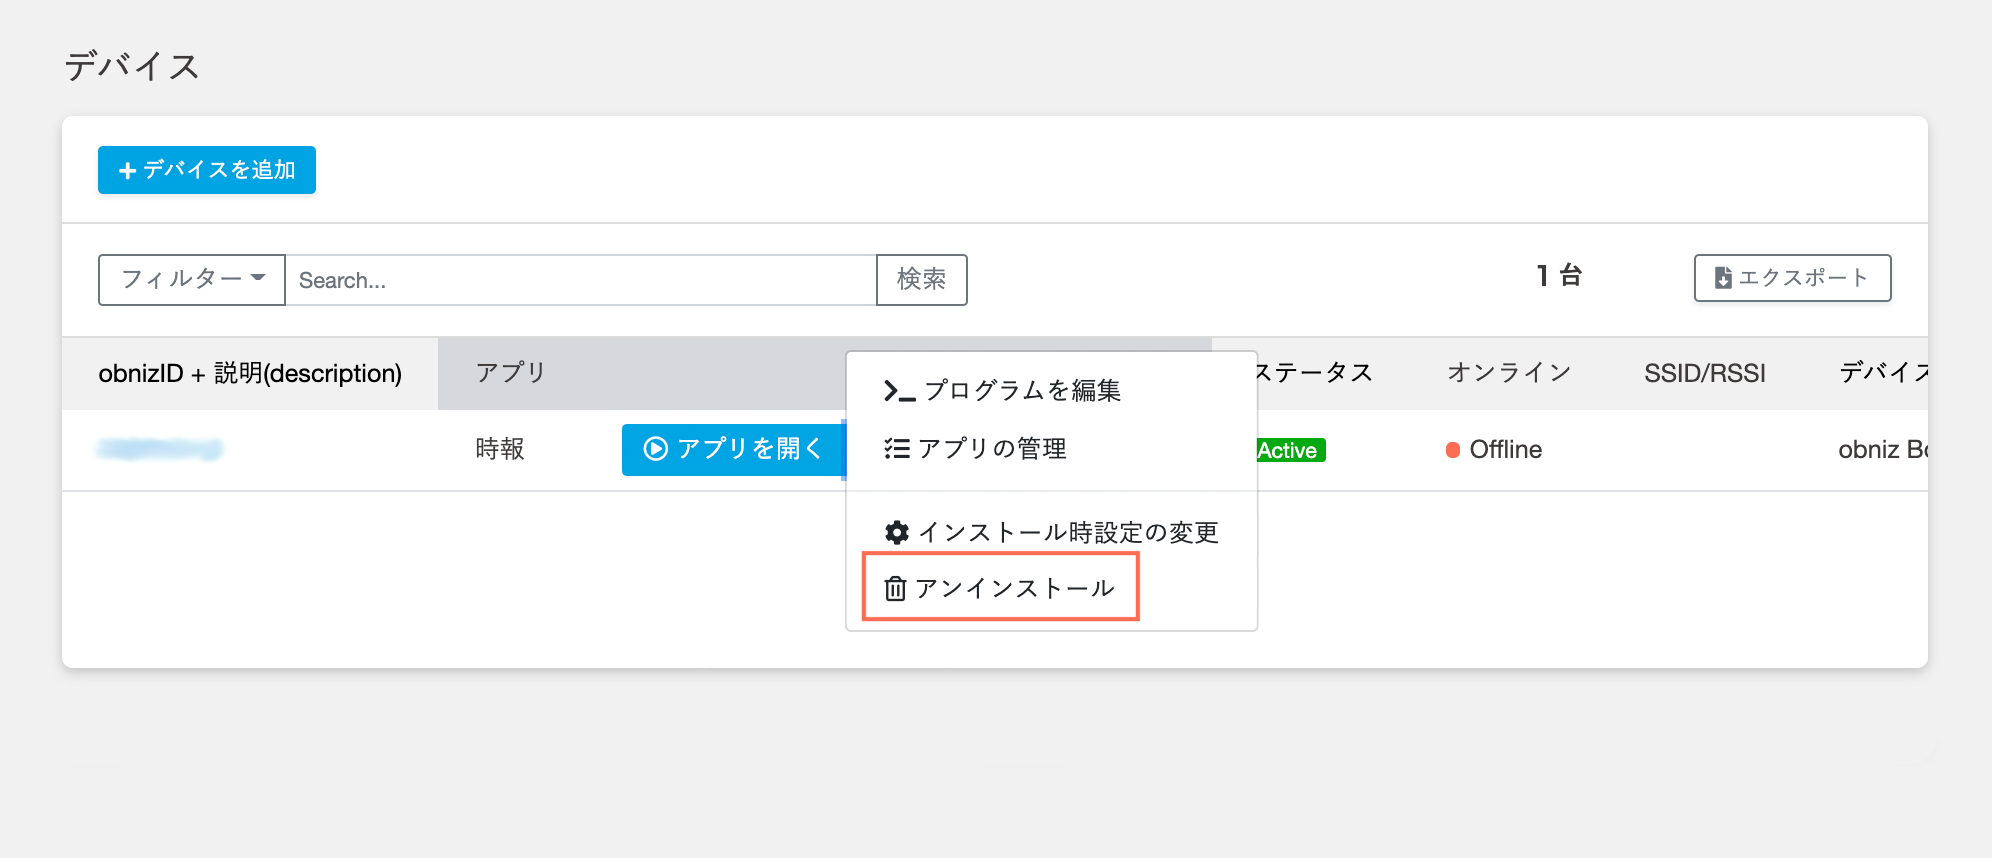
Only one app can be installed on one device, so you need to uninstall the time signal app to install this temperature recording app.
Select "Device" from the tab on the left to go to the device list screen.
If you press the lower triangle button next to "Open App", there is "Uninstall" at the bottom, so press it.
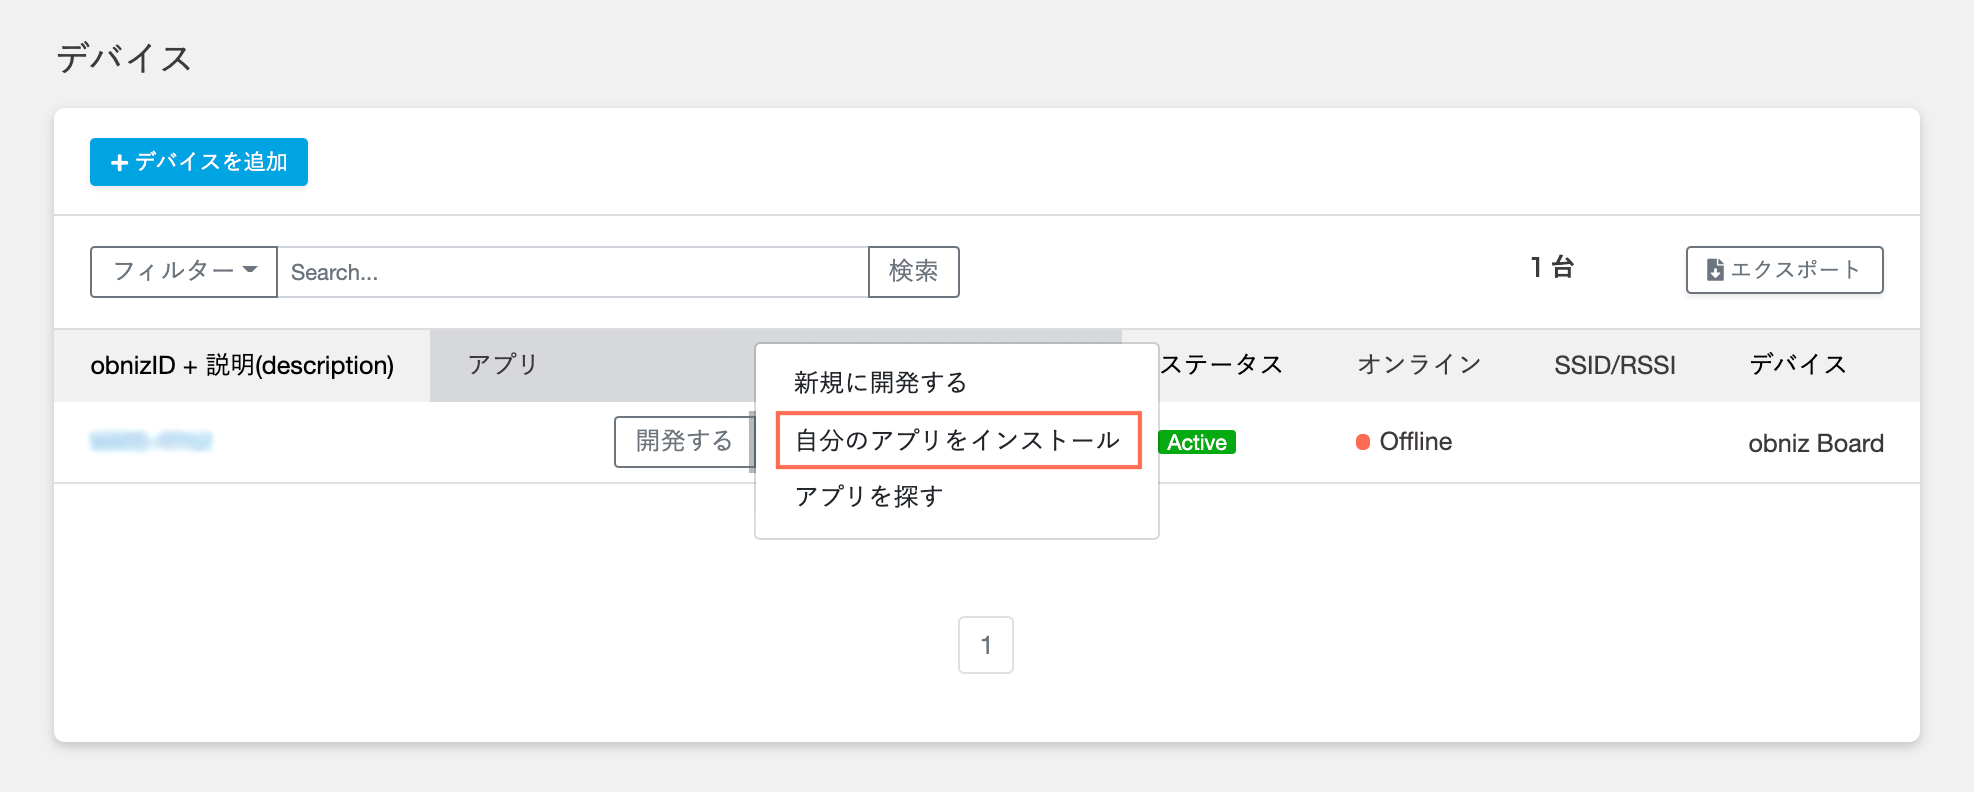
Now that the time signal app has been uninstalled, install the temperature recording app that we made this time.
You can install it from the app settings or app list screen as in the previous lesson, or you can install it from the current device list screen with "Install my app".
After the app is installed, wait 10 minutes.
If the app works well in the cloud, you should see the value obtained by the temperature sensor in the app status.
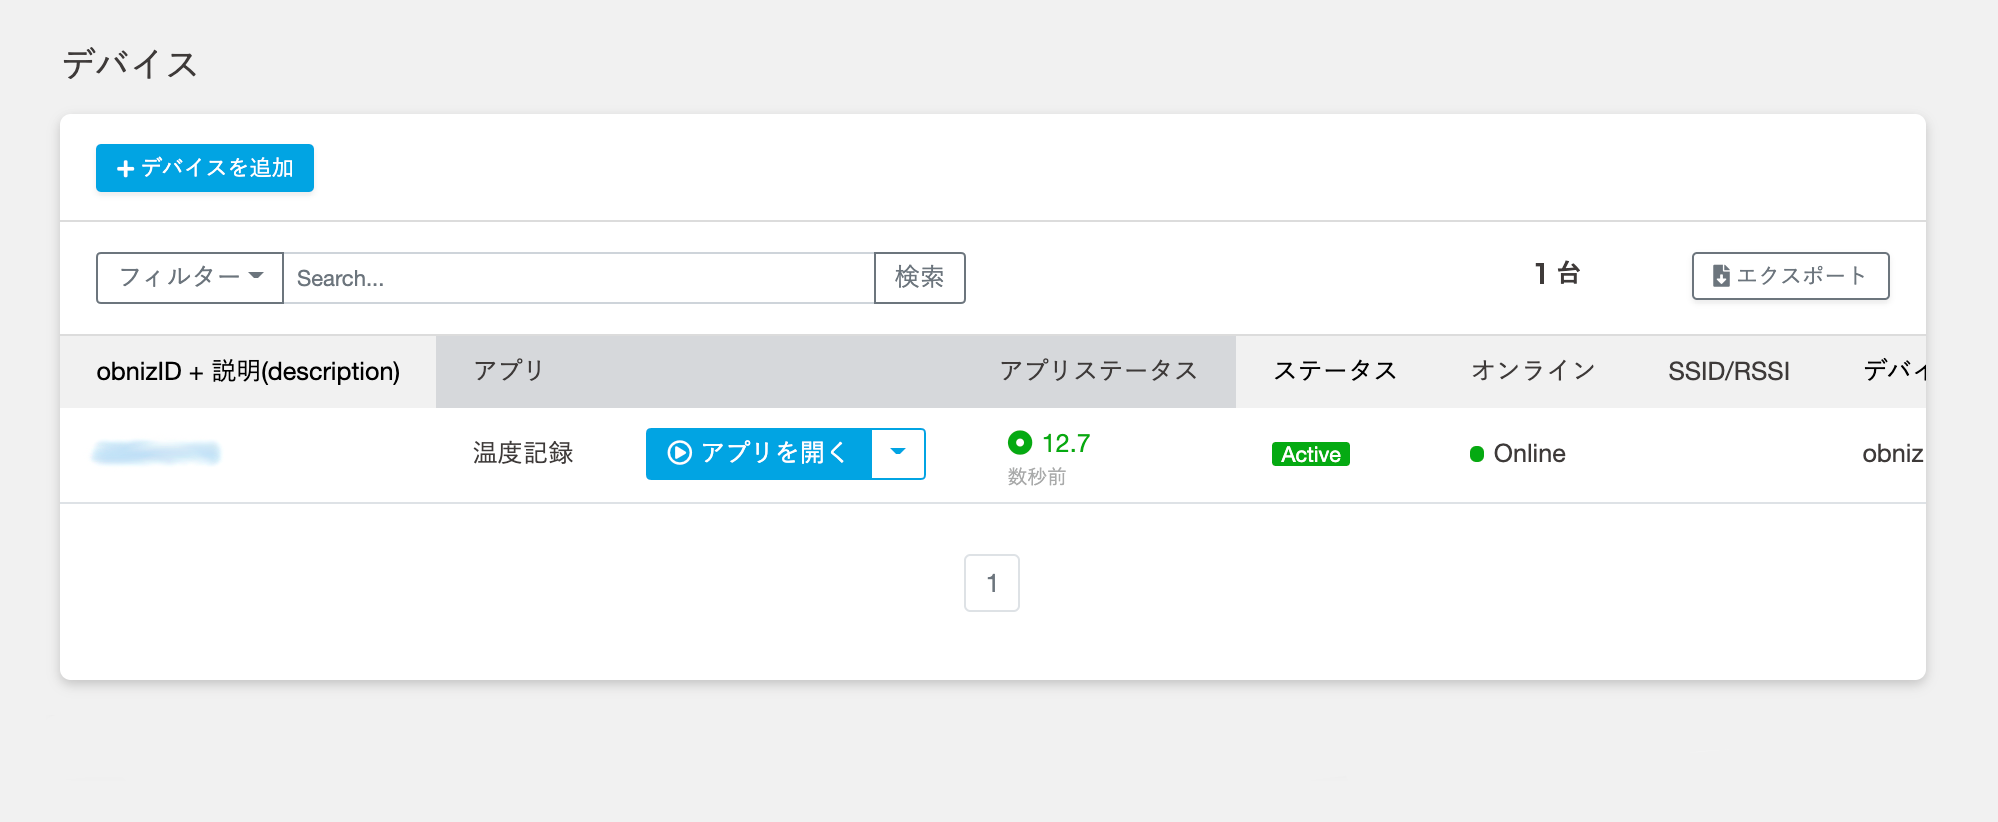
Development: Devise a character string to be displayed
In the current program, the value acquired by the temperature sensor is displayed as a simple number in the app status.
At first glance, it's hard to tell what this number represents, so let's devise a display to make it a little easier to understand.
Now it is displayed as "12.7", but we would like to change it to "Temperature: 12.7 °".
Please move to the program edit screen of the temperature recording application.
To create your favorite string, use the blocks in the "String" category.
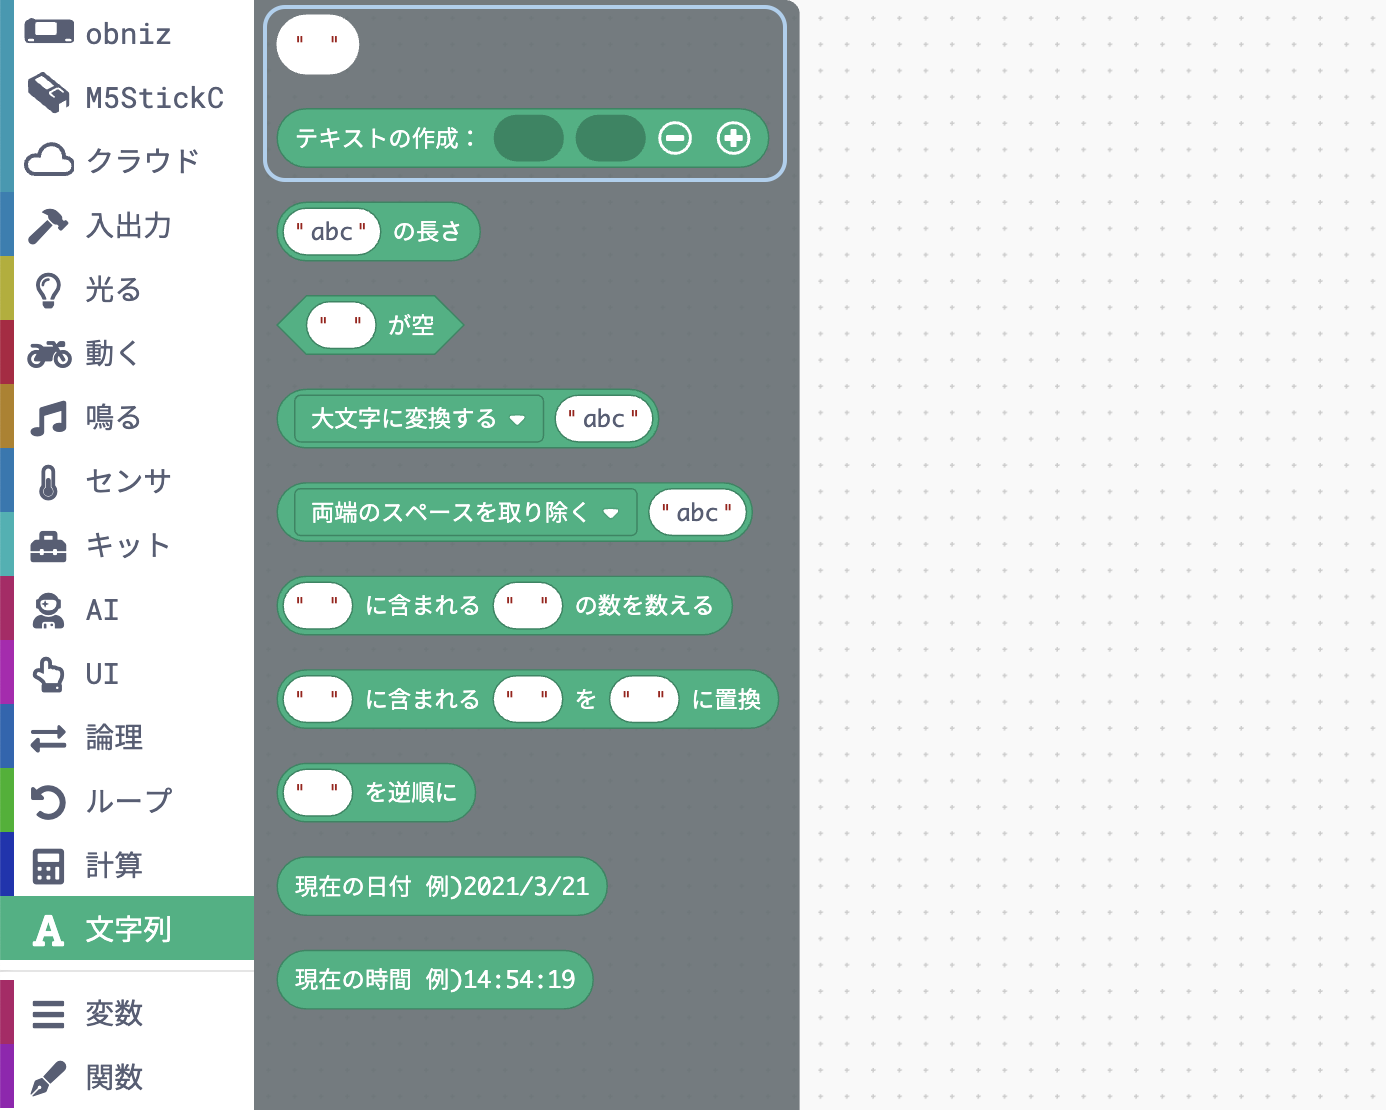
Prepare the character string blocks "Temperature:" and "°", combine them with the measured temperature block, and put them in the blanks of the "Create text" block in order.
You can increase the number of blanks in the "Create Text" block by pressing the plus button on the far right.
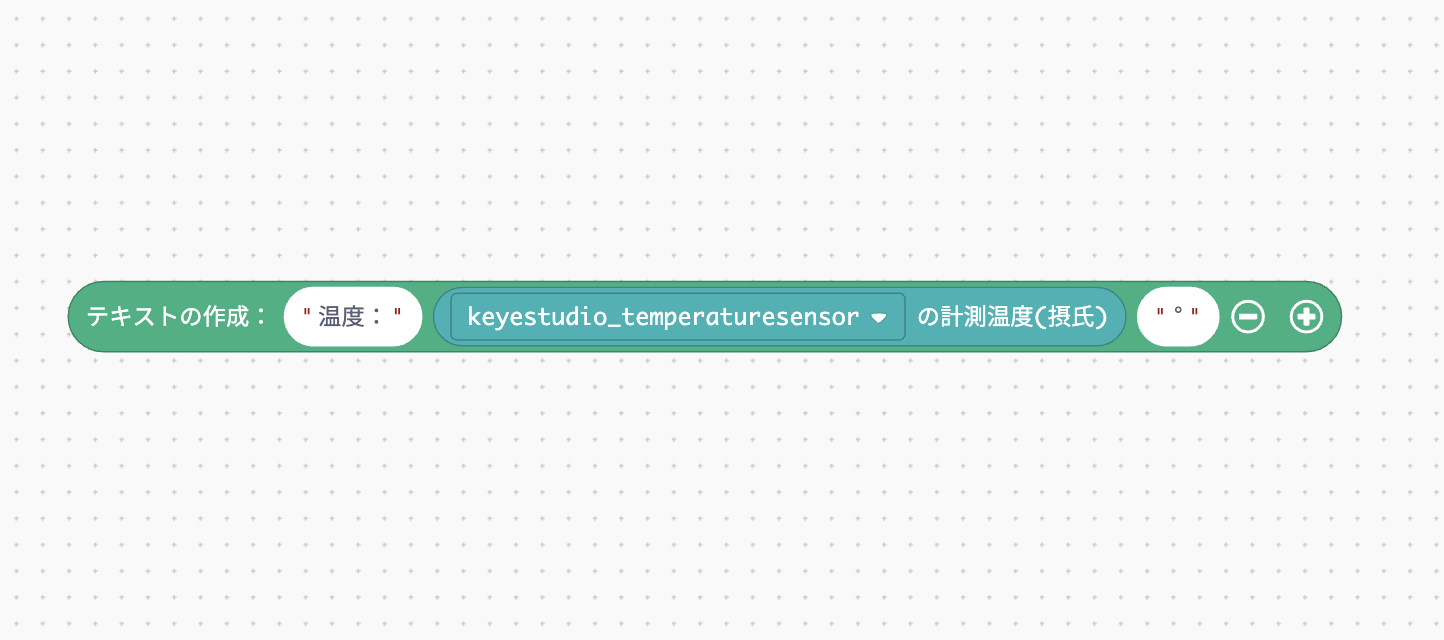
Put this in the text part to be displayed in the app status and you're done.

Save the program and return to the device list screen.
Wait 10 minutes for the string to appear in the app status. If the display is as you intended, it is a success!
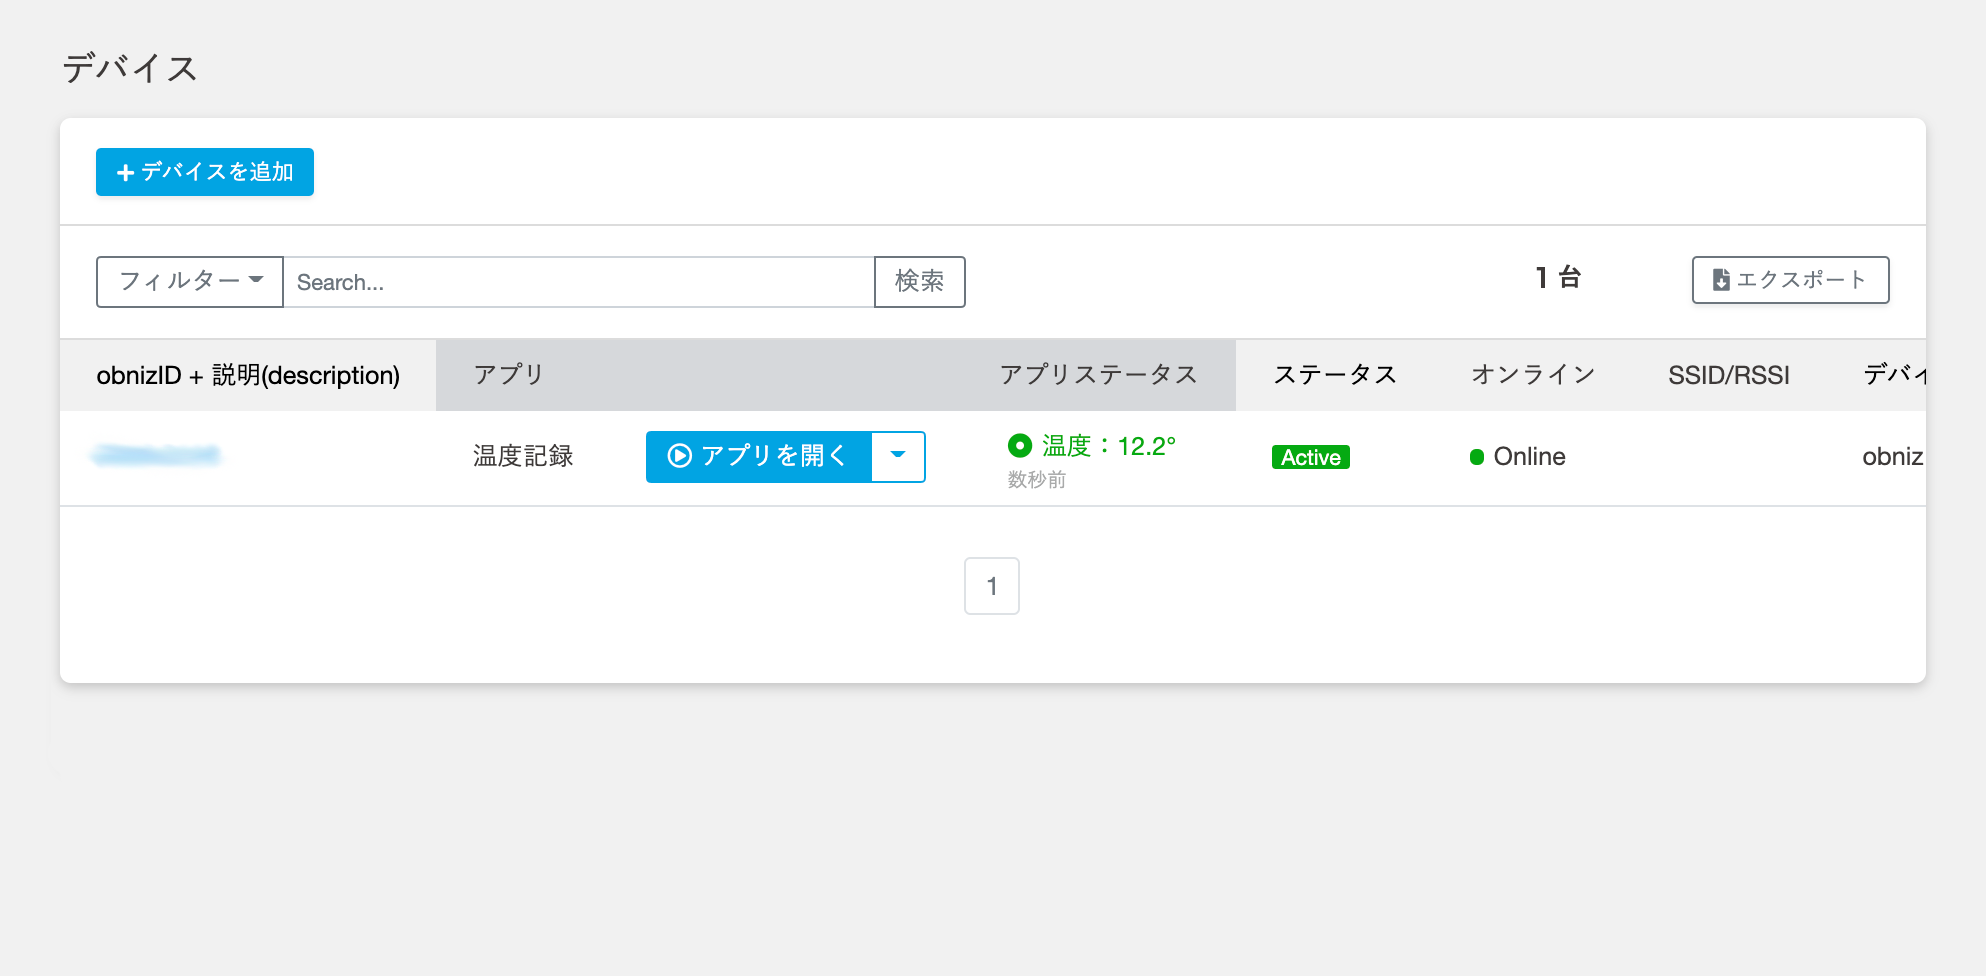
By using the character string block in this way, you can freely create a character string.
Let's make good use of the character string block so that the information displayed in the app status will be easy to understand in the future.