Make a time signal: Sound the buzzer every hour in the app
In [Last lesson] (make-app-ja.md), we checked the app function of obniz and prepared to make an app.From here, we will continue to develop apps!
In this lesson, we will use the buzzer parts to make a sound every hour and make a time signal.
Buzzer
A buzzer is a part that can make a sound.
There are two types of buzzers, active buzzers and passive buzzers.
The buzzer included in the Starter Kit is a passive buzzer.
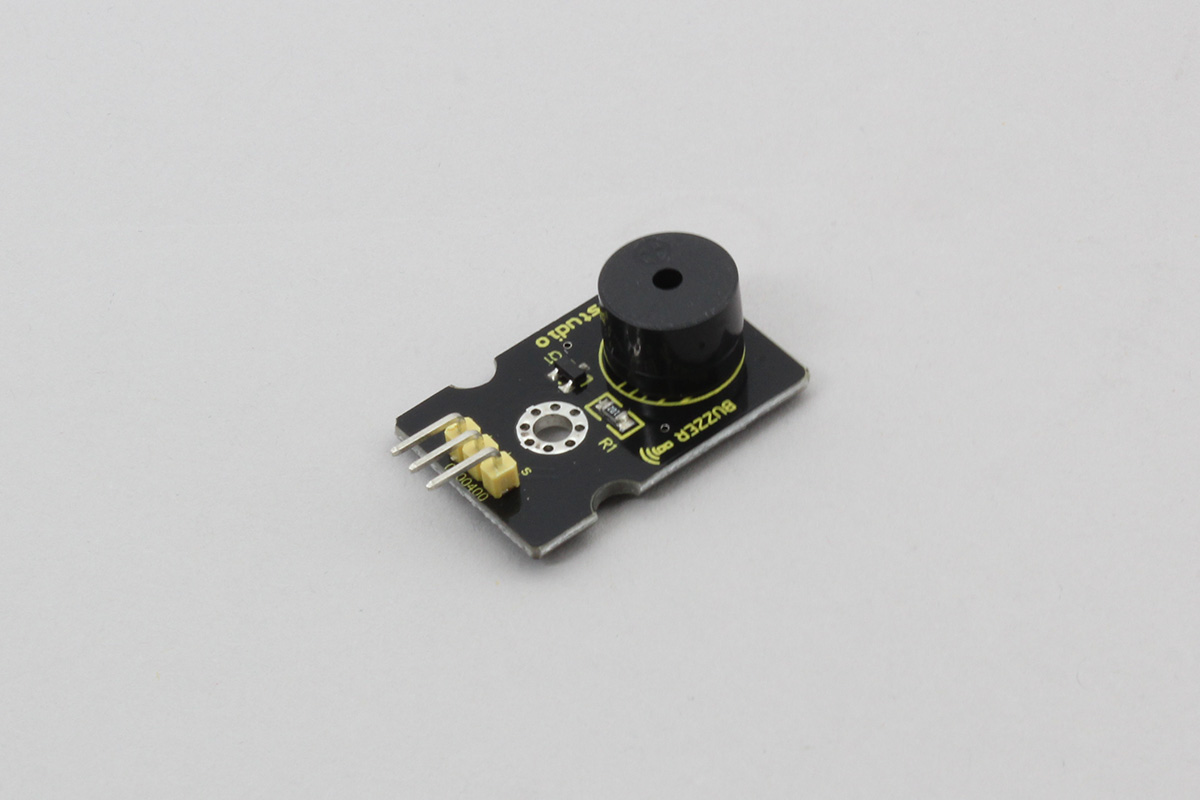
The active buzzer has a built-in vibration source, so you can make a sound just by connecting it to the power supply.
On the other hand, the passive buzzer does not have such an oscillation circuit, and the sound is produced by an external audio signal.
The passive buzzer can change the pitch of the sound by changing the frequency of the external signal.
The buzzer of the Starter Kit can also specify the pitch, and in the block program, it can be specified by the scale of Doremi Fasolaside.
Make an app
Now that you understand the parts to use this time, let's start the work of creating an application.
First, as usual, go to Developer Console.
Then select "App Development" from the tab on the left and press the "New" button.
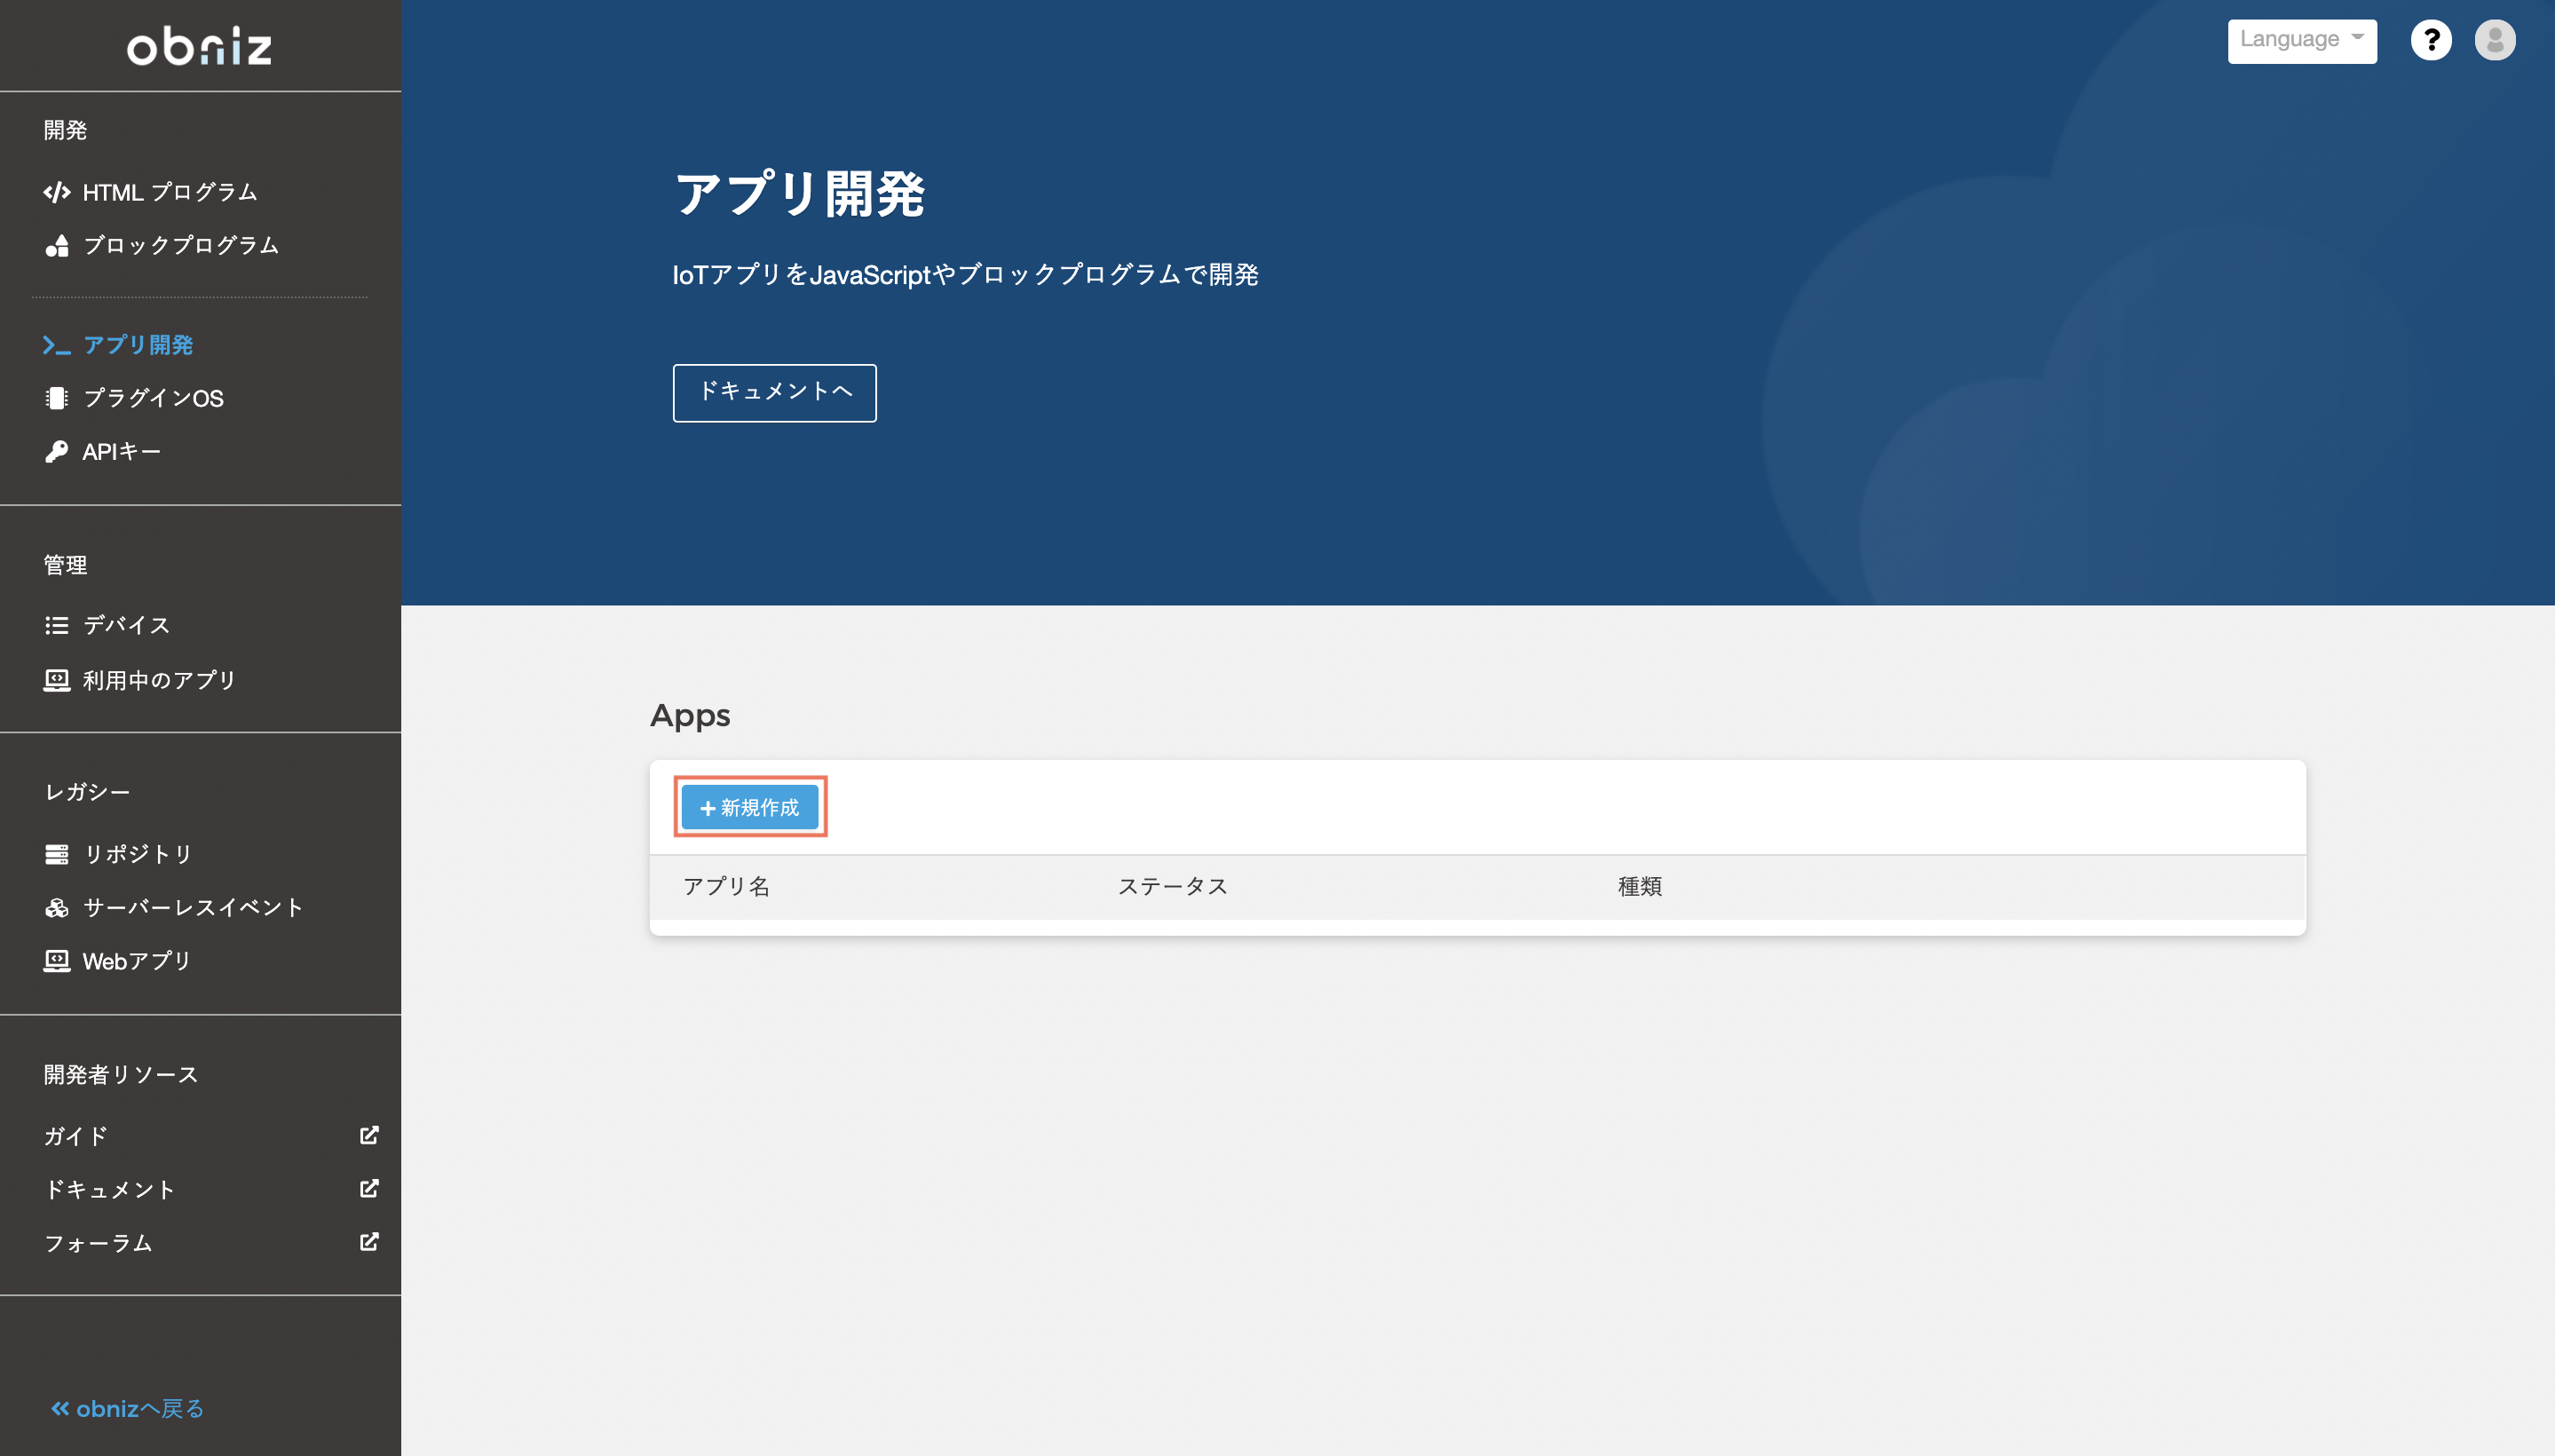
Select "Browser app (block program)" as the app type, and select "Empty" in "Template using obniz Board / 1Y".
A window for entering the app name will appear. Enter the app name you like and press "Create App".
(Here, we named it "Time Signal" because it is a time signal application.)
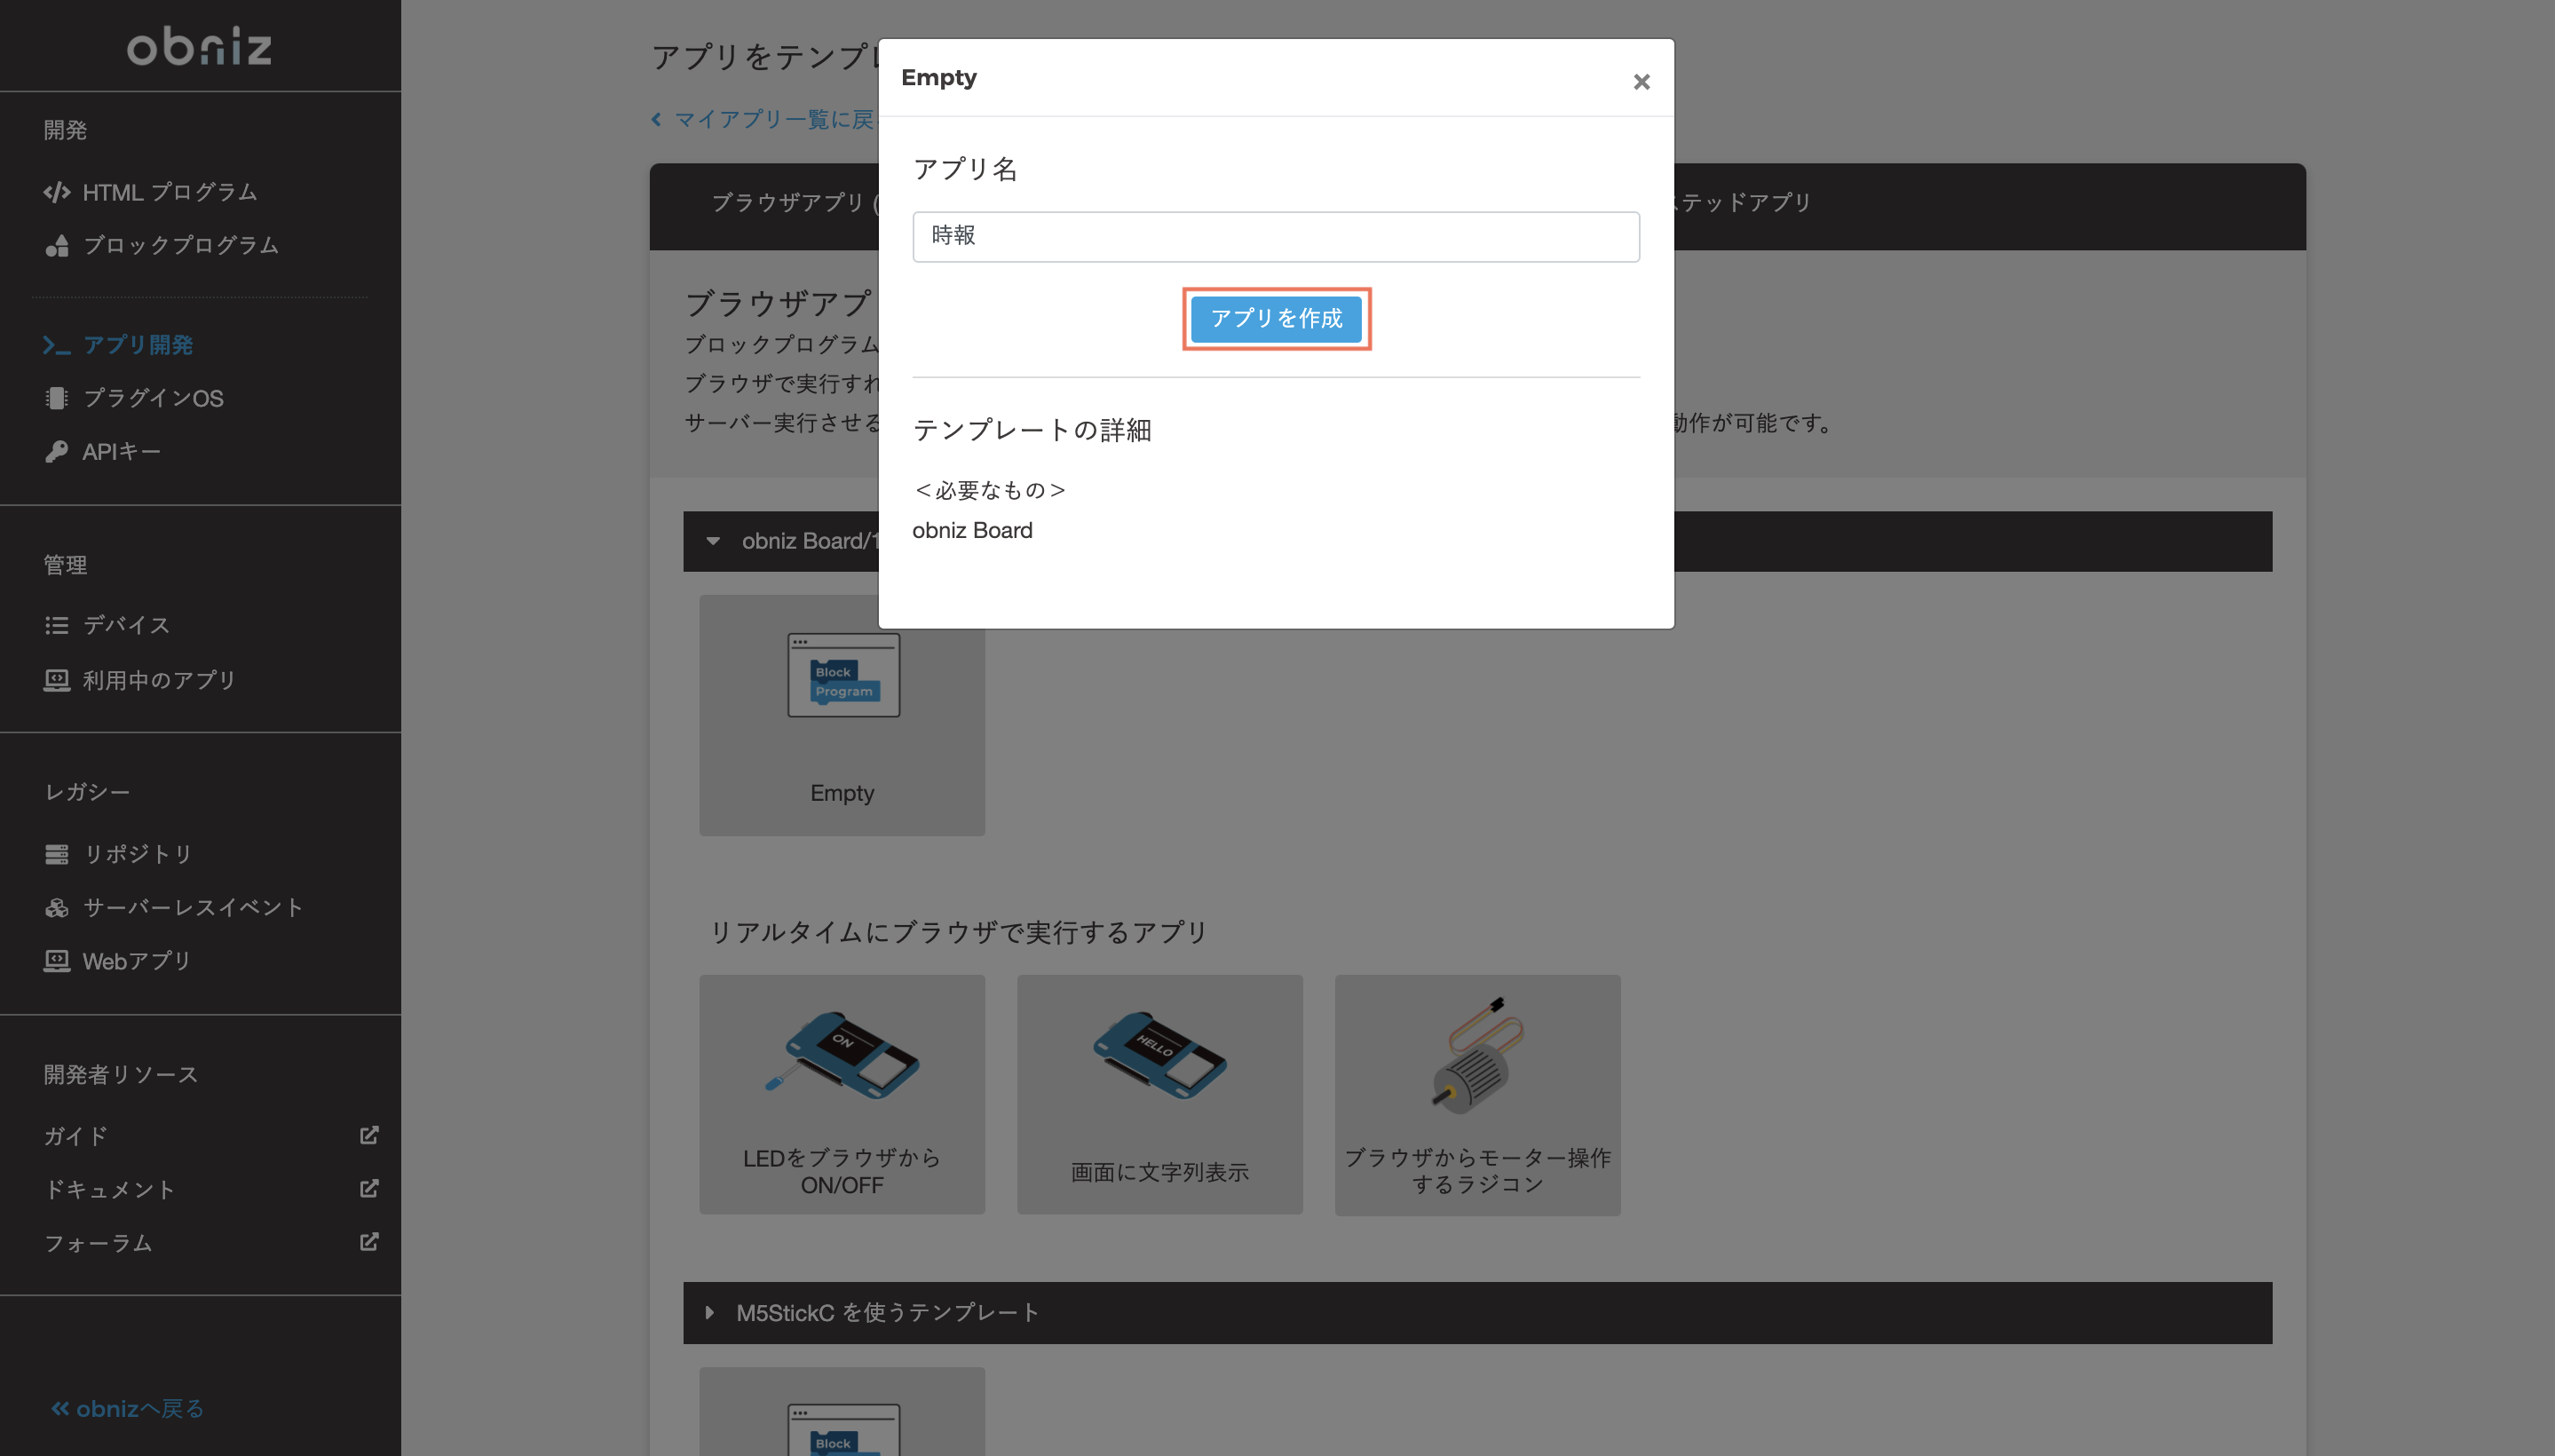
Then, the screen of the application settings will be displayed.This setting can be changed later, so let's leave it as it is for now and go to the screen to create the program first.Click the "Edit Program" button.
The familiar program screen has appeared.On this screen, you will create a program by arranging blocks as before.
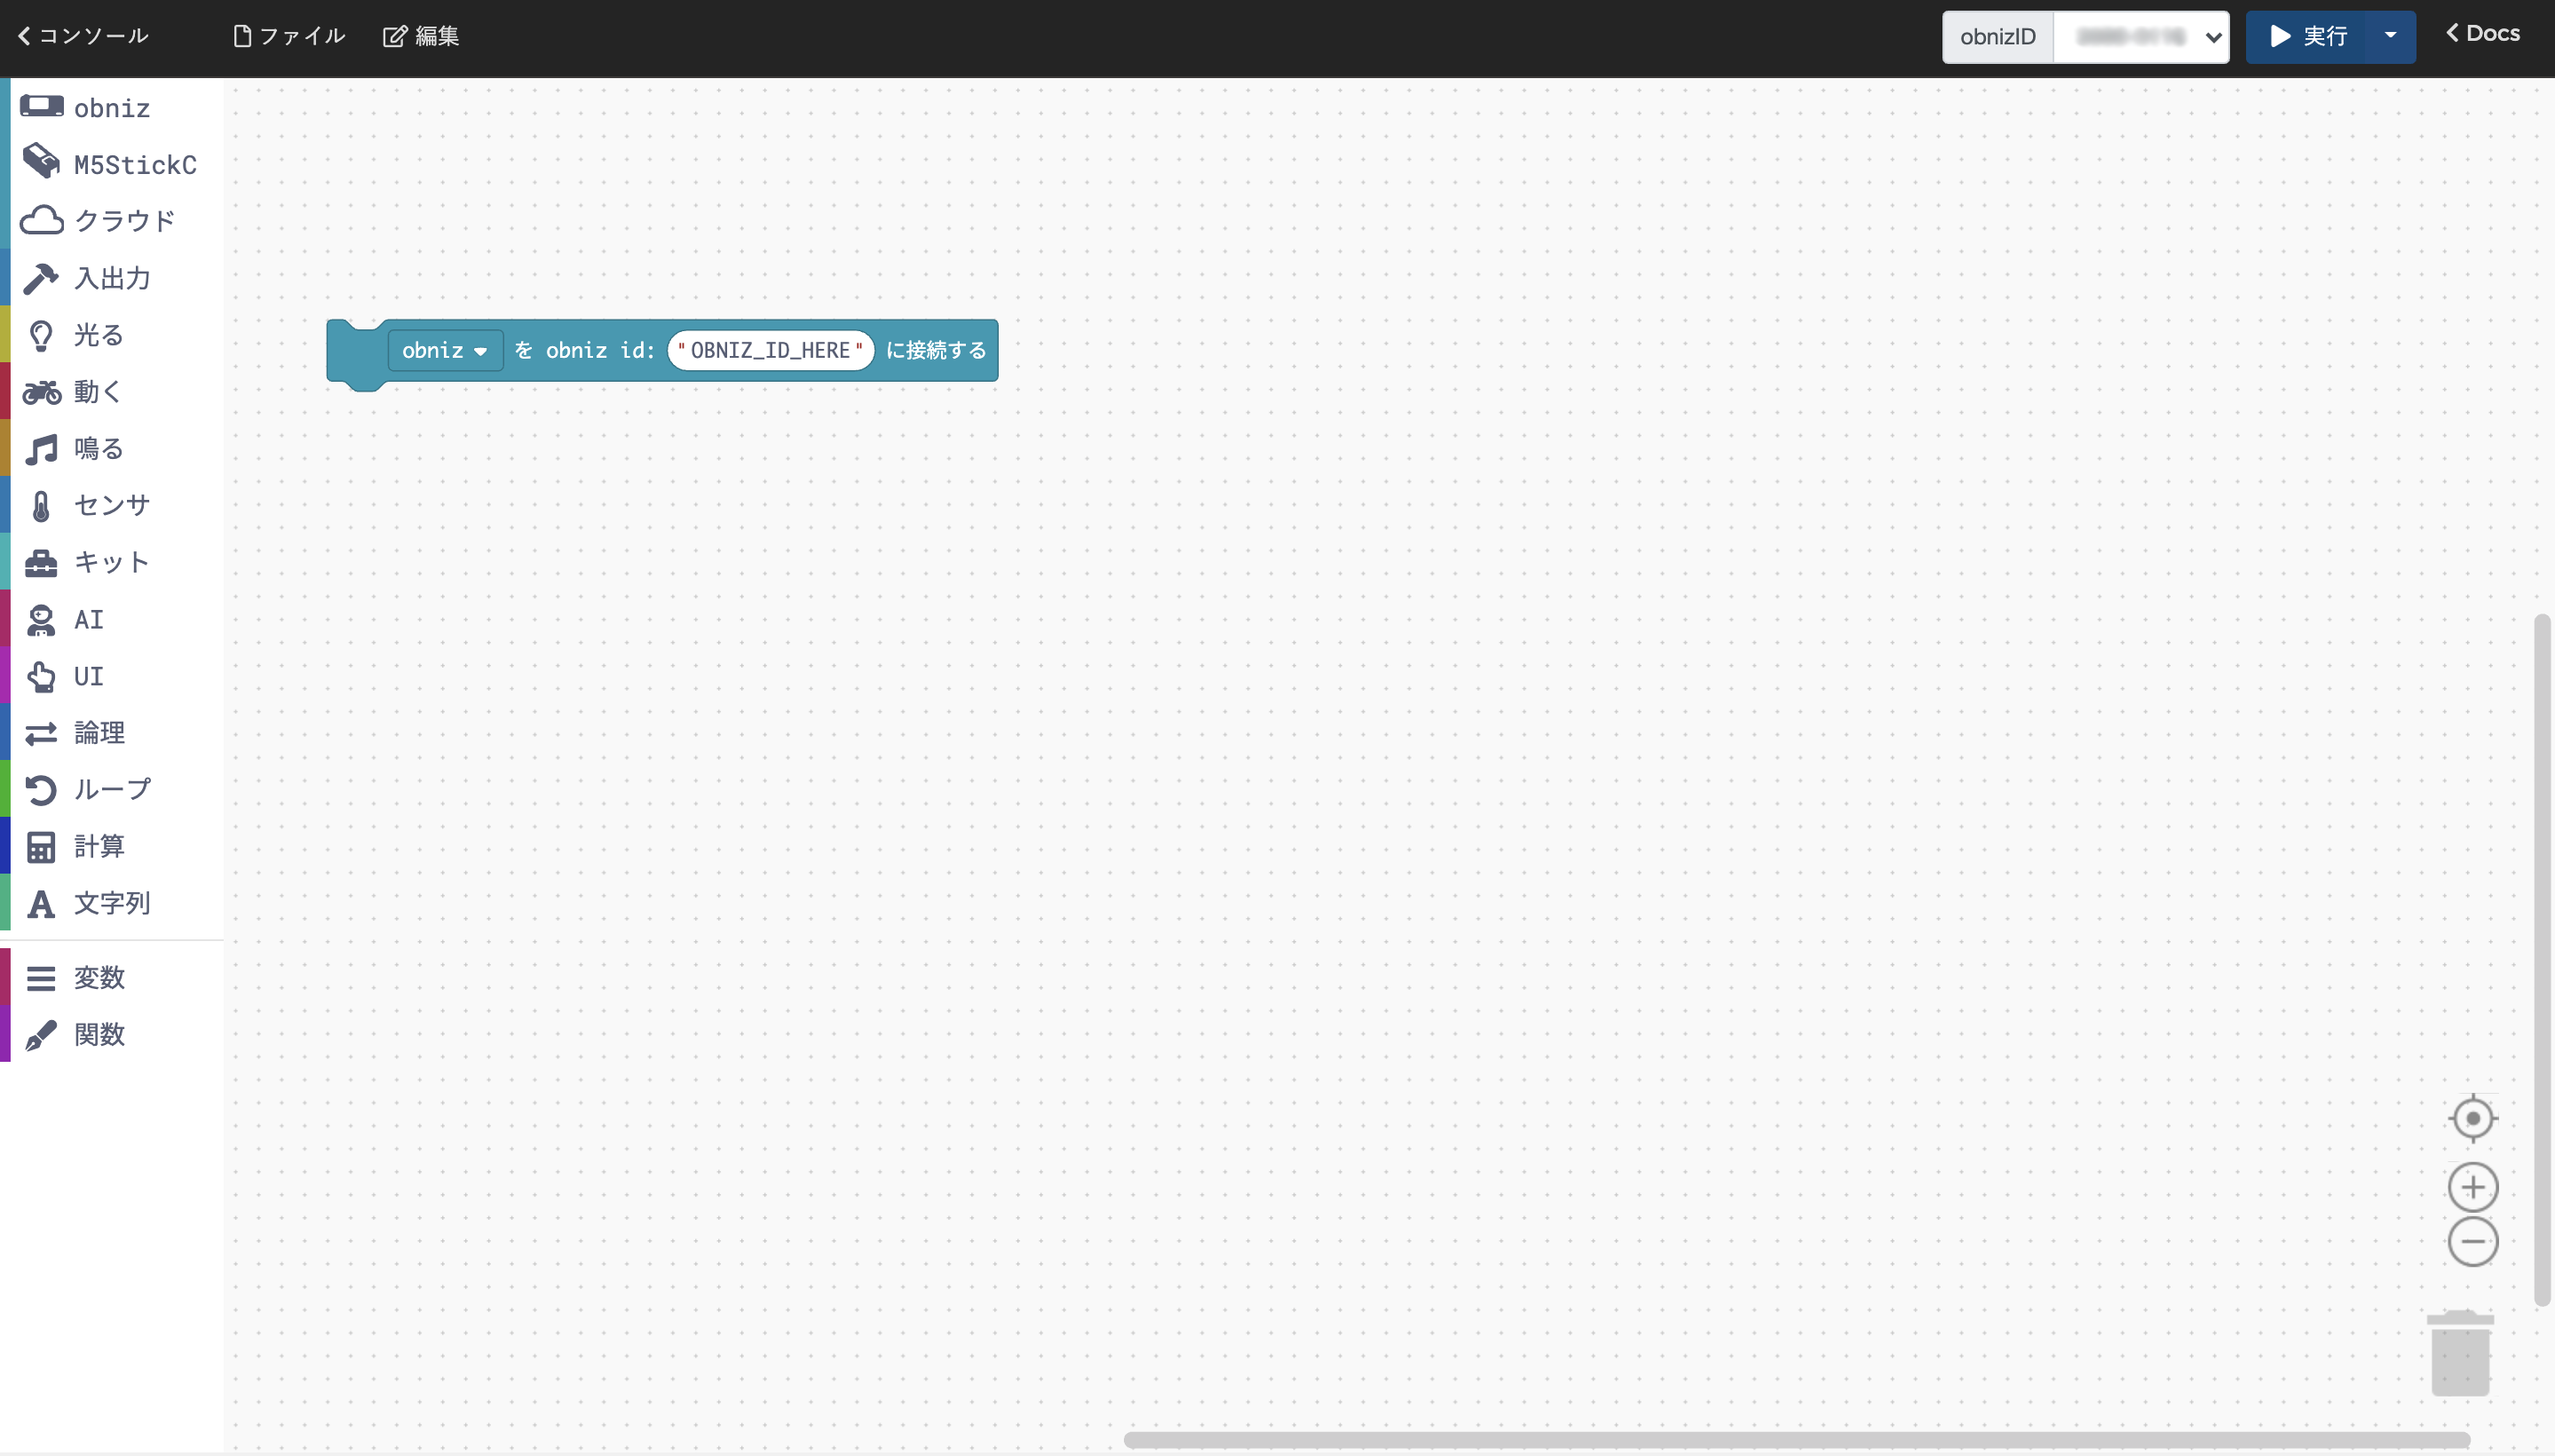
The difference from the program screen of the normal block program is that the obnizID is specified as "OBNIZ_ID_HERE" and the obnizID of the registered device is entered in the upper right.
The app is described in the form of "OBNIZ_ID_HERE" without specifying the obnizID so that it can be used on various devices.
However, so that you can check the operation, you can immediately execute it on the browser by pressing the button on the upper right on the registered device without installing it.
Sound the buzzer
You can run it in your browser without installing the app, so let's use that function to sound the buzzer first.
There is a buzzer block in the "Starter Kit" category.
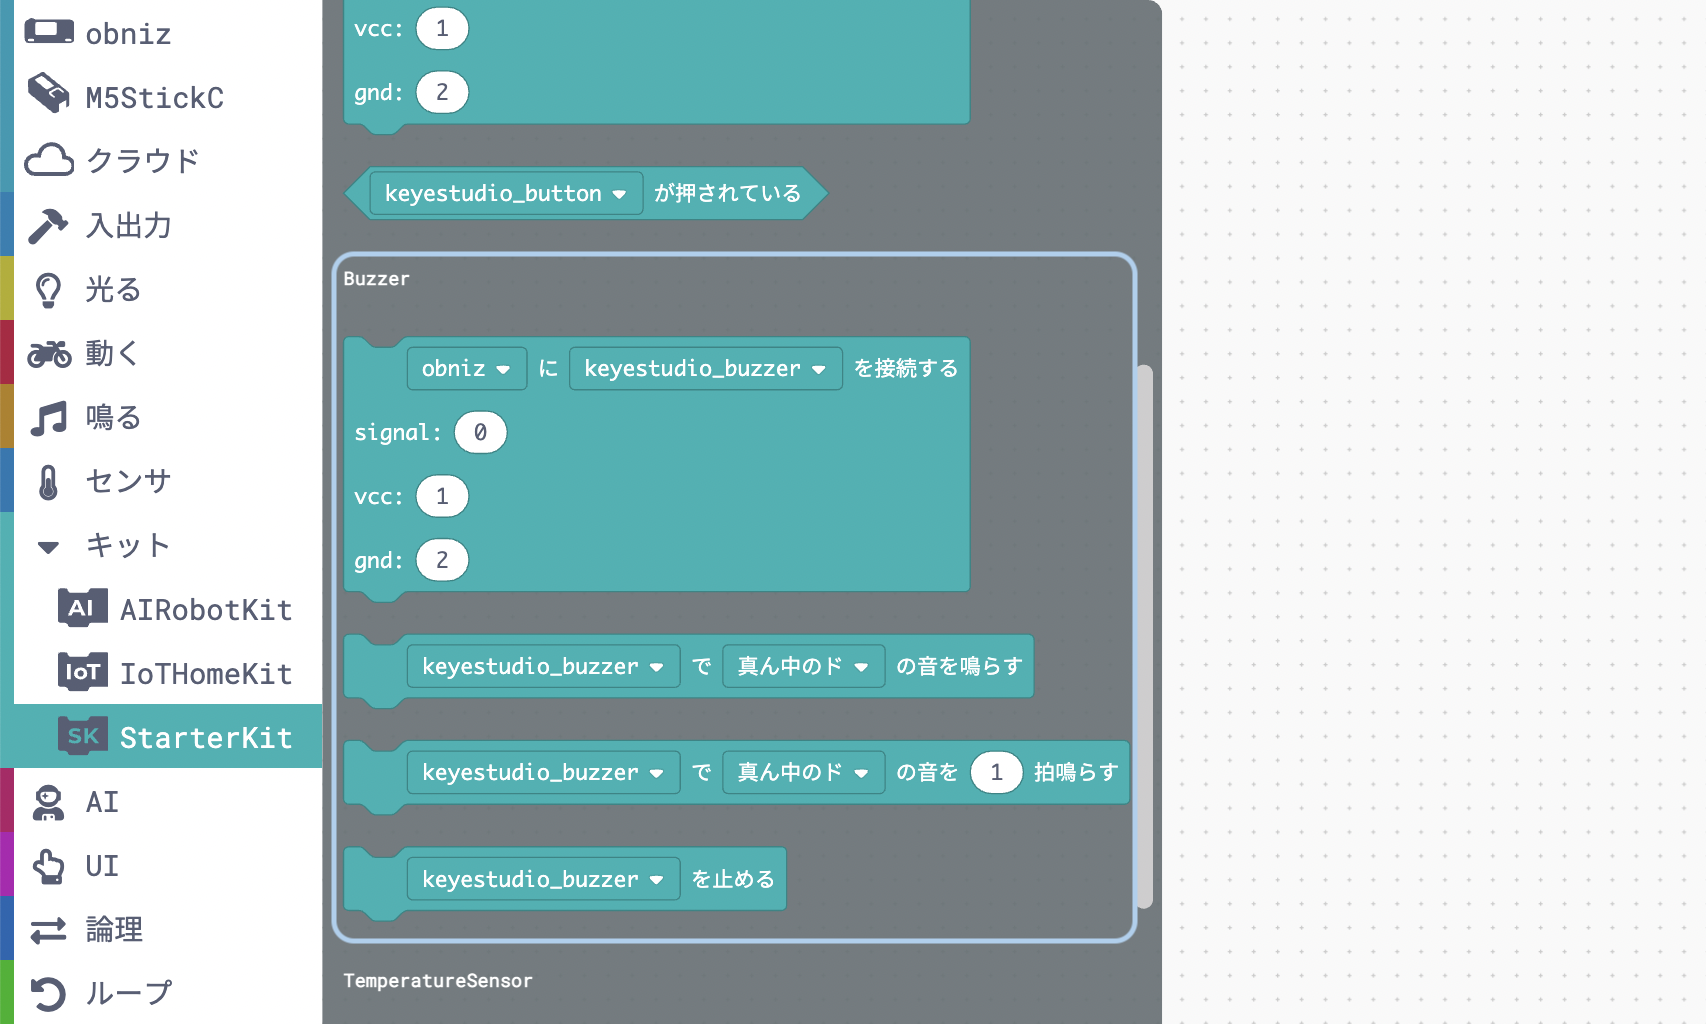
The "sound" block will continue to sound until the "stop" block is used.
The "Beat the sound" block will play the sound for the specified number of beats.
This time, I want you to stop naturally when it sounds a little, so I will use the "play tone" block.
Create the following program and execute it with the execute button on the upper right.
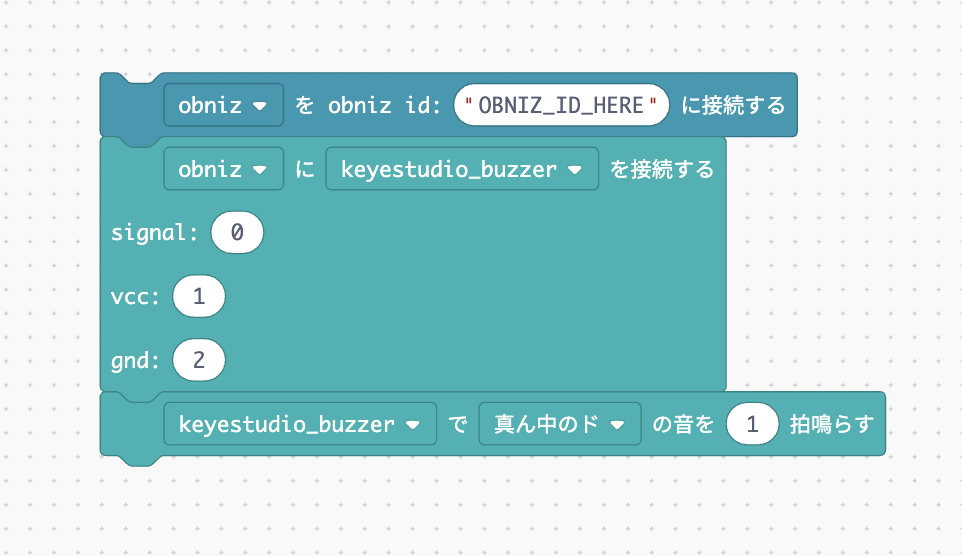
Does only middele C sound ?
If it doesn't work, check that the pin with the buzzer corresponds to the number on the block.
You can change the pitch by changing the "middle C" part to a different scale, and you can change the length of the sound by changing the "1" beat part.
Now you can use the buzzer parts to make sounds!
Run the program in time
If you just press the run button and sound the buzzer, you can do the same with a normal block program.
However, it is necessary to run the program regularly in time because it is not a time signal just to make a sound manually.
Therefore, let's use the function called "cloud execution" of the application.
Cloud execution is a mechanism to run a program on the cloud instead of launching a browser and executing it.
You can set a trigger and run the program each time the trigger occurs.
What can be set as a trigger
- Webhook
- Fixed time
- Fixed time interval
- When the device comes online
- When the device switch is pressed
There are avobe 5 types.。It is also possible to set multiple triggers.
(Reference: Browser app: Cloud execution)
This time, we want to make a time signal that sounds the buzzer every hour, so we set it to execute the program at the "fixed time interval" of "every hour".
Now, let's set the cloud execution on the application setting screen that we skipped earlier.
Save the program by selecting "File"-> "Save", and then return to the developer console by clicking "<Console" in the upper left.
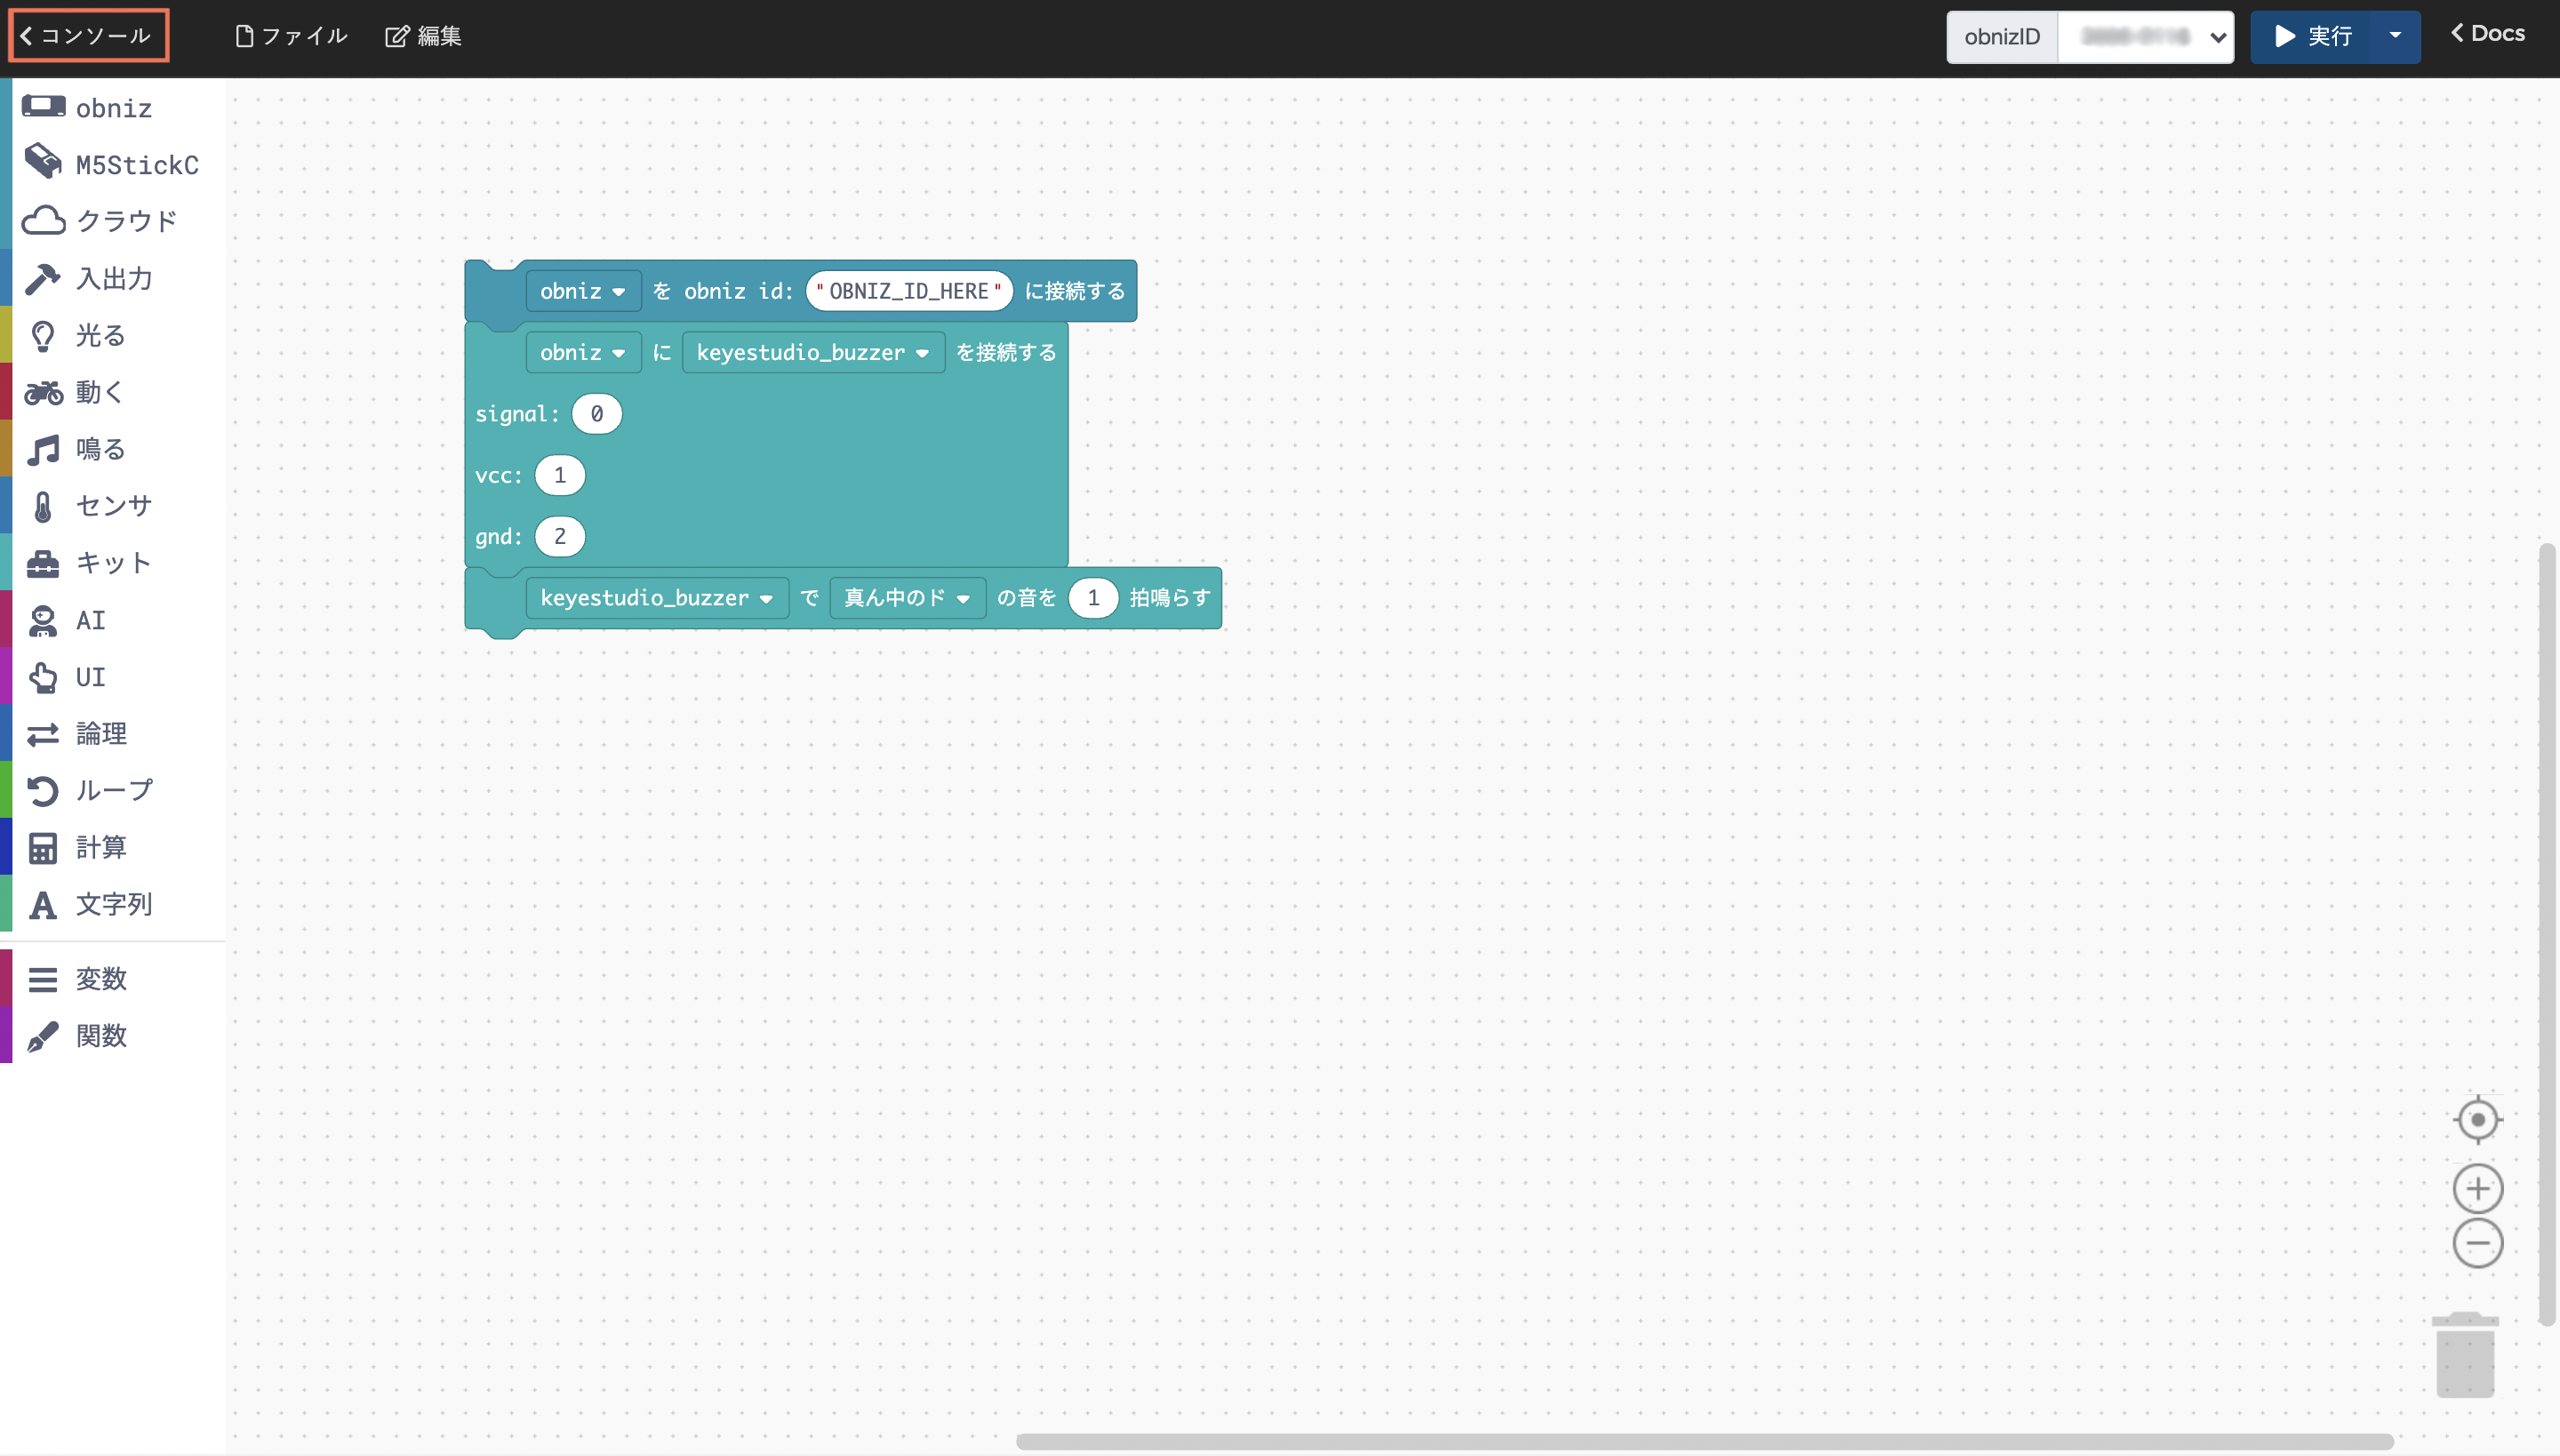
Go to "App Development" and press "App Settings" for this app.
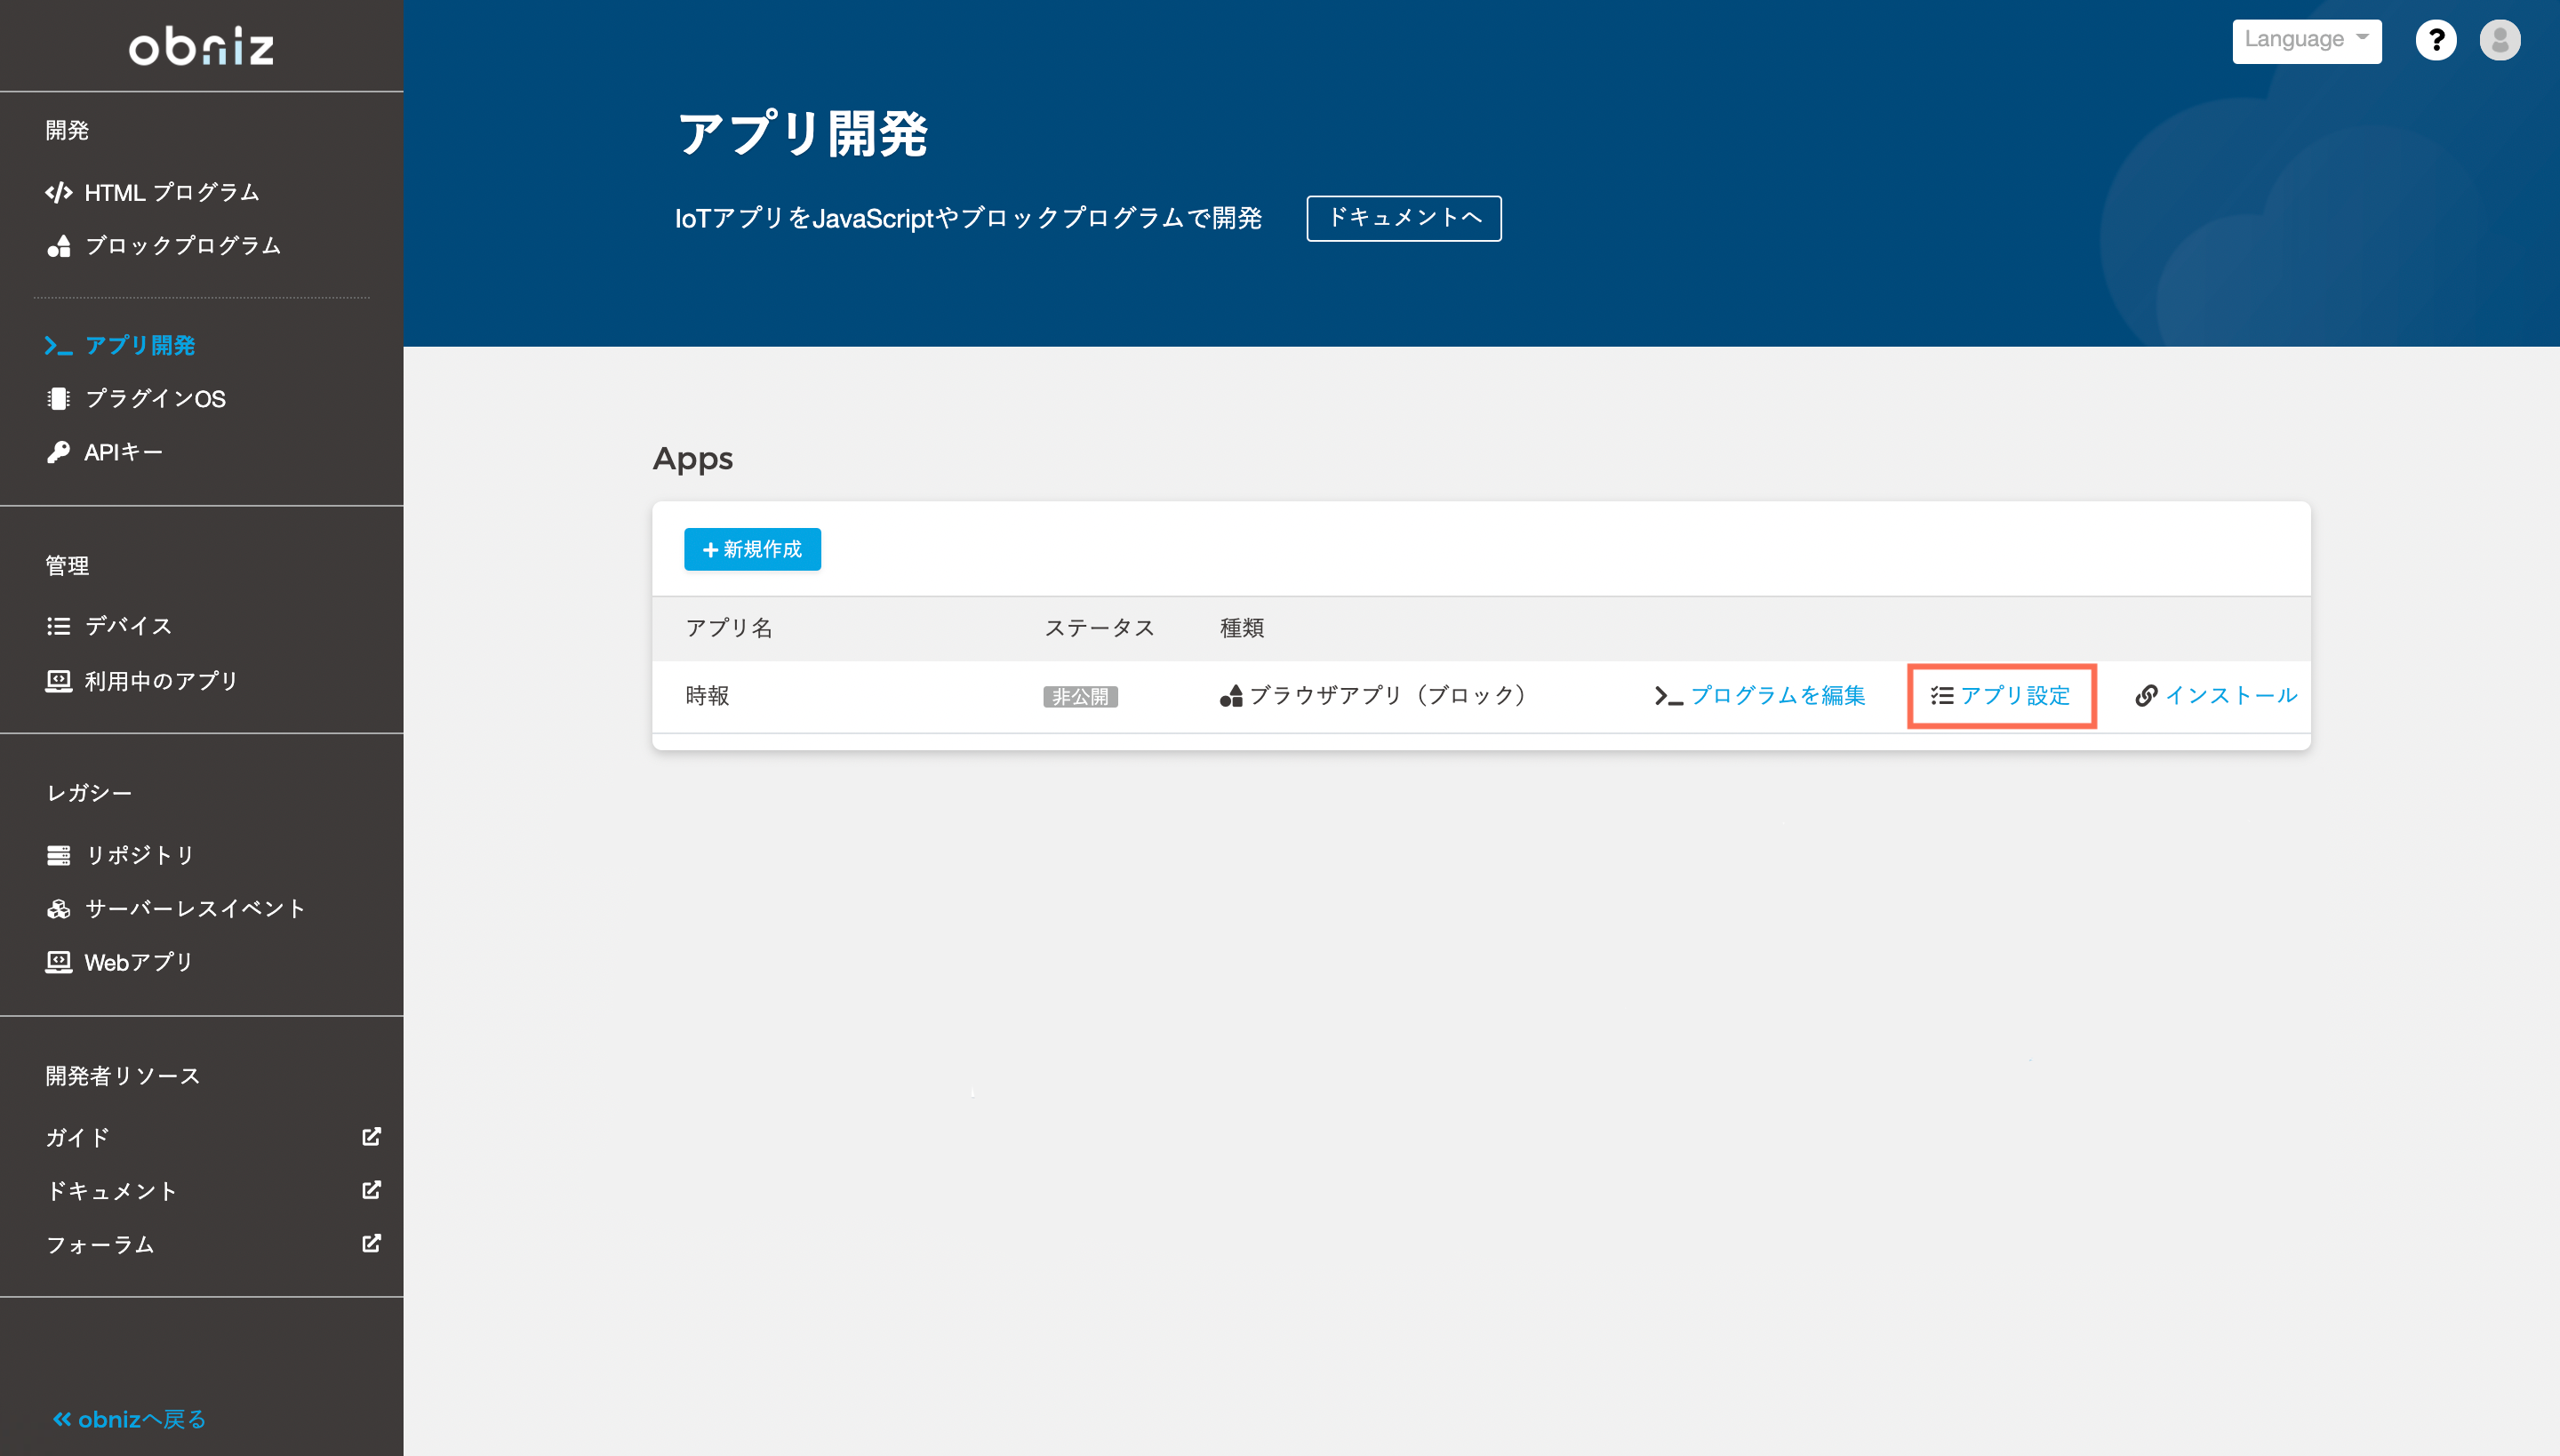
Enter the time setting in "Run in time" of "Cloud execution".
In "Run in time", you can set the trigger of "fixed time" or "fixed time interval".
Fixed time: Specify a specific time of the day
Described aseveryday / 11: 11(executed every day at 11:11)Fixed time interval: Specify the interval in minutes or hours
Described asevery / 10minutesorevery / 10hours(executed every 10 minutes or every 10 hours)
This time you want to run the program every hour, so you would enter every / 1hours.
But if you set it every hour from the beginning, you'll have to wait an hour to see if it works.
Therefore, let's set it to work every 10 minutes at first, and then set it again every hour after confirming the operation (the maximum number of executions per day of the application is 150 times, so it can be set for a short time. I chose 10 minutes as).
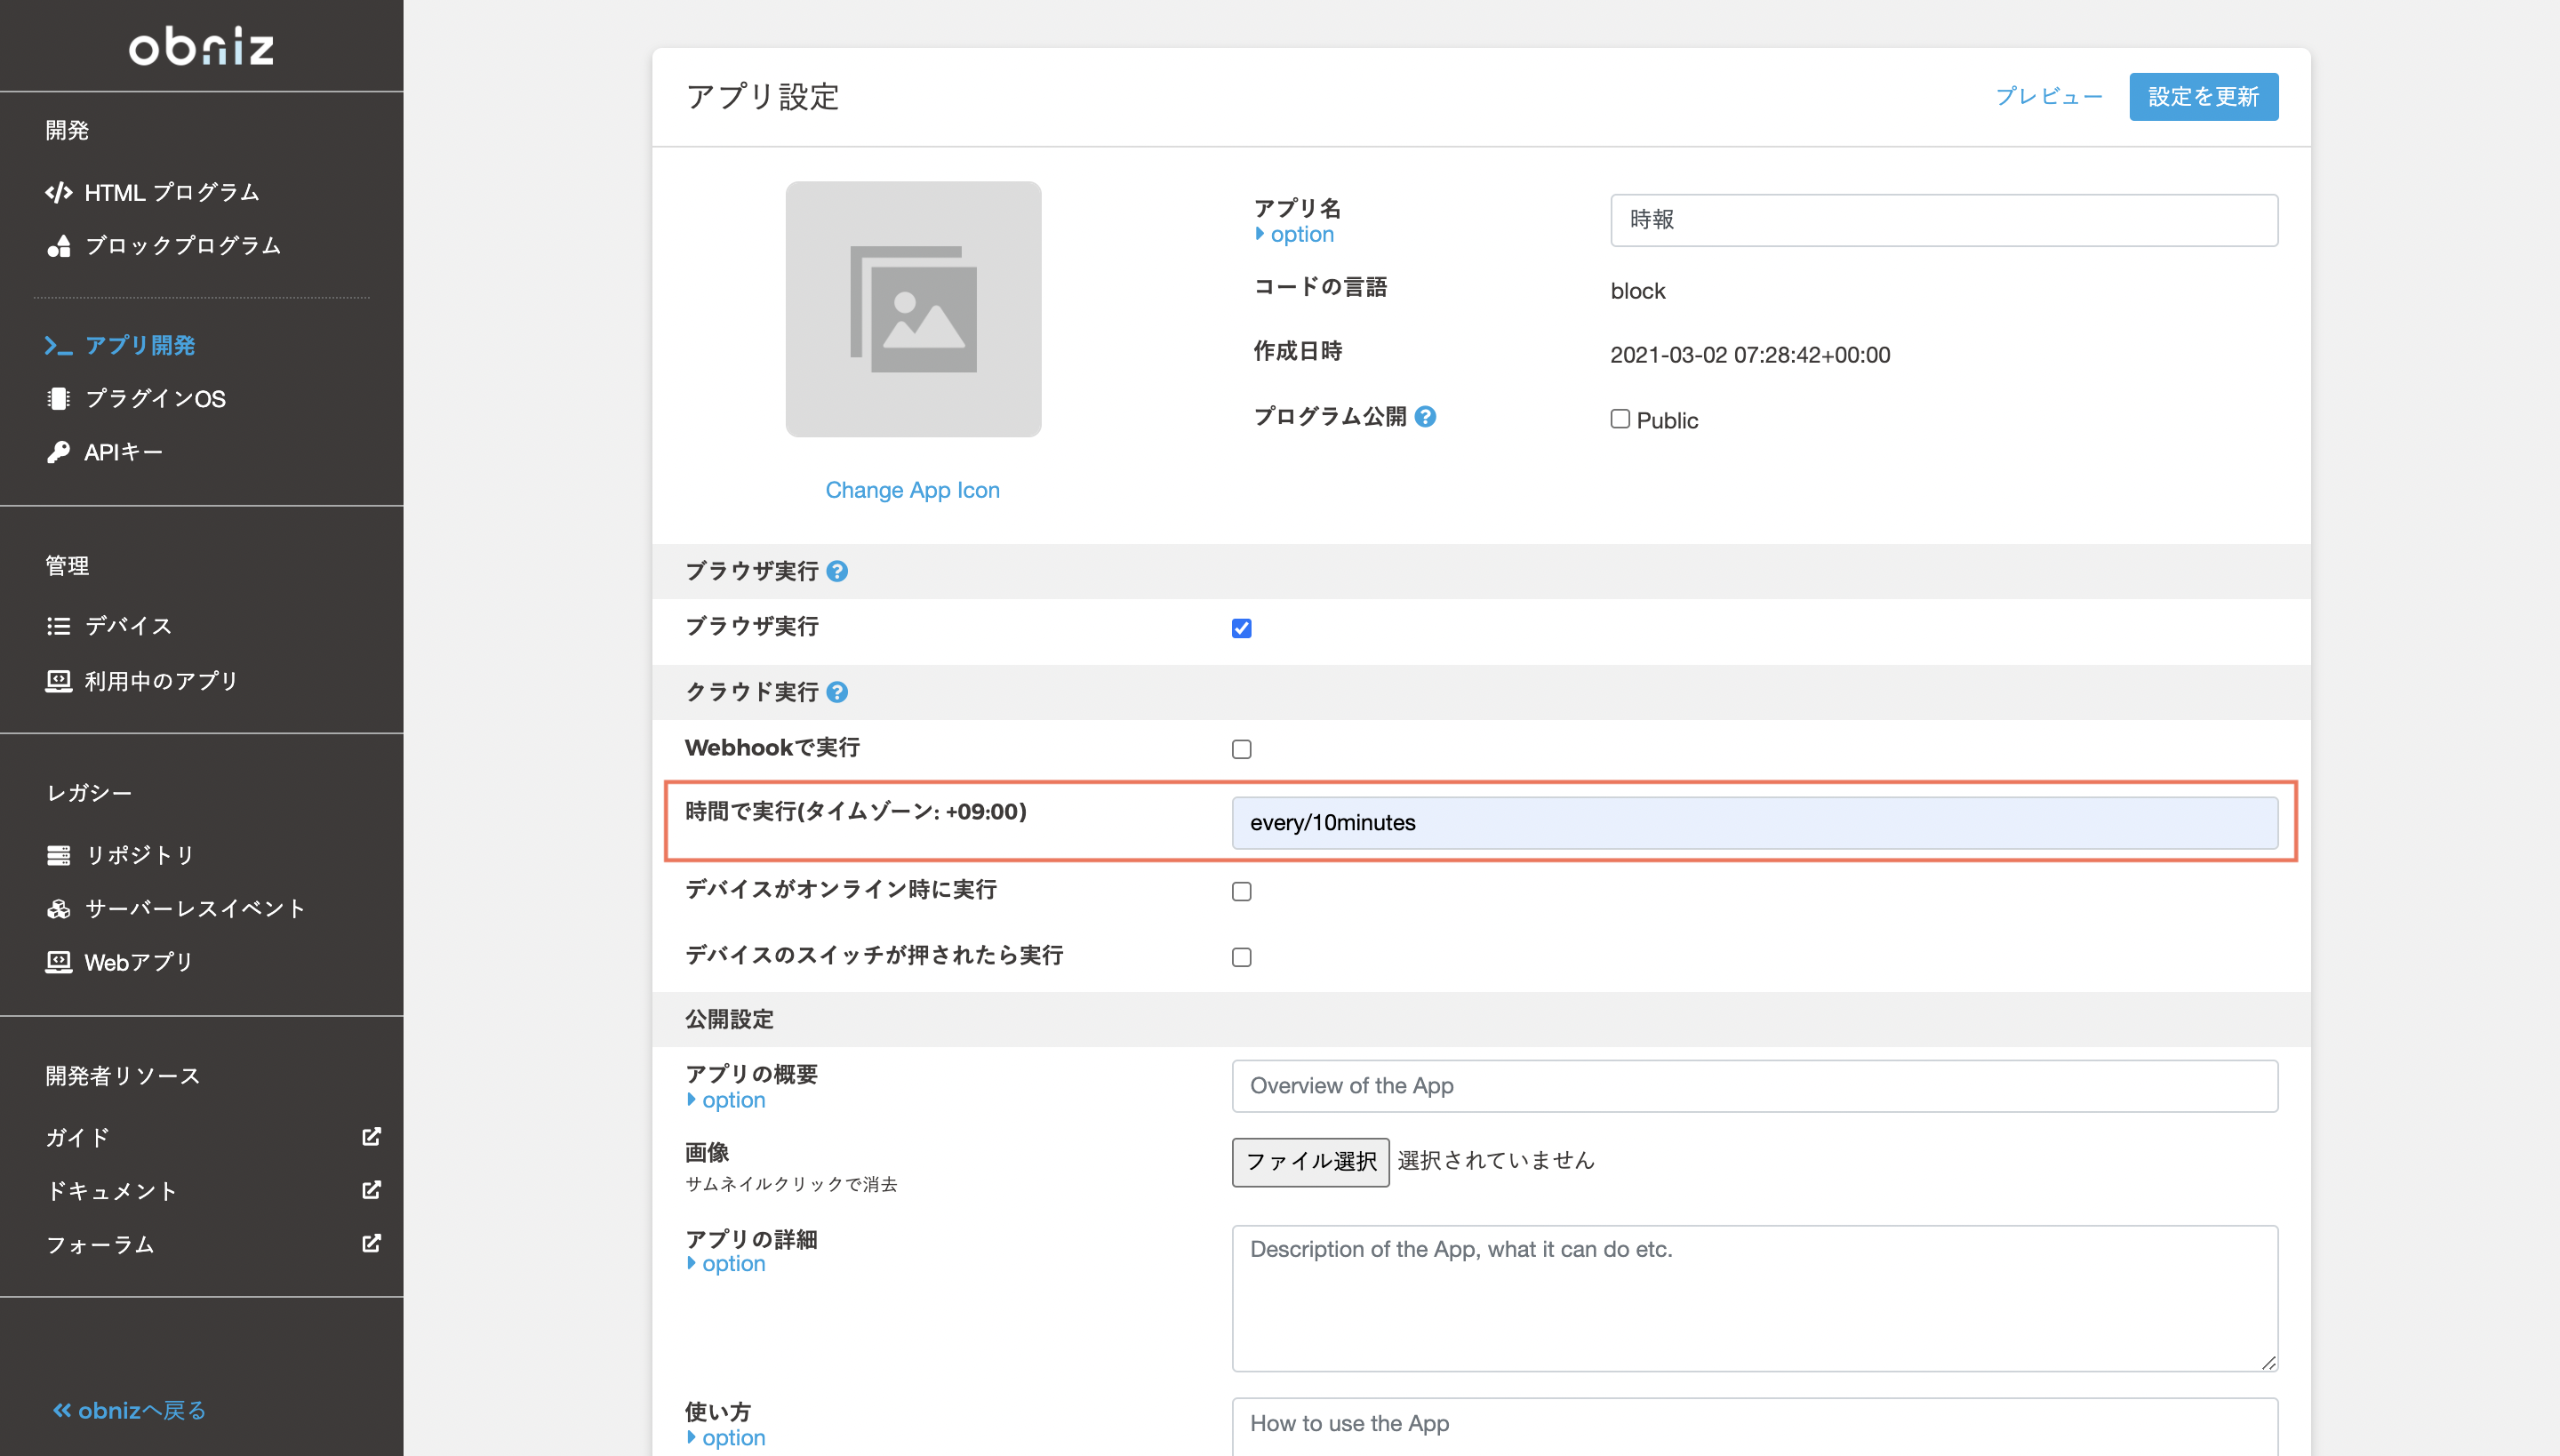
After entering the time settings, press "Update Settings" in the upper right to save the app settings.
Install the app on your device
Once the app is complete, install it on your device and use it.
Let's install the app on the device registered in Last lesson and check if the program works.
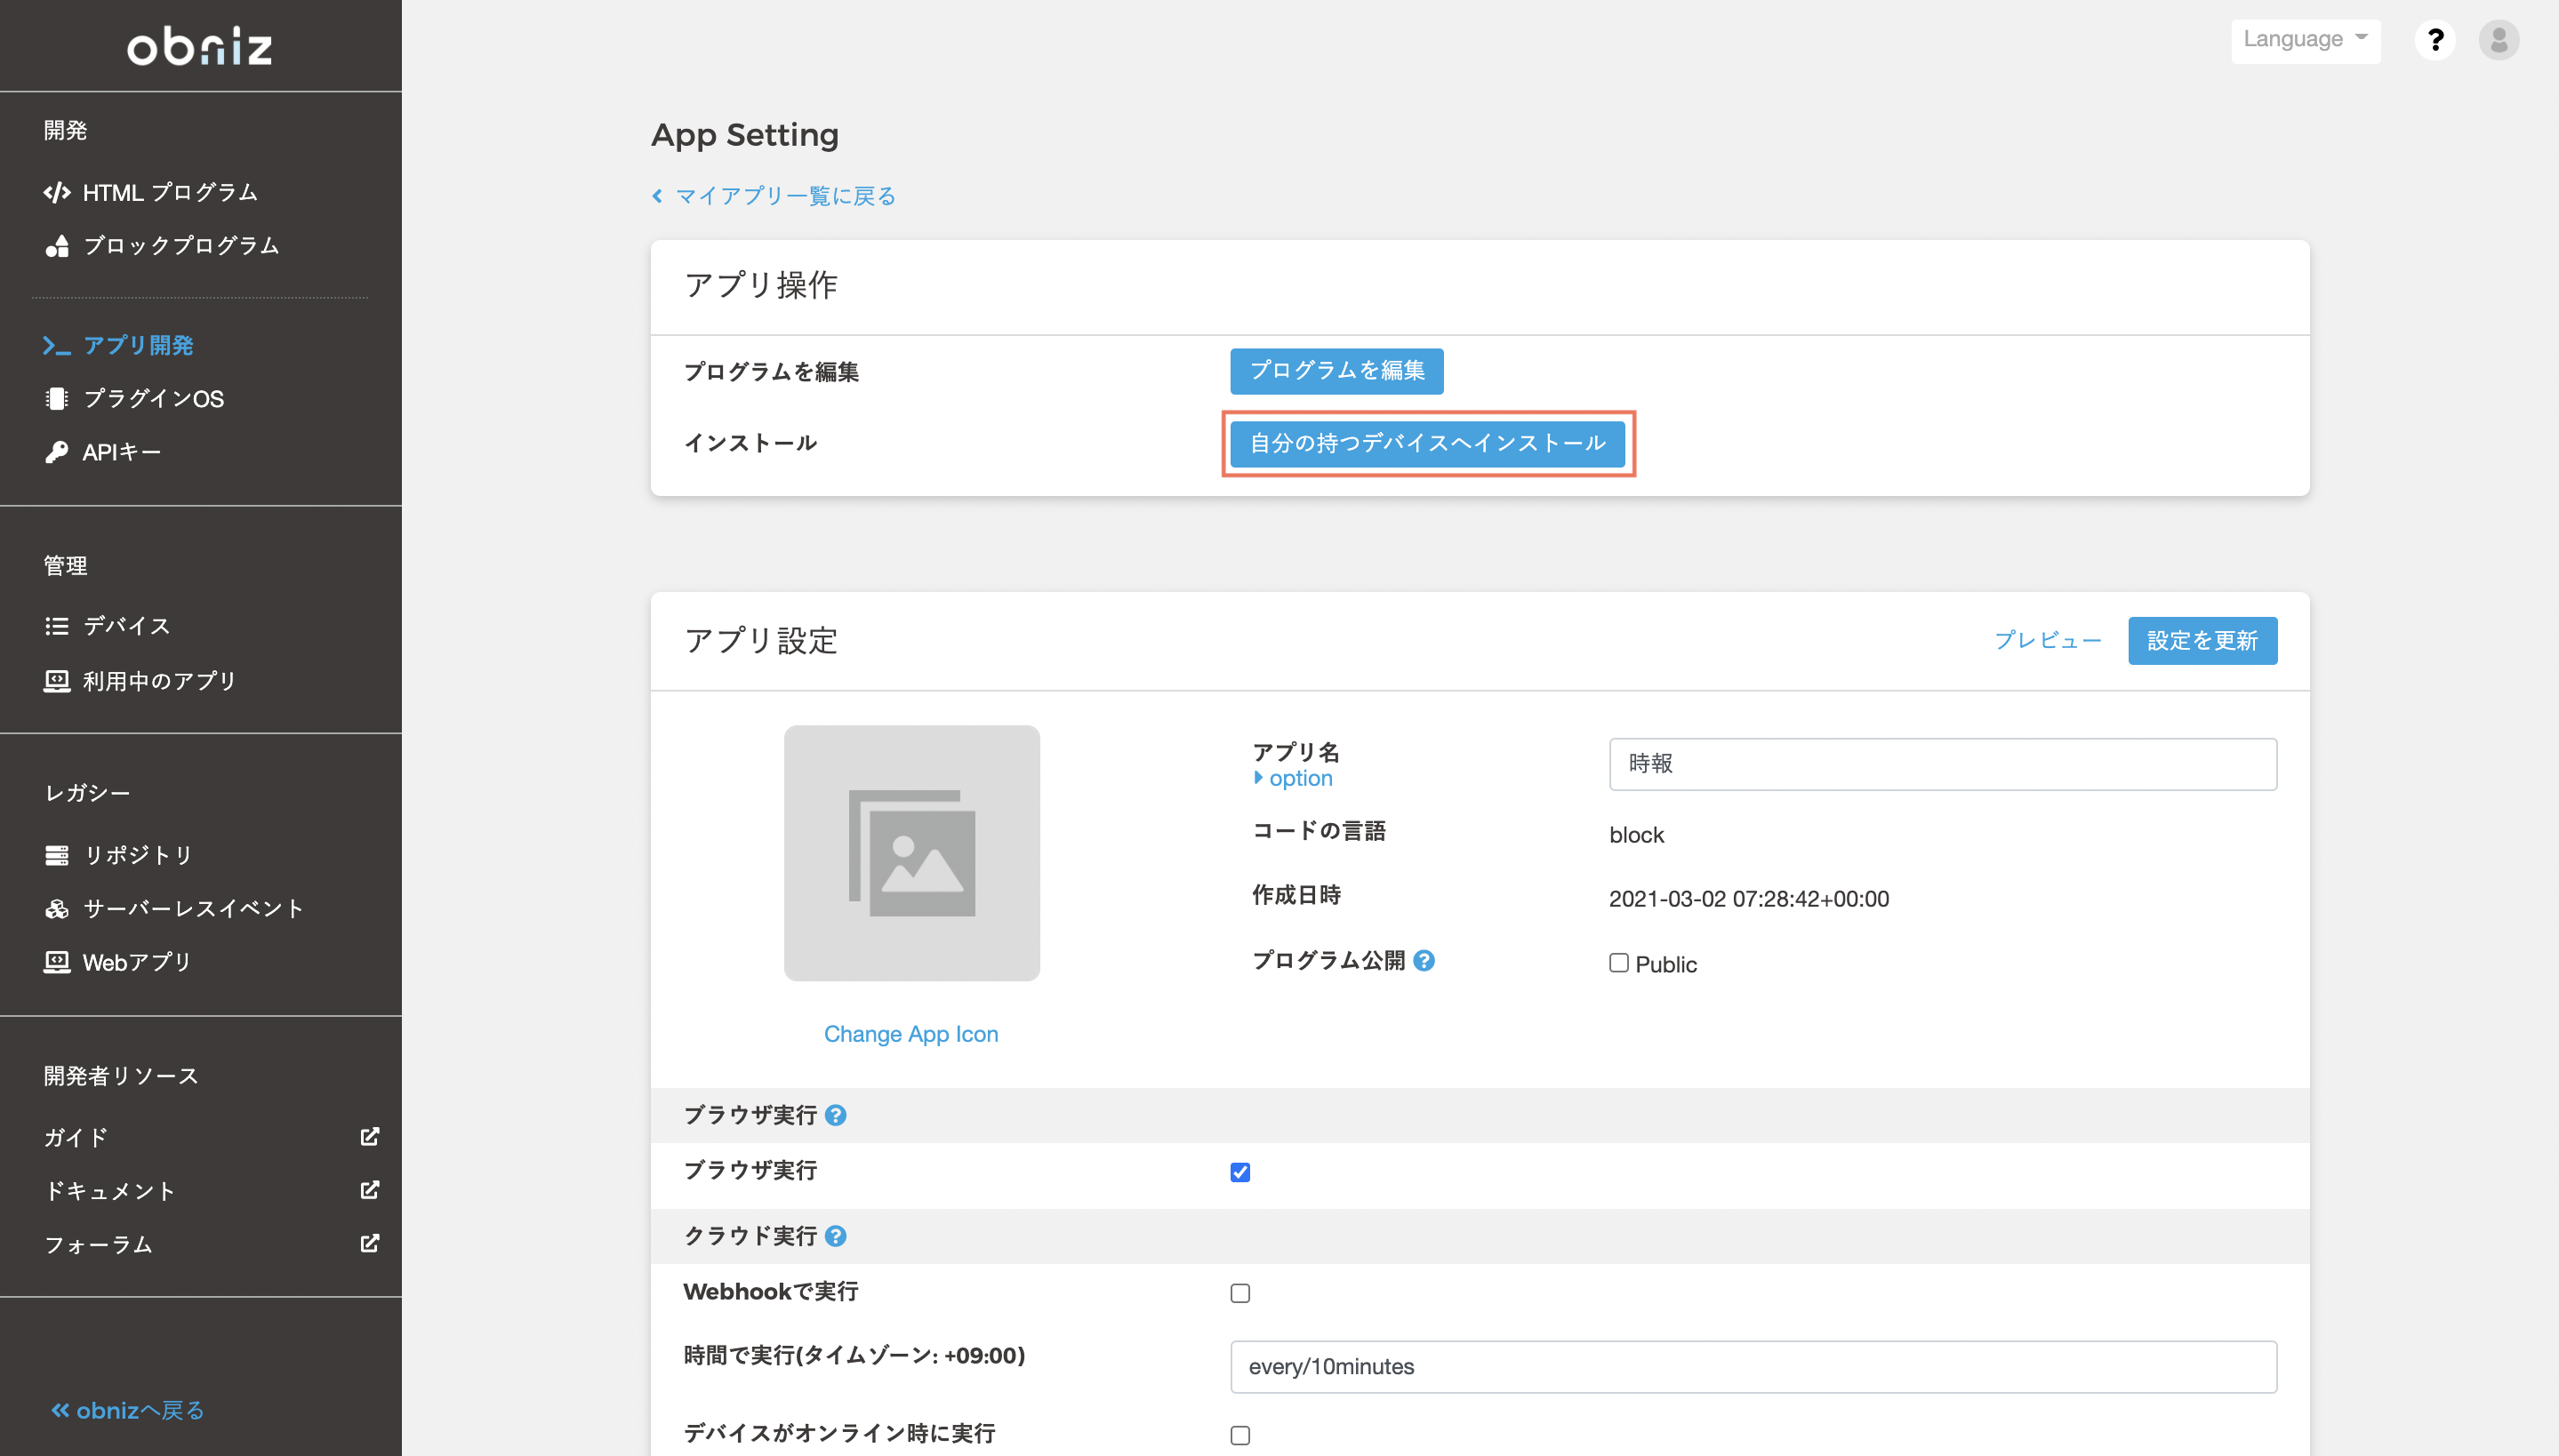
On the application setting screen where you set the cloud execution time earlier, there is a button called "Install to your own device" in the "App operation" item at the top, so press it.
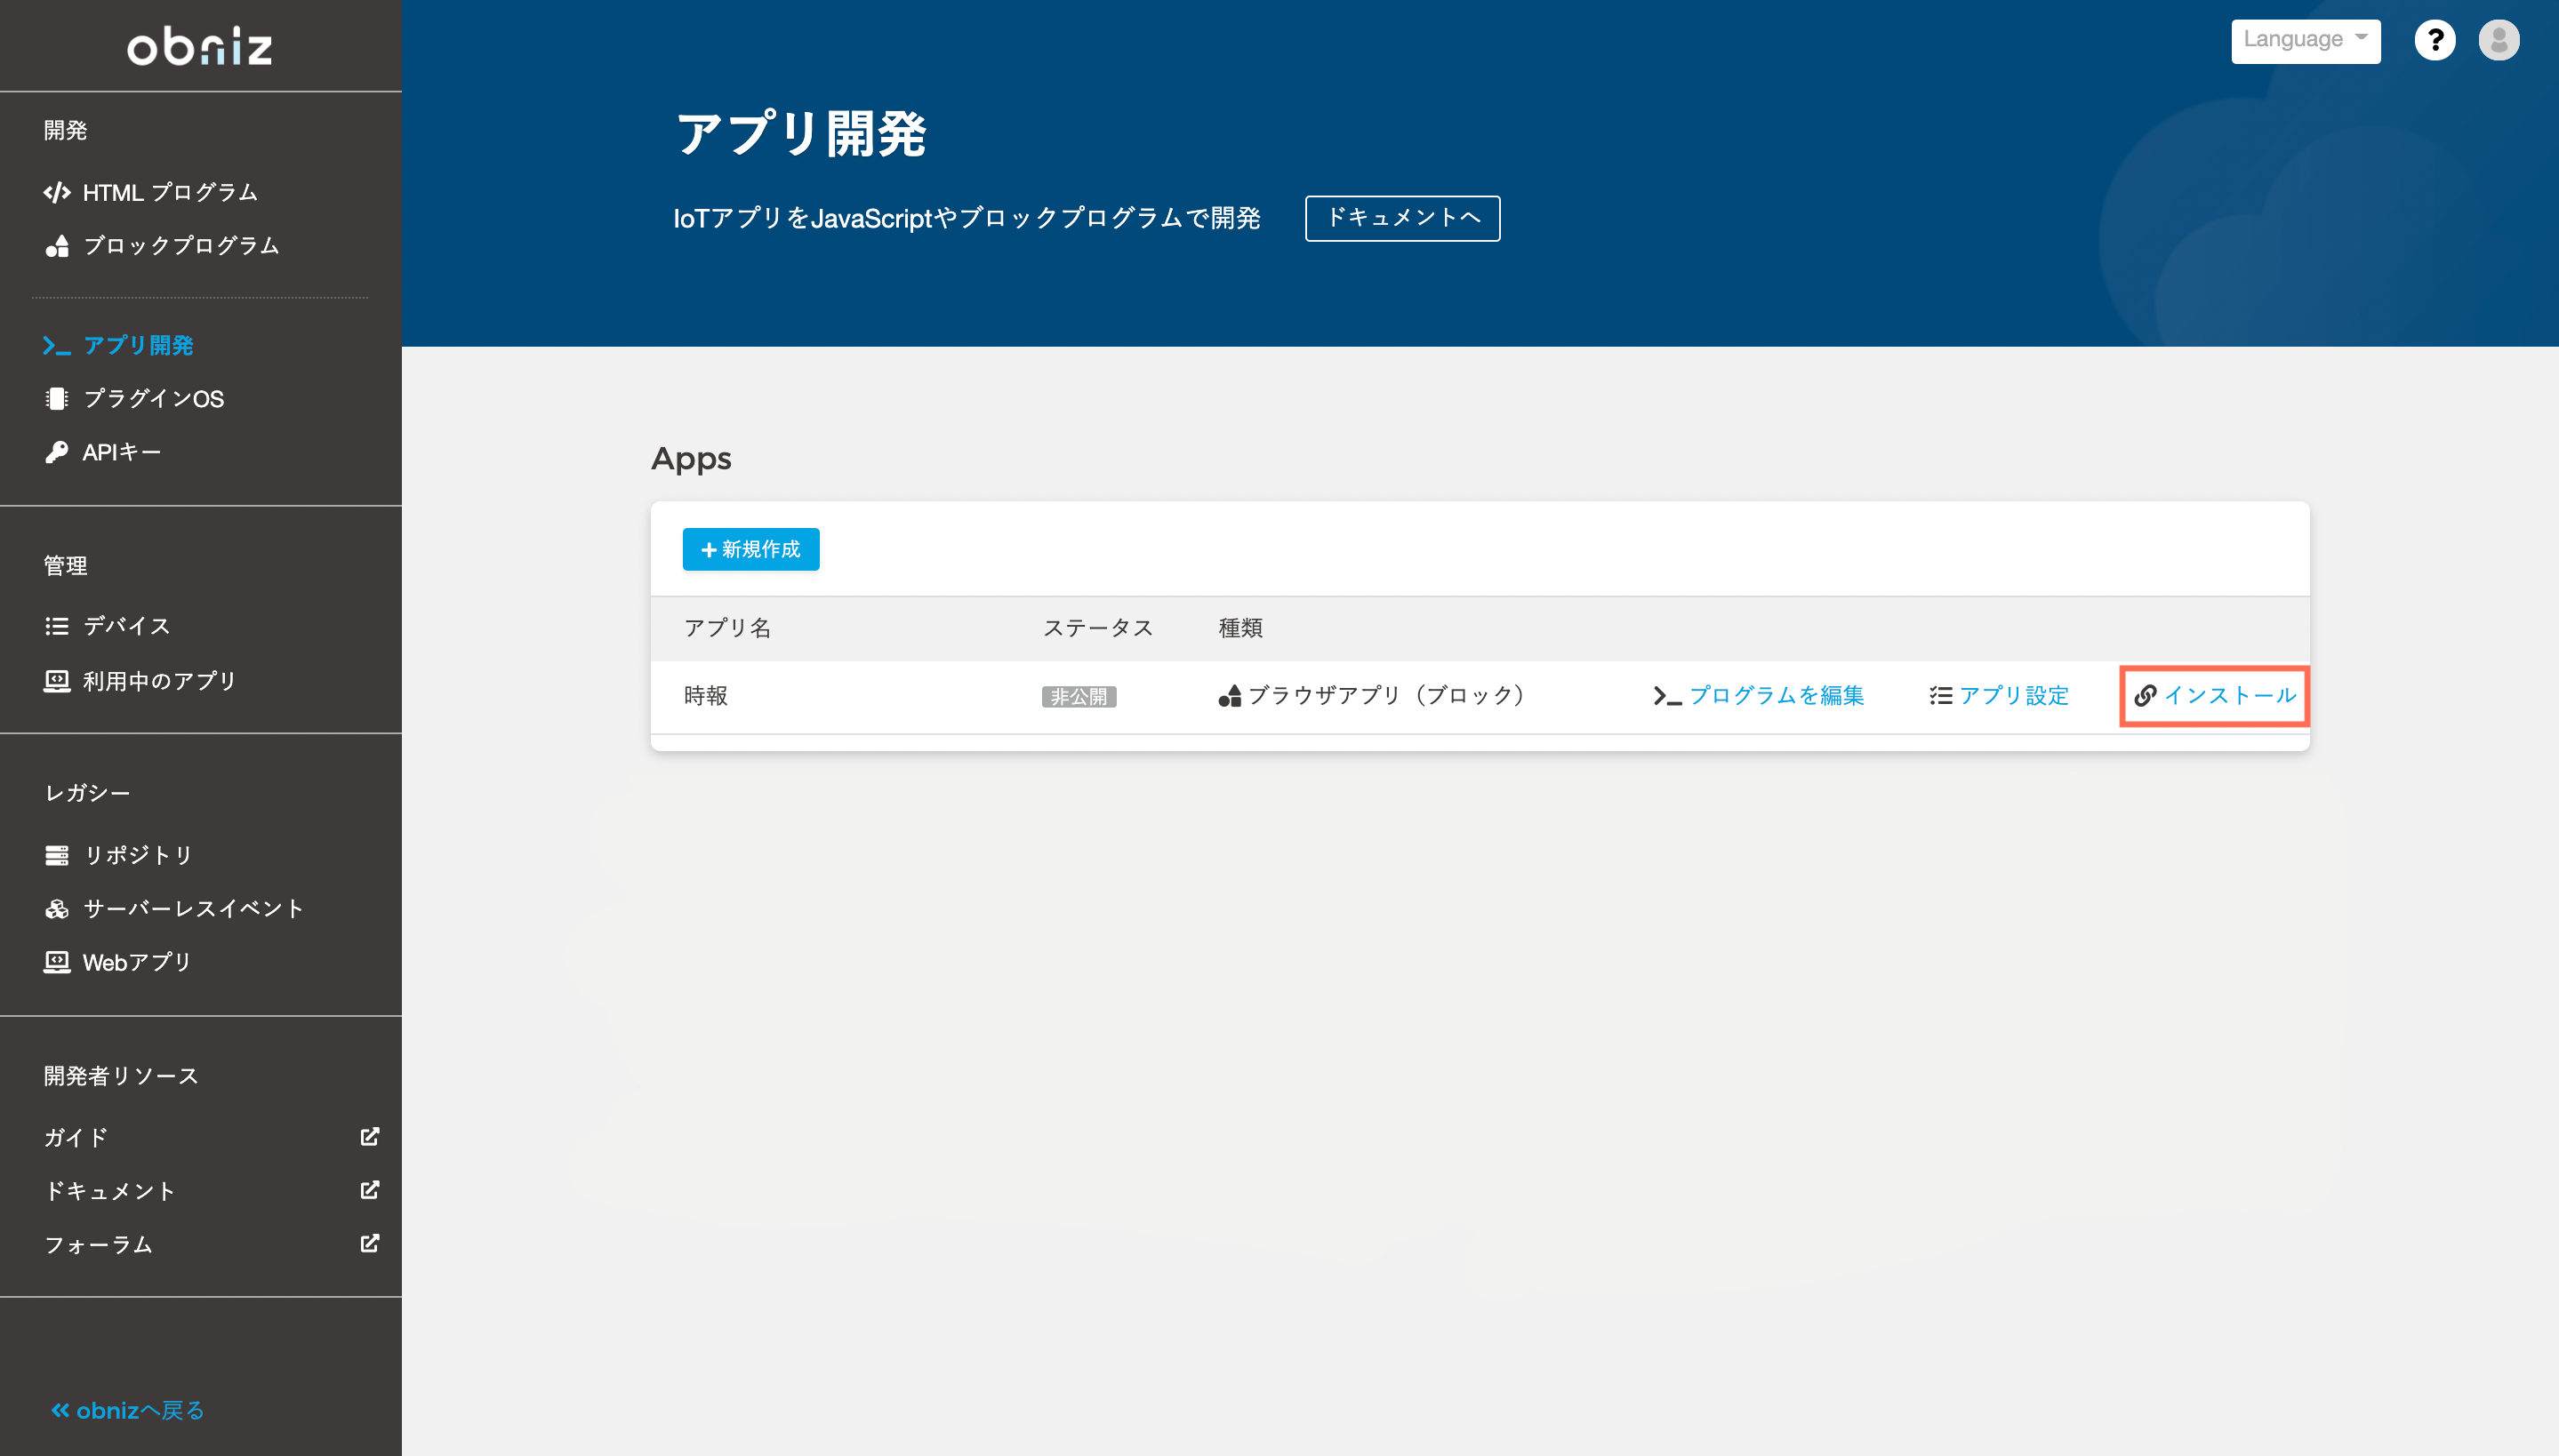
You can also install it by clicking the "Install" part on the application list screen.
Select the device you want to install and click "Install" to install the app on the device.
You can check that the app is installed on the device in the device list.
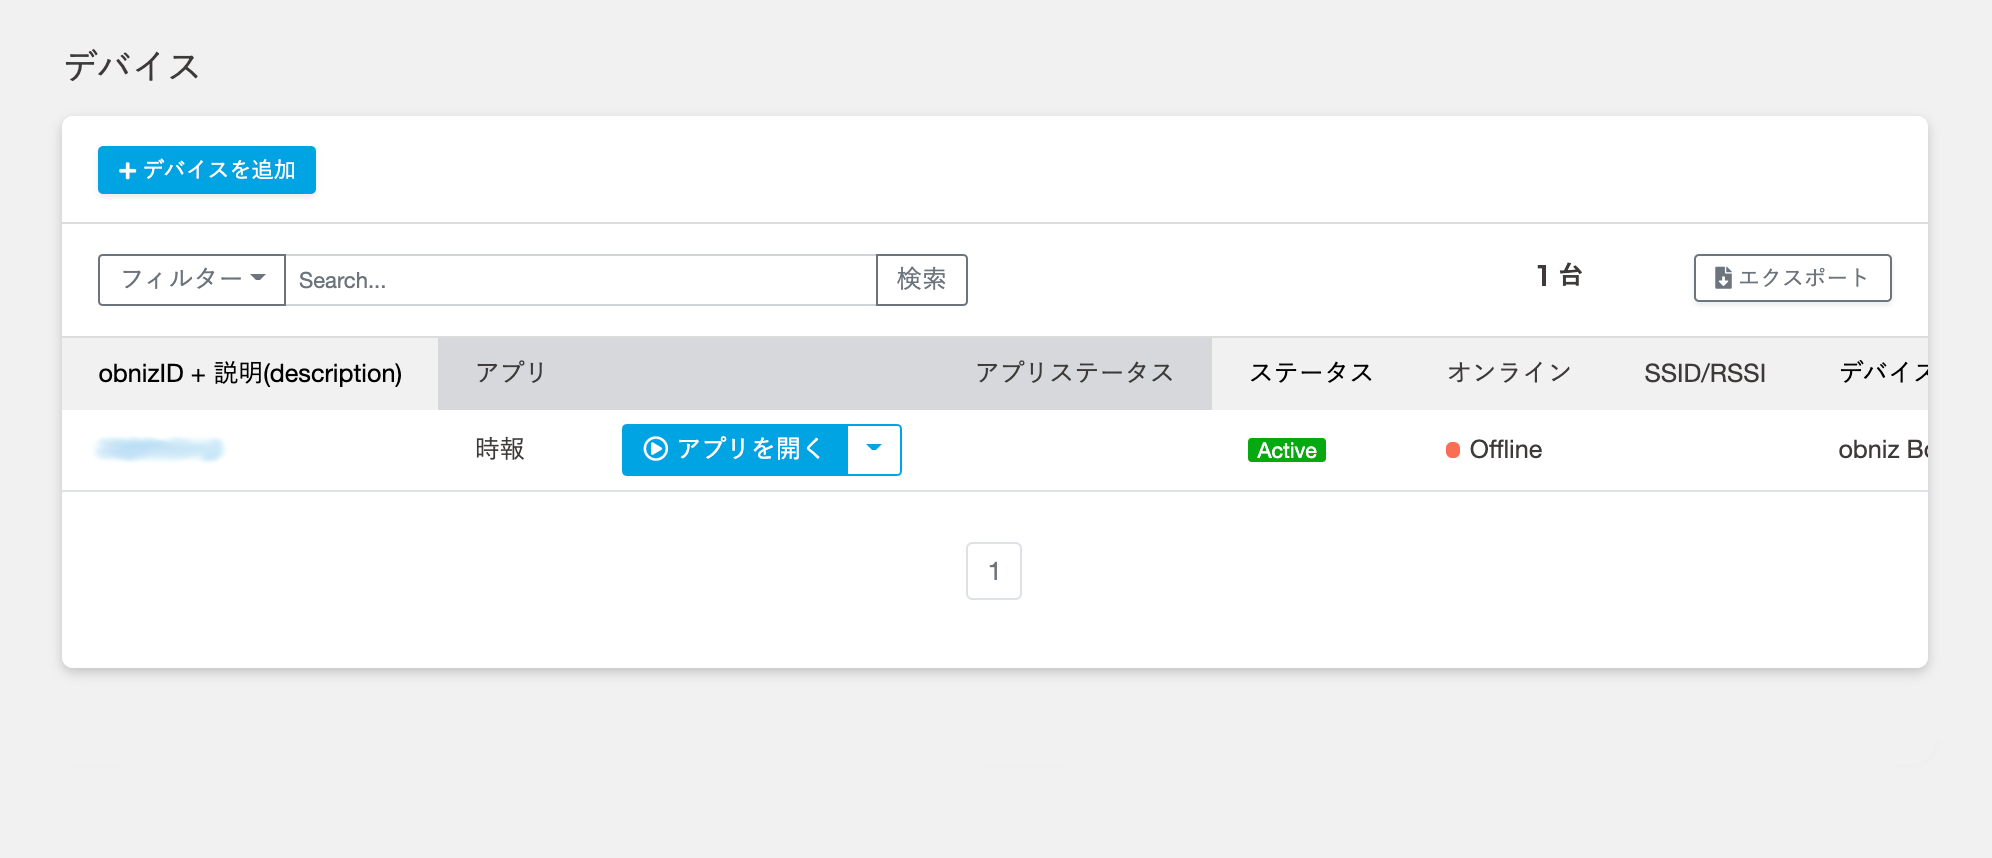
You can run the app in your browser by pressing the "Open App" button.
We want to run it in the cloud this time, so let's wait patiently for the buzzer to sound after 10 minutes.There may be a slight error, so if you don't hear anything after 10 minutes, don't rush and just wait a little longer.
Did the buzzer sound? Then it's a success!
In cloud execution, the program will end after a time-out (depending on the plan).
So, if this program is working fine, you should see a timeout message in "App Status".
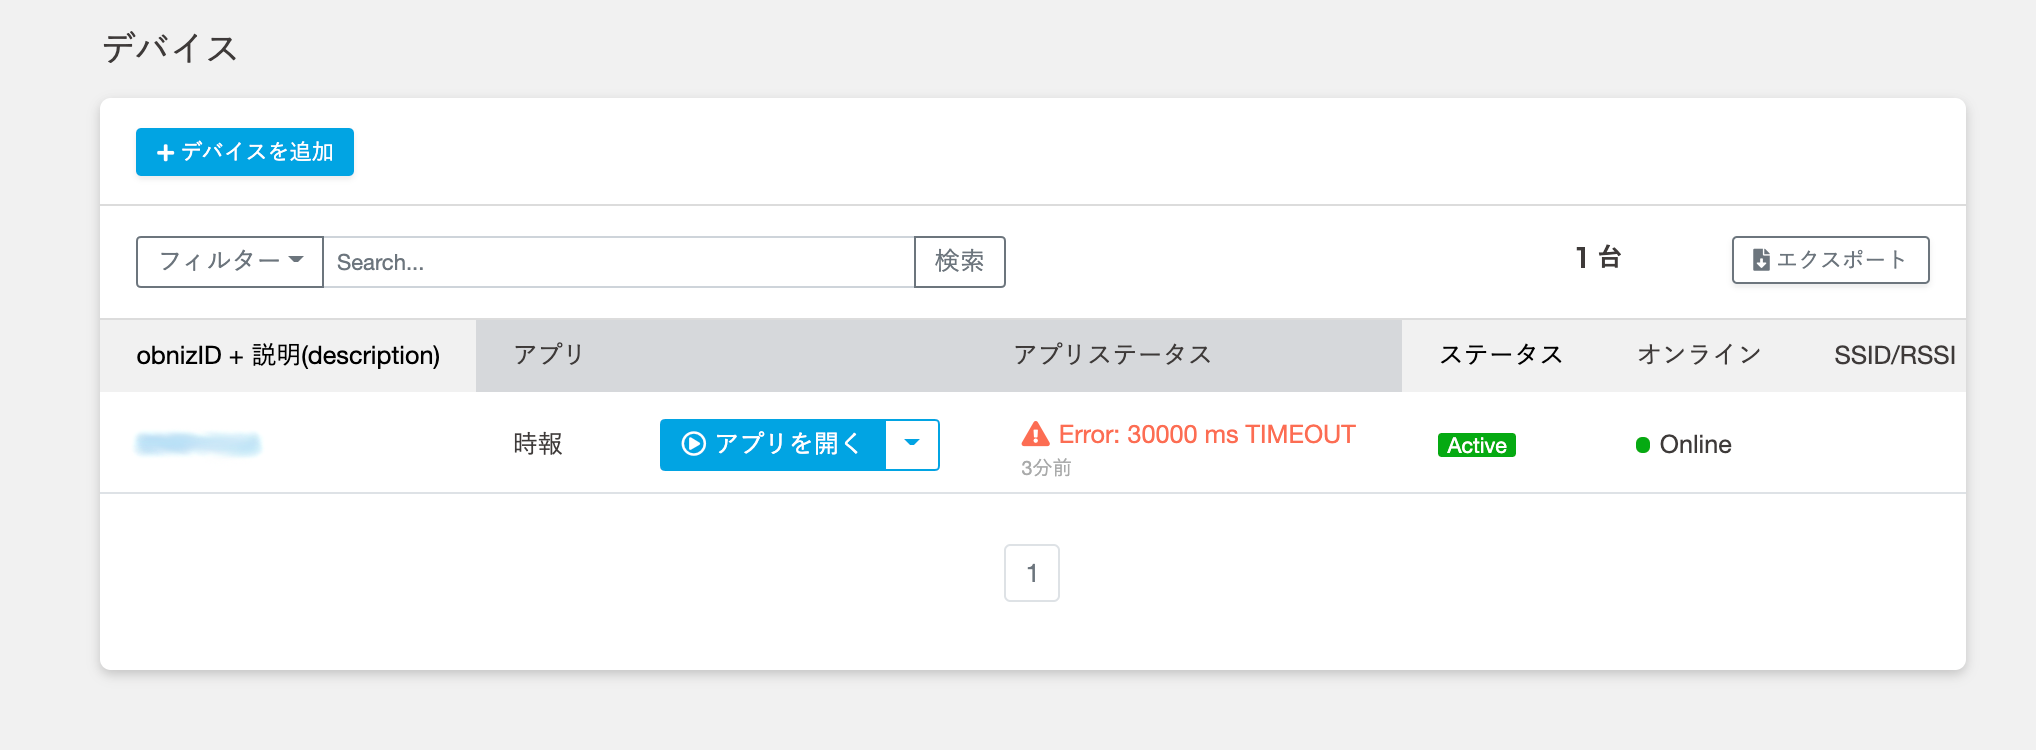
The error is displayed because you have not specified what to do when the application is closed, and if the buzzer sounds properly every 10 minutes, the program is operating correctly, so there is no problem.
If you can confirm that it works every 10 minutes, rewrite every / 10minutes to every / 1hours in the app settings, and the time signal that sounds every hour is completed!
How was your first app development? Have you somehow figured out what the app looks like?
Next time, we will try to display your favorite information in the "App Status" part!
Bonus: Arrangement of sounds
I talked about the fact that the Starter Kit buzzer is a passive buzzer, so you can change the scale.
Some people may have tried playing various scales when moving the buzzer.
Even though you can make various sounds, it's a waste to just make a short sound!
Even though it's a time signal, it's not like a time signal just by making a sound!
So, for reference, I'll post a program that has been arranged so that it sounds a little more like a time signal.
If you are interested, please listen to it.How is it, is it like a time signal?
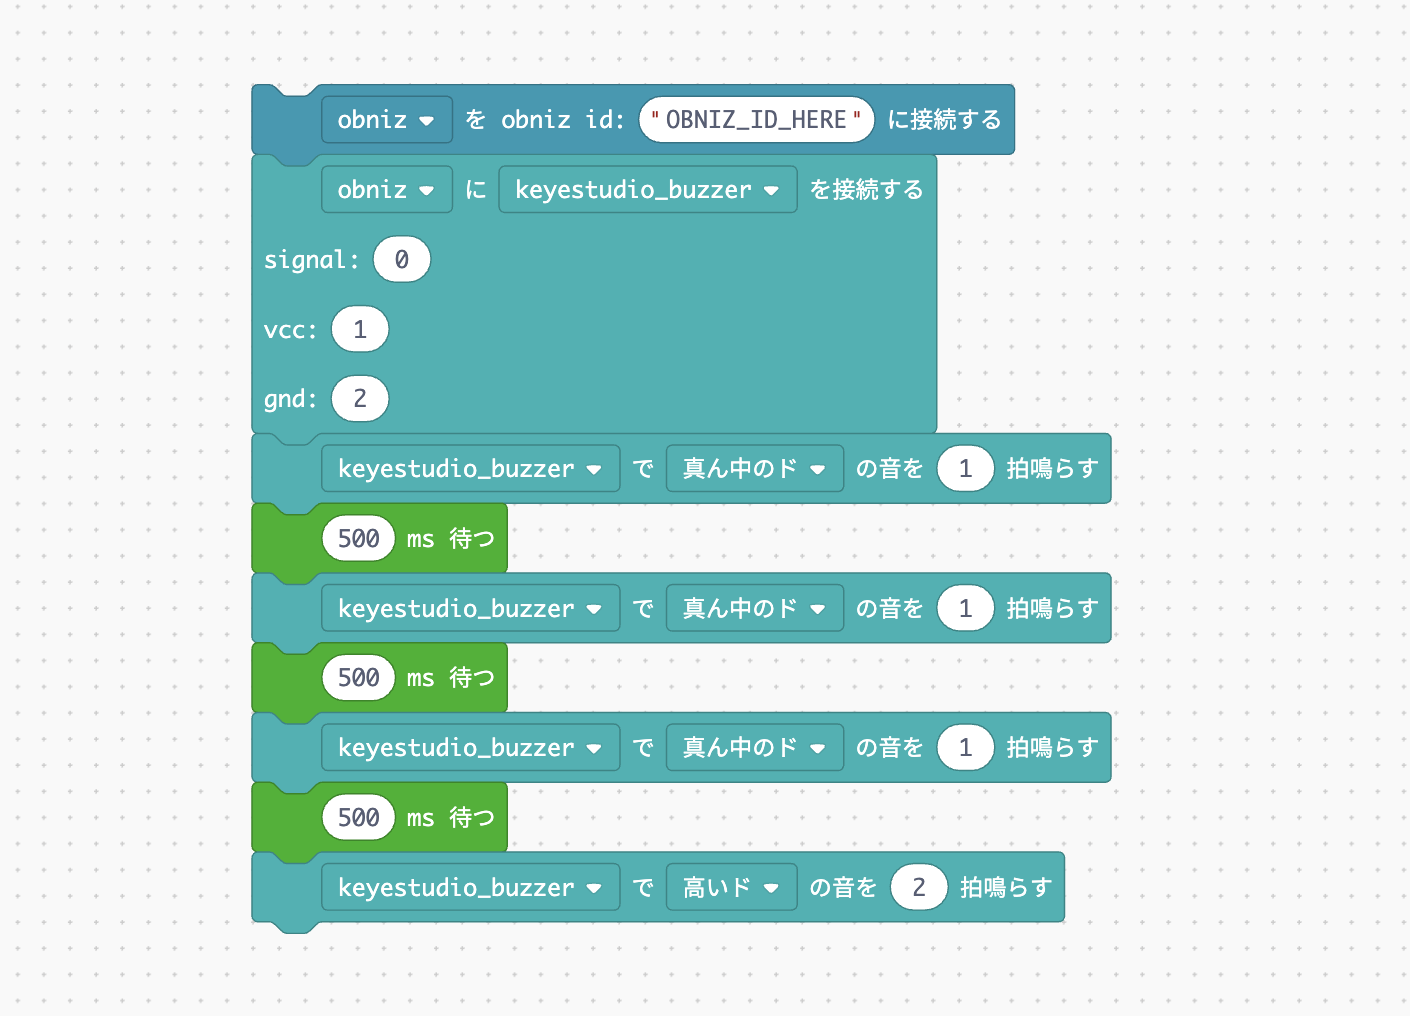
In this way, the buzzer can produce various sounds by changing the pitch and length of the sound, so if you combine it well with the standby block, you can create various melodies.
Please try to make the sound of the time signal full of originality by yourself!