Welcome to the HTML/JavaScript lesson page of the obniz Starter Kit!
In the last lesson, we tried to turn the servo motor from the button we put on the browser.
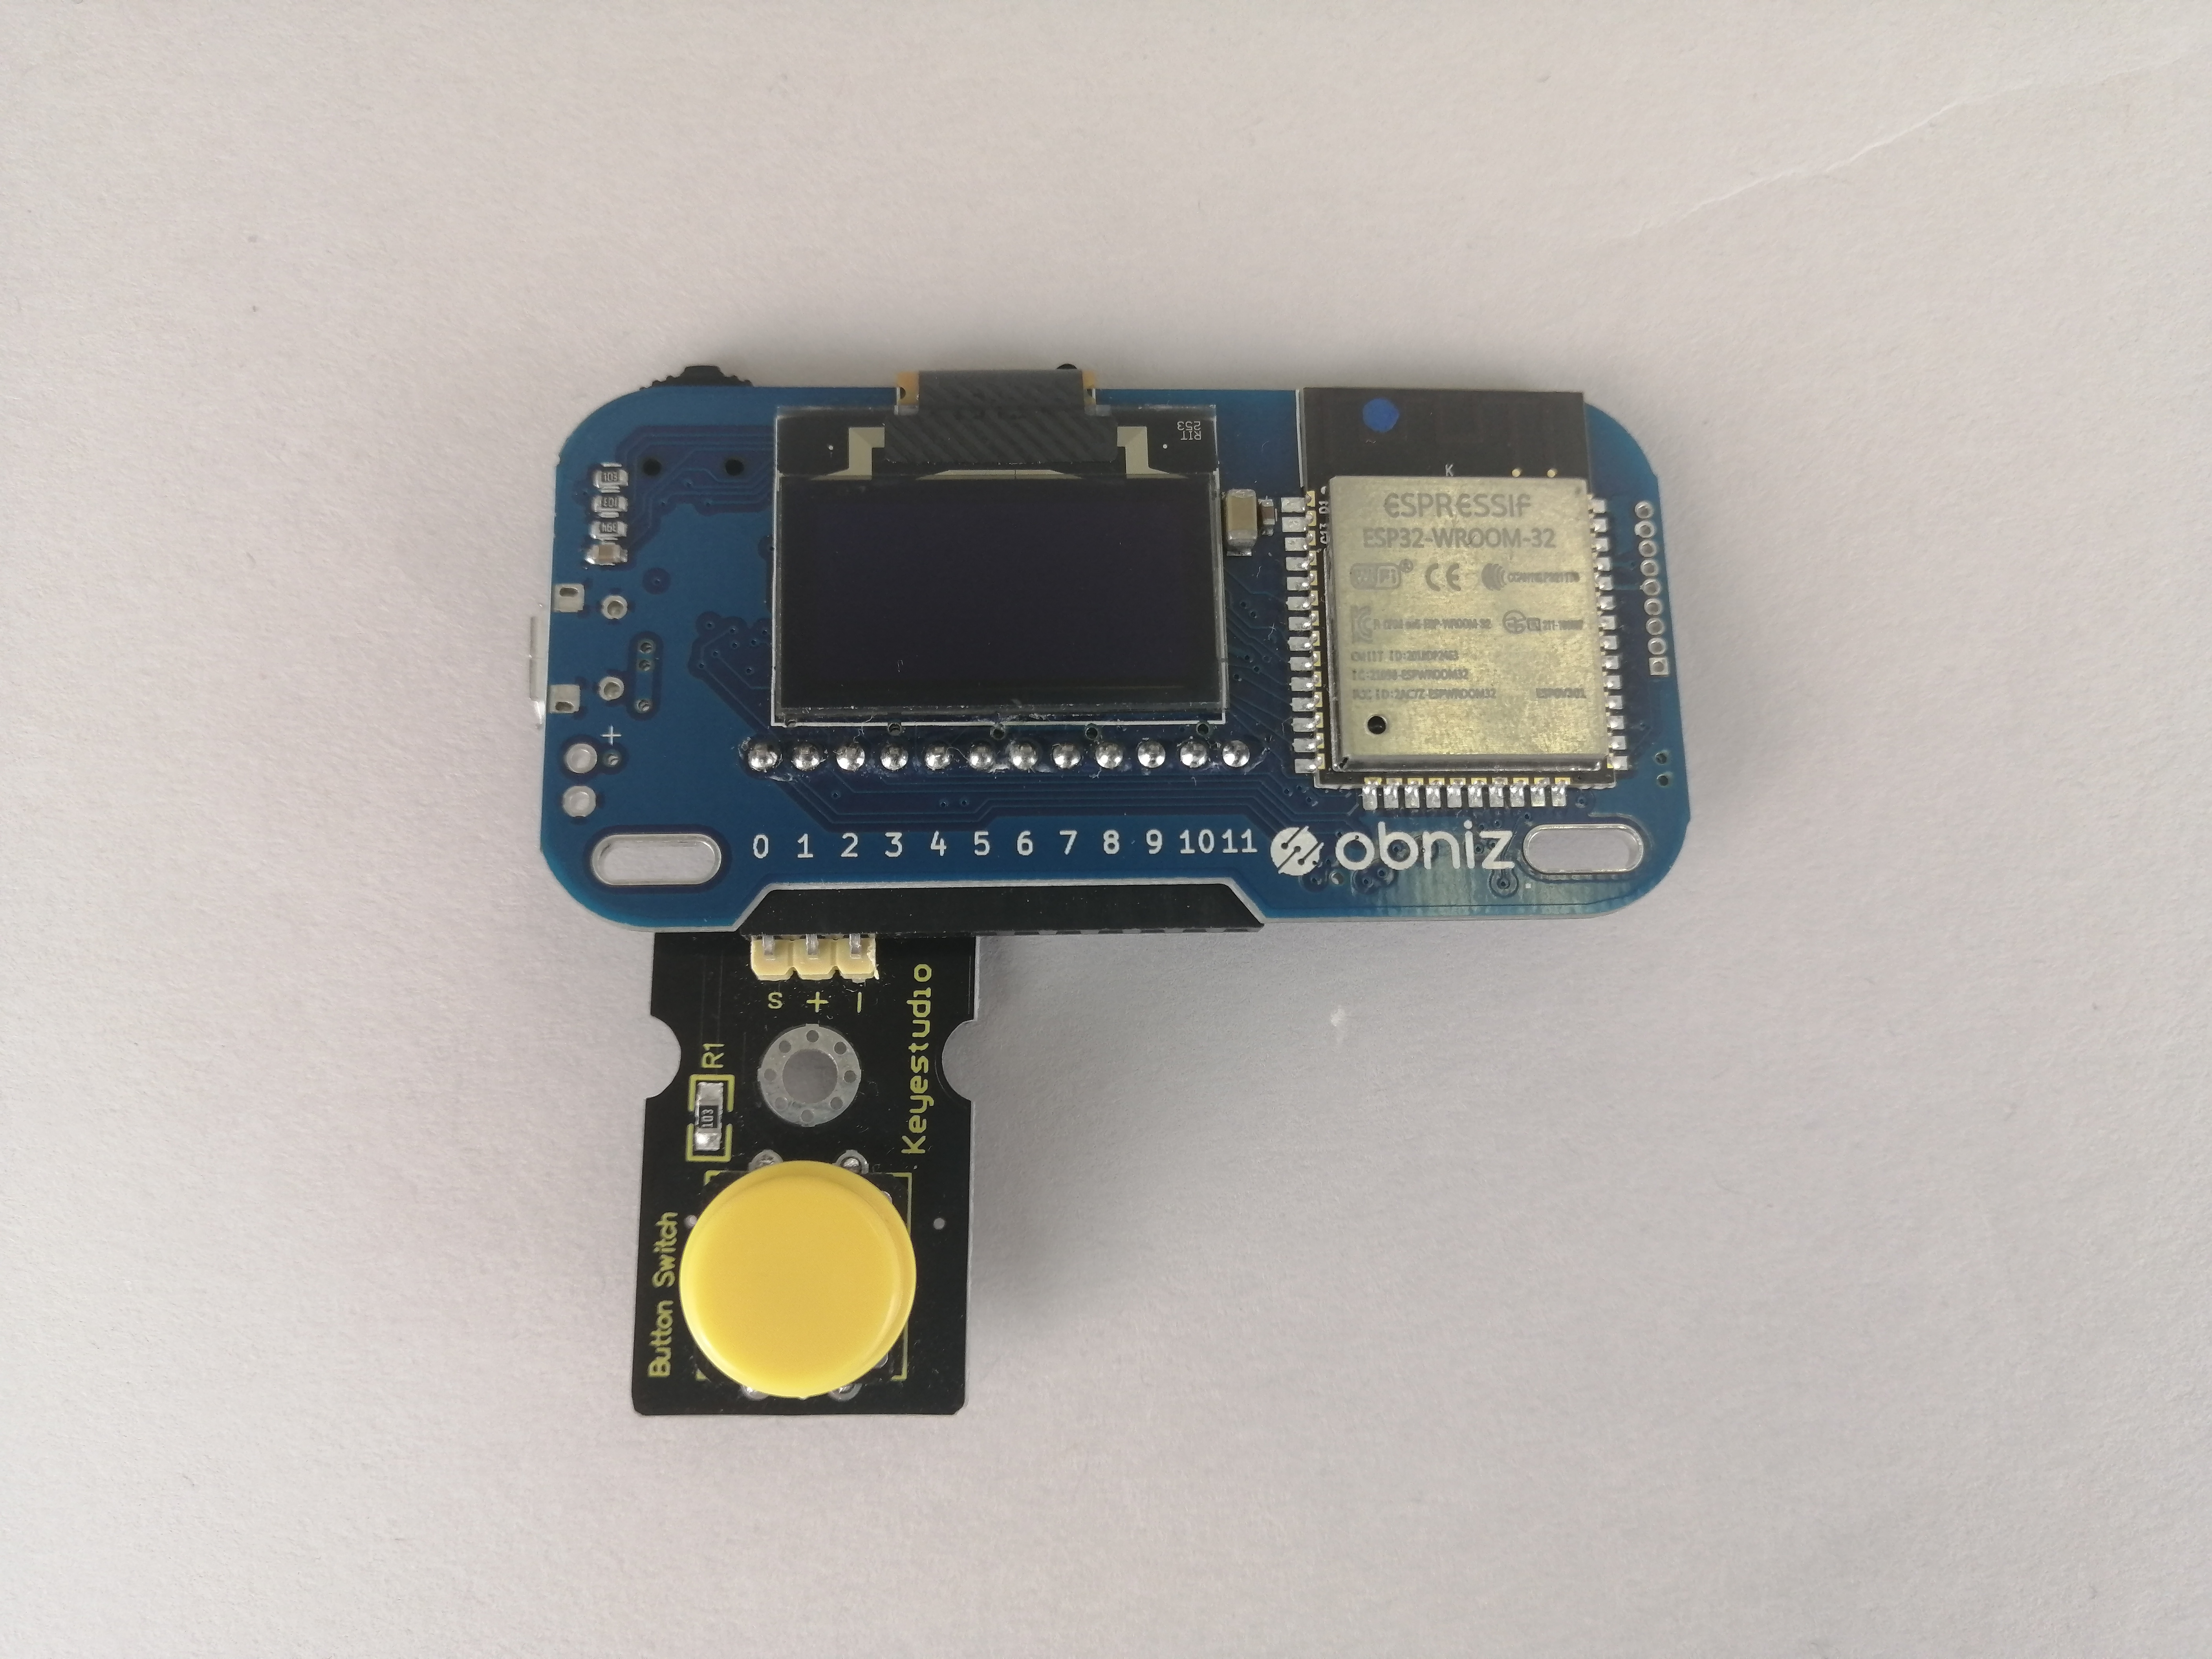
In this lesson, let's use a "physically pressable button" from the parts and check if the button is pressed in the browser.
Learn about buttons.
The buttons in the Starter Kit have a documentation page.
(There is a page one level above this one called Connecting Parts that explains about each part of the Starter Kit. If you are interested, please have a look.)
Now, if you look at this page
onchange = function(pressed){}
Calls the callback function when the button is pressed or released.
There is a function above
Let's write a program using it.
Connect the parts
The connection should be as follows.
| Pin number of obniz | Servo motor wire |
|---|---|
| 0 | signal |
| 1 | vcc |
| 2 | gnd |
Actually, this pin connection corresponds to {signal:0, vcc:1, gnd:2} in obniz.wired shown below.
var button = obniz.wired("Keyestudio_Button", {signal:0, vcc:1, gnd:2});
This means that if you want to connect a button part to another part, you just have to change the corresponding pin number!
Write the program
Once the connection is made, it's programmed..
As you did in [1. Running a Servo: Simply Rotate a Servo Motor](. /rotate-servo-motor.md), you just need to add a library for buttons to the basic obniz program part.
If you can afford it, write as much as you can, run it, and then compare it with the program below to see what doesn't work.
<!-- HTML Example -->
<html>
<head>
<!-- Load various preferences -->
<meta name="viewport" content="width=device-width, initial-scale=1">
<script src="https://obniz.com/js/jquery-3.2.1.min.js"></script>
<script src="https://unpkg.com/[email protected]/obniz.js"></script>
</head>
<body>
<script> //JavaScript starts here
var obniz = new Obniz("OBNIZ_ID_HERE"); //Set your obniz ID.
obniz.onconnect = async function () { //When the .obniz connects...
var button = obniz.wired("Keyestudio_Button", {signal:0, vcc:1, gnd:2}); //Set a library of buttons
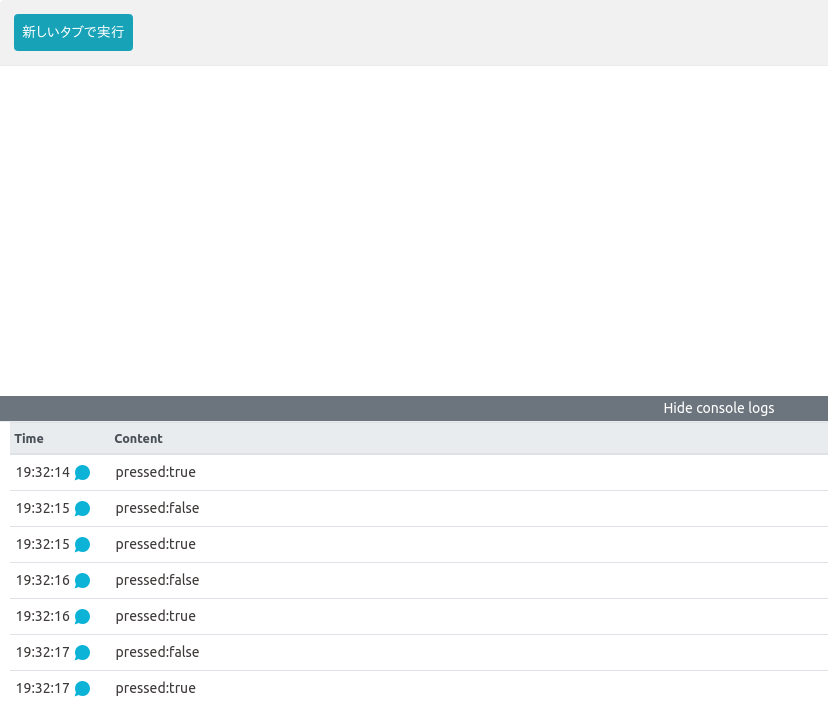
button.onchange = function(pressed){
console.log("pressed:" + pressed)
};
};
</script>
</body>
</html>
Now open the console logs (the part that says "Show console logs"), and you will see the following text when you press the button.
That's ultimately all this lesson is about!
Are you a little short?
That's good, because it means you're getting used to obniz HTML/JavaScript programming! (Maybe it's also because the last lesson was a tough one).
Now, in the next section, we'll try to add some more movement when the button is pressed!
Let's make the action when the button is pressed more flashy.
First, let's get some text on the run screen.
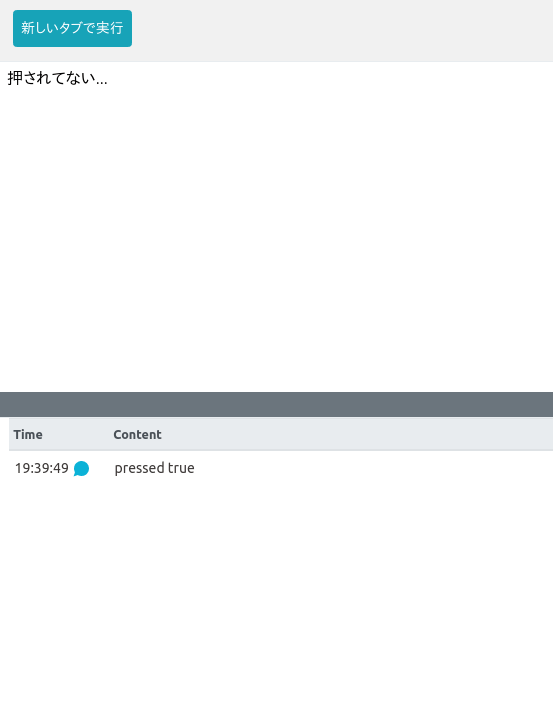
Now, you can see in your browser that you have pressed the button in the previous program.
But even if it's only displayed on the console screen, it's very plain....
So, let's add an action when the button is pressed.
First of all, it would be easier to understand if the execution screen shows that you pressed the button.s
So, let's add some text to the execution screen so that the text changes when the button is pressed.

There are comments in the newly added areas, so please read them carefully.
<!-- HTML Example -->
<html>

<head>
 <meta name="viewport" content="width=device-width, initial-scale=1">
 <script src="https://obniz.com/js/jquery-3.2.1.min.js"></script>
 <script src="https://unpkg.com/[email protected]/obniz.js"></script>
</head>

<body>

  <div id="press">  <!-- Add a sentence + assign an id-->
    Was the button pressed?
  </div>

 <script> //JavaScript starts here
  var obniz = new Obniz("OBNIZ_ID_HERE");
  obniz.onconnect = async function () {
   var button = obniz.wired("Keyestudio_Button", {signal:0, vcc:1, gnd:2});
   button.onchange = function(pressed){
    console.log("pressed " + pressed)
    if(pressed == false){ //When the button is pressed...
      $("#press").text("press!"); //Rewrite the id: "press" text.
    };
   };
  };
 </script>

</body>

</html>
Try to change the background color randomly when a button is pressed.
The behavior when the button is pressed is written in the if statement, so let's write the JavaScript to change the background color there.
   button.onchange = function(pressed){
    console.log("pressed " + pressed)
    if(pressed == false){
      $("#press").text("press!");
      colors=new Array(10);
      colors[0]="yellow";
      colors[1]="red";
      colors[2]="blue";
      colors[3]="green";
      colors[4]="lime";
      colors[5]="brown";
      colors[6]="gray";
      colors[7]="orange";
      colors[8]="purple";
      colors[9]="fuchsia";
      index=Math.floor(10*Math.random());
      document.bgColor=colors[index];
    }else{
      $("#press").text("not press...");
      document.bgColor="white";
    }
   };
Is it done?
Unlike the keyboard, it would be quite interesting to be able to change the background in the browser via the Internet from a button that is not connected to the PC, wouldn't it?
That's it for this lesson!s
In the next lesson, we'll use the distance sensor to see the distance to an obstacle in numbers!