Use Buttons: Check in your browser if the button was pressed
Now that you can use the servo motor in the previous lessons, let's use the button parts.
Last time we used the browser to move the servo motor, but this time we will change the display of the browser using the button.
Connection
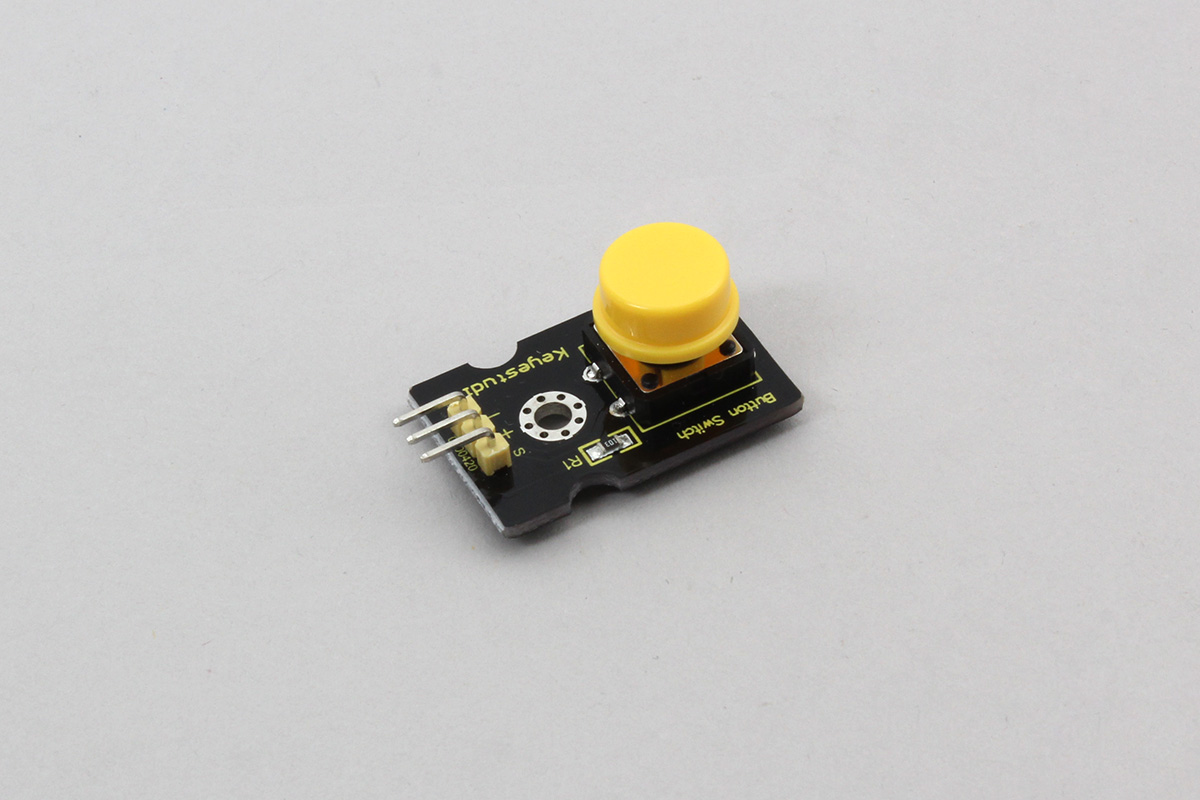
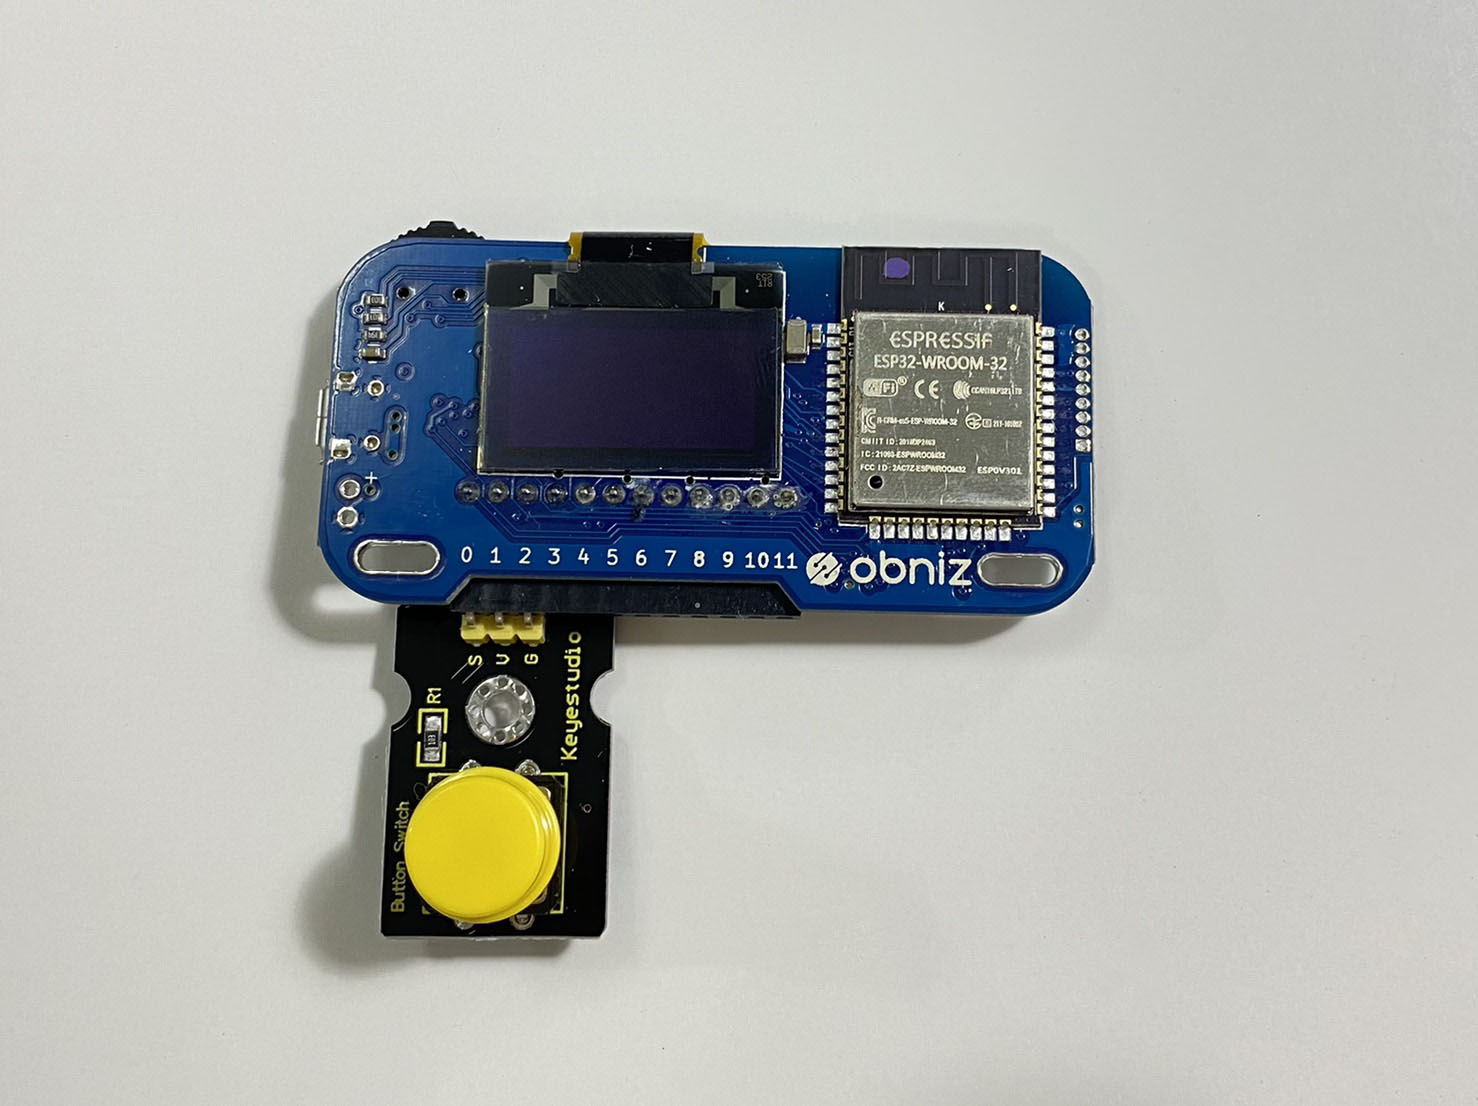
First, connect the button to obniz.The parts shown in the picture are the buttons.You can detect that it has been pressed.
The Starter Kit Guide Parts Page introduces each part of the kit.You can also go to the details page from the part name on the left.
Please refer to it when you do not know which part is what or when you want to know more about each part.
Like the servo motor, the button has three pins, which are S (signal), V (vcc), and G (gnd), respectively.
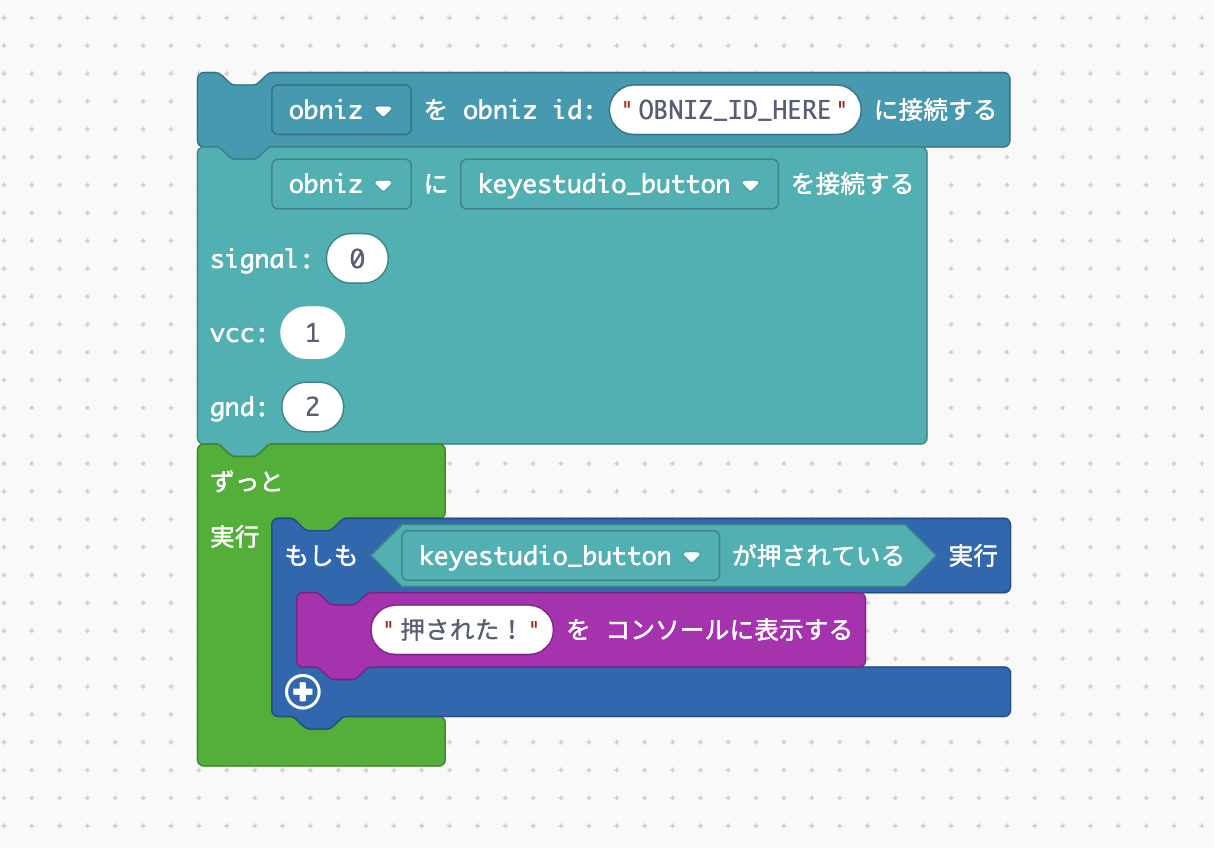
This time, connect as follows.
| obniz pin number | Button pin |
|---|---|
| 0 | signal(S) |
| 1 | vcc(V) |
| 2 | gnd(G) |
Program
Now let's make it possible to confirm in the browser that the button has been pressed.
There are two types of button blocks in the Starter Kit category. Make a program using these.
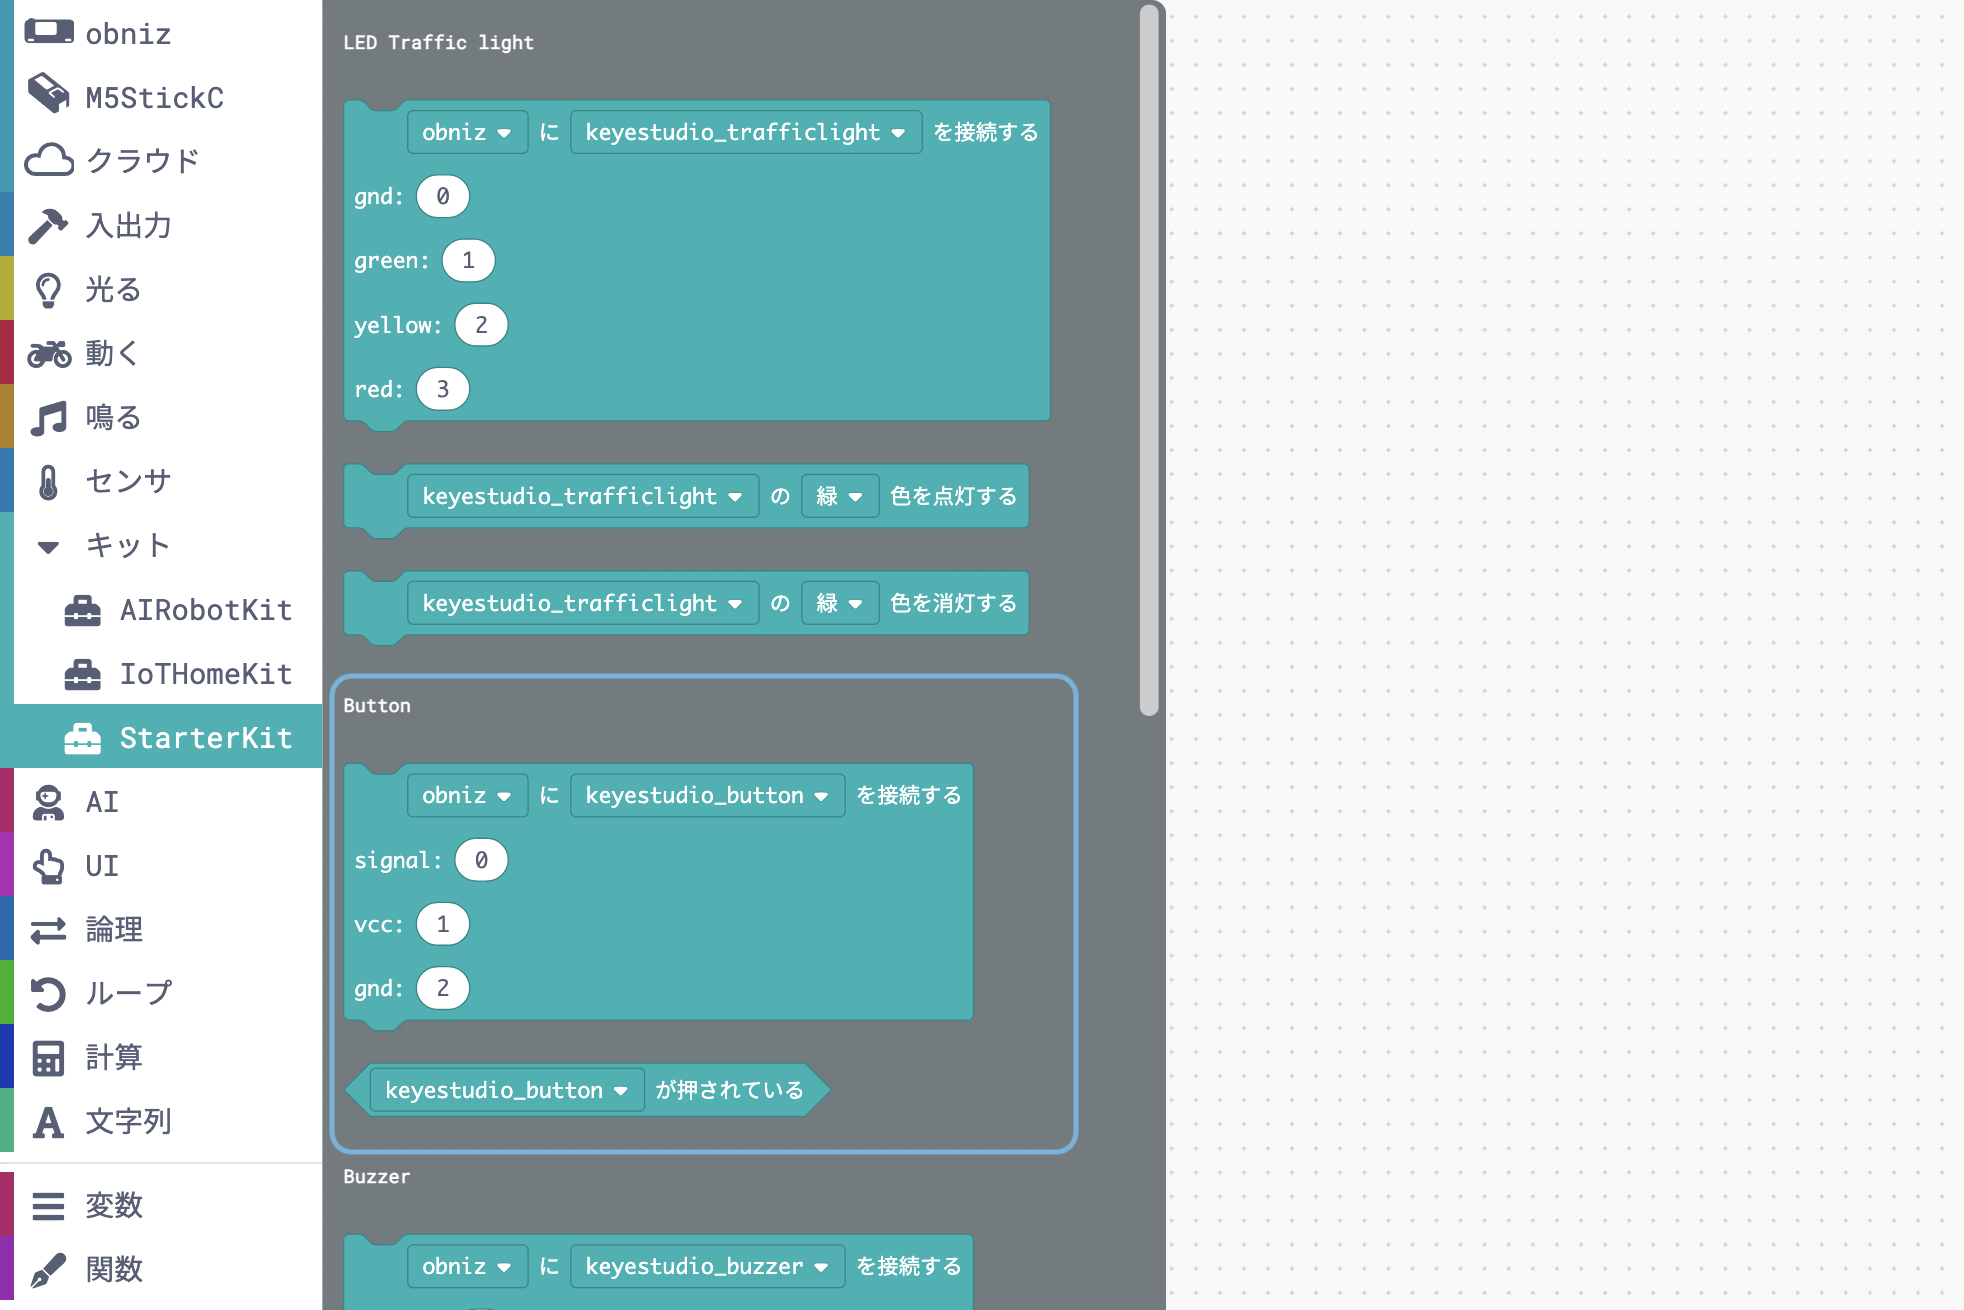
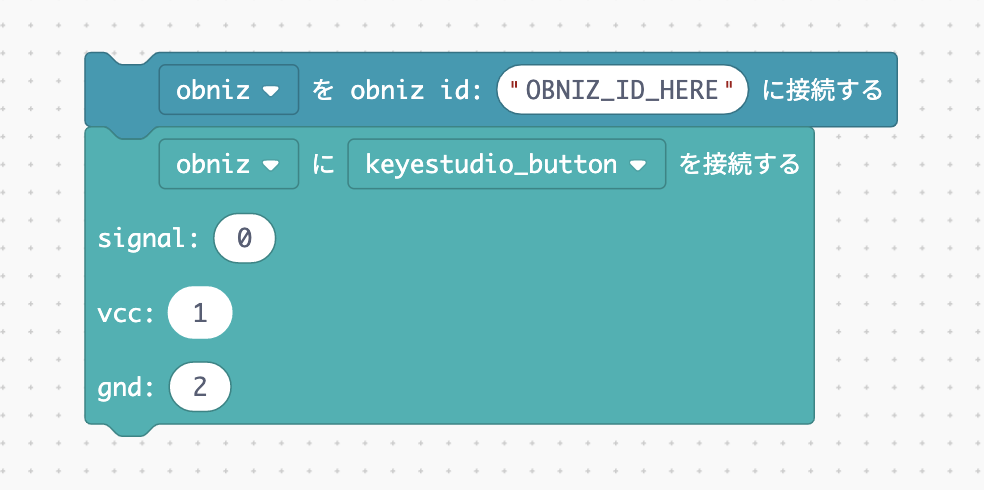
First, arrange the blocks that connect the buttons to obniz, as in the case of the servo motor.
From here, we would like to create a program that displays characters on the console when a button is pressed.
To create a program such as "If a button is pressed, a character is displayed" or "If ...", use a block.
Select the "If
Reference: [IF Block] (https://obniz.com/guides/block-programing/uibutton#%E3%82%82%E3%81%97%E3%82%82%E3%83%96%E3%83%AD%E3%83%83%E3%82%AF)
If the block condition part (the diamond that is true), put the block where the Starter Kit button is pressed.
(It is easier to put it in if you bring it so that the finger or mouse holding the block can put it in the place you want to put it in)
To display the characters on the console, use the debug block you used in the previous lesson.
The debug block is in the UI category. Enter the characters you want to display in text when the button is pressed.
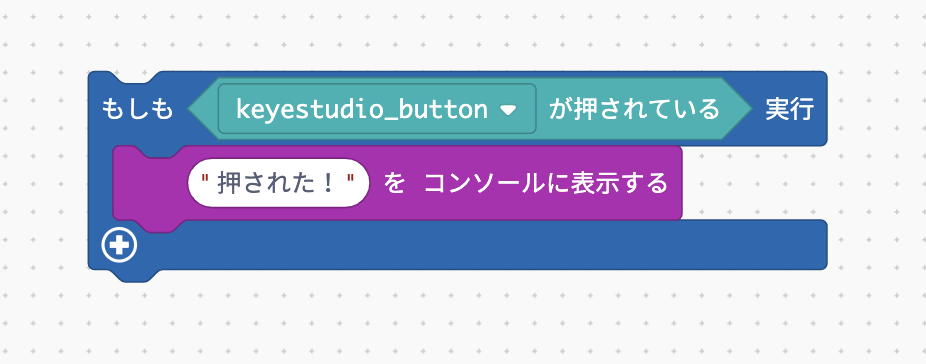
If this is left as it is, it will be judged only once immediately after the program is started, and it will not be judged after that, so nothing will happen even if the button is pressed.Put it inside a loop block so that it can be judged many times.

The rest is completed by arranging these.
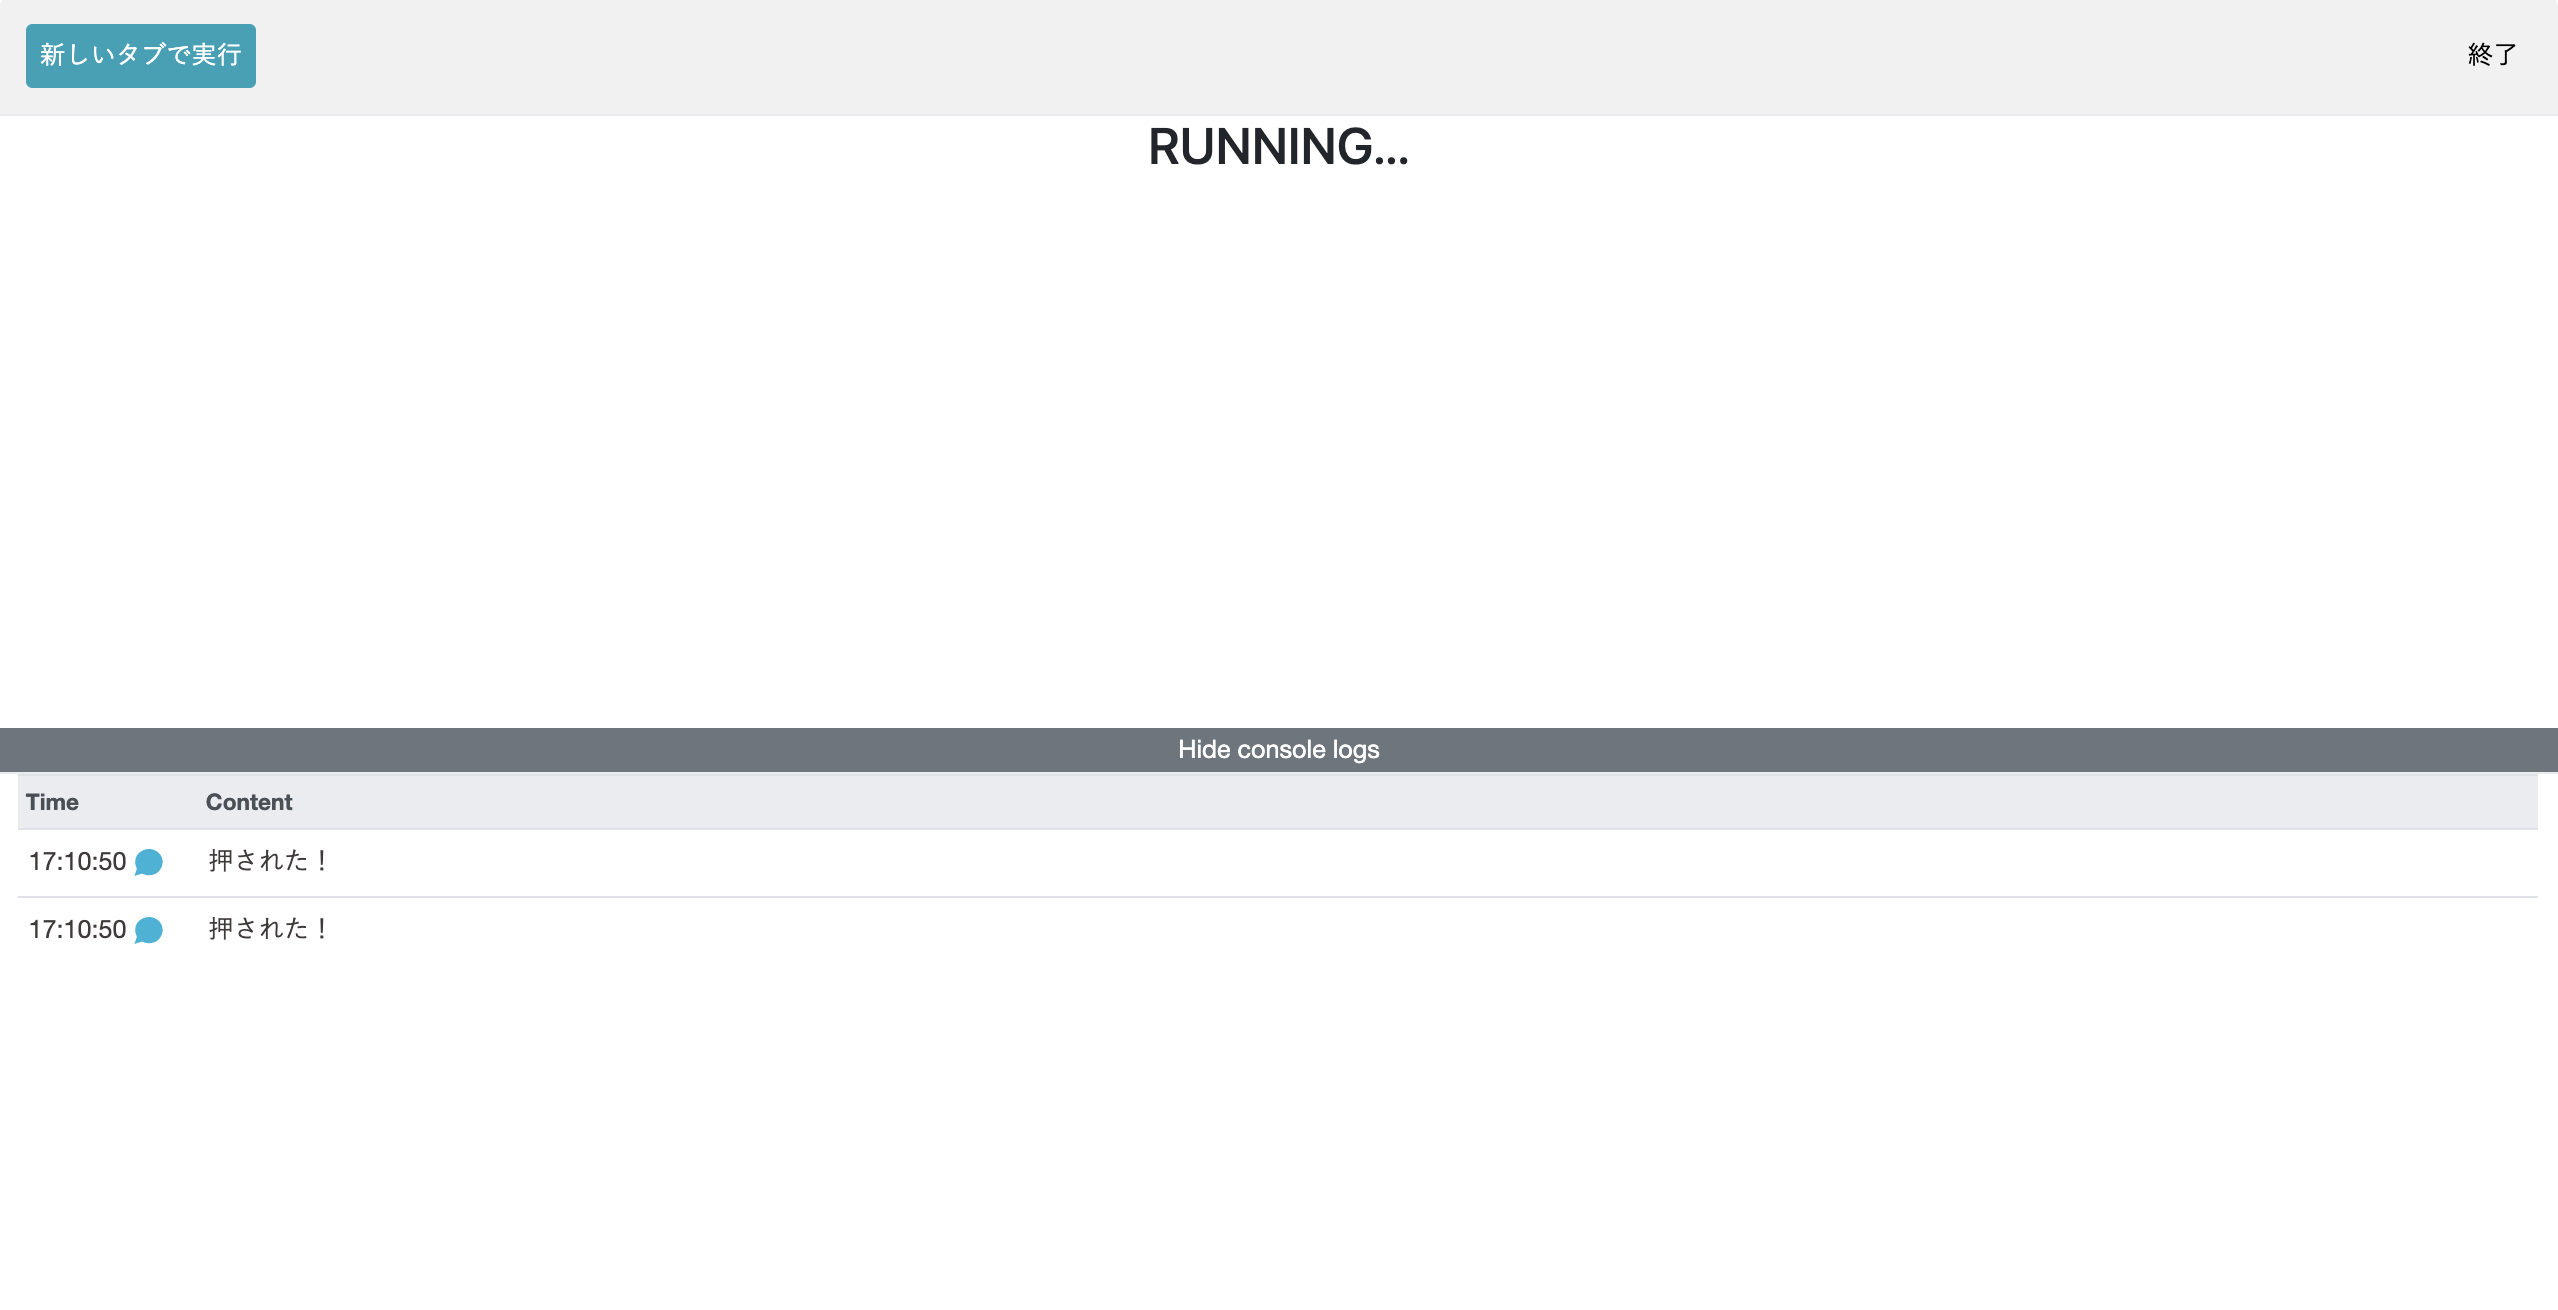
Let's run it. If you see the letters on the console when you press the button, you're good to go!
Evolution: Press a button to move the illustration on the browser
Let's make what happens when a button is pressed more dynamic than just displaying characters.
Try using a UI image that you haven't used yet in the UI category.
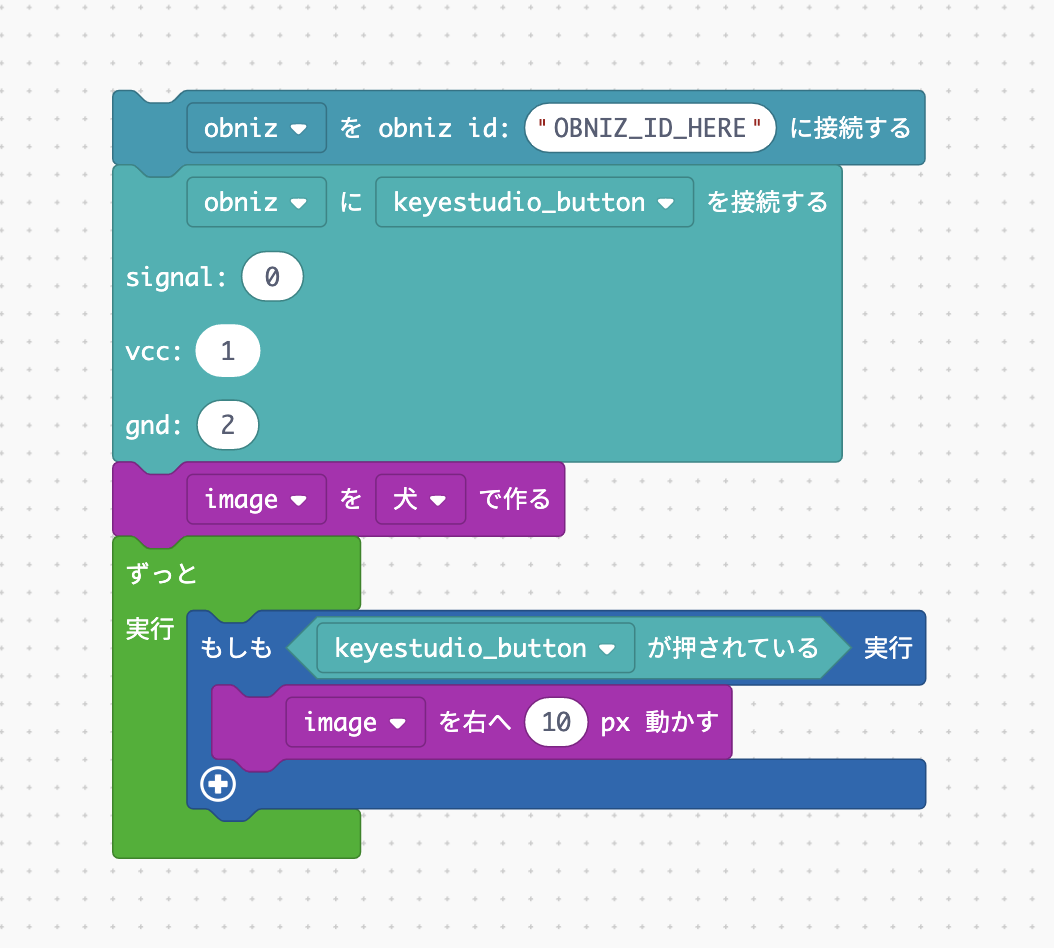
The program to make is that the illustration displayed on the browser moves to the right when the button is pressed.
If you can make it, please try to make your own program before seeing the answer.
The basic usage of the UI image is the same as other UI blocks, and you can display the illustration on the screen with the "Create image" block.
You can choose an illustration where it defaults to "banana". You can use any illustration you like, but we chose "dog" as an example to move.
After that, when the button is pressed, execute "Move image 10px to the right".
Did the illustration move to the right by the amount you pressed the button?
It's fun to be able to operate the browser via the Internet using buttons that are not connected to the PC.
In the next lesson, we'll use the distance sensor!