
🎯
Goal
Connect the Intelligent Edge Kilo to the internet through a Wi-Fi access point added to an existing Ethernet network when LTE-M / NB-IoT signal is weak.
Network Topology
When LTE-M / NB-IoT signal is weak and an existing Ethernet network is available, add one Wi-Fi router, set it to AP mode (bridge mode), and connect the Intelligent Edge Kilo (Kilo) to that network over Wi-Fi.
Existing Ethernet
  ↓
Wi-Fi router (AP mode / bridge mode)
  ↓ Wi-Fi
Intelligent Edge Kilo
This page uses a Buffalo Wi-Fi router as an example. Screen names, switch names, and port names vary by model. Check the manual for the actual device as well.
❗
The Kilo connects to the WAN over Wi-Fi. This is not a procedure for connecting the Kilo Ethernet port to a Wi-Fi bridge or repeater.
Before You Start
| Item | Details |
|---|---|
| Upstream network | Existing Ethernet |
| Added device | Wi-Fi router |
| Wi-Fi router mode | AP mode (bridge mode) |
| Kilo connection method | Wi-Fi |
| Kilo Wi-Fi | IEEE 802.11b/g/n (2.4GHz) |
| IP address | Configure DHCP or Static IP according to the network administrator's instructions |
1. Install the Wi-Fi Access Point
Place the Wi-Fi router near the Kilo installation location.
- Turn on the Wi-Fi router.
- Place it where the existing Ethernet cable can reach.
- Place it where the Kilo can connect with sufficient signal strength.
⚠️
If the Kilo or the Wi-Fi router is installed inside a metal panel or enclosure, Wi-Fi signal may become weak. Check the signal strength at the Kilo location after installation.
The general setup flow is as follows.
- Connect a PC or smartphone to the Wi-Fi router's factory default SSID.
- Configure the SSID and Wi-Fi password for Kilo.
- Connect the existing Ethernet cable to the Wi-Fi router.
- Switch the Wi-Fi router to AP mode (bridge mode).
- Confirm that a PC or smartphone can connect to the changed SSID.
The procedure for switching to AP mode (bridge mode) varies by vendor and model. Check the setup instructions for the Wi-Fi router you are using.
- Buffalo: Use a Wi-Fi router in AP mode (bridge mode)
- NEC Aterm: Switch to access point mode (bridge mode)
- I-O DATA: Configure AP (access point) mode
- ELECOM: Use a Wi-Fi router in AP (access point) mode
1.1. Configure the Buffalo Wi-Fi Router (Example)
1.1.1. Connect to the Factory Default Wi-Fi
From a PC or smartphone, connect to the Buffalo Wi-Fi router's factory default SSID.
Check the router label or setup card for the factory default SSID, Wi-Fi password, and login information for the settings screen.
Example:
SSID: Buffalo-XXXX
Wi-Fi Password: ************
Settings screen: http://192.168.11.1
After connecting, open the Wi-Fi router settings screen in a browser.
💡
Some Buffalo models can be opened athttp://192.168.11.1in the factory default state. If it does not open, use the AirStation app or check the device manual.
1.1.2. Set the SSID and Password for Kilo
Set the SSID and password that the Kilo will use.
Example:
SSID: kilo-ap
Password: any secure password
- Open the Wi-Fi router settings screen.
- Open the Wi-Fi, wireless, or SSID settings screen.
- Set the SSID for Kilo.
- Set the Wi-Fi password.
- Save the settings.
- Reconnect the PC or smartphone to the changed SSID.
⚠️
When you change the SSID or Wi-Fi password, the current Wi-Fi connection from the PC or smartphone is disconnected once. Select the changed SSID and reconnect with the new password.
1.1.3. Connect Existing Ethernet to the INTERNET Port
Connect the existing Ethernet cable to the port labeled INTERNET or WAN on the Wi-Fi router.
Existing Ethernet
  ↓
Wi-Fi router INTERNET / WAN port
  ↓
Wi-Fi for Kilo
1.1.4. Switch to AP Mode (Bridge Mode)
After changing the SSID and password, switch the Wi-Fi router to AP mode (bridge mode).
On some Buffalo models, use the switches on the back or bottom of the unit.
Example:
AUTO / MANUAL switch: MANUAL
ROUTER / AP / WB switch: AP
- Turn off the Wi-Fi router.
- If there is an
AUTO / MANUALswitch, set it toMANUAL. - If there is a
ROUTER / AP / WBswitch, set it toAP. - Turn the Wi-Fi router back on.
- Reconnect the PC or smartphone to the changed SSID.
Some models use a ROUTER switch set to OFF or AP instead. If the switch names differ, check the manual for your router model.
⚠️
Set the SSID and password before switching to AP mode. After switching to AP mode, the IP address of the router settings screen may change. If you can no longer open the settings screen, check the IP address assigned by the upstream router or DHCP server.
❗
In AP mode, router functions such as the DHCP server, address translation, and packet filtering on the Wi-Fi router are not used. IP addresses are assigned by the upstream router or DHCP server.
💡
Buffalo documentation says that, after switching to AP mode, the LAN cable connected to theINTERNETport can remain connected. If communication fails, check the port requirements for your specific model.
1.1.5. Confirm the Connection from a PC or Smartphone
Connect a PC or smartphone to the changed SSID and confirm that it can reach the internet or the upstream network.
Example:
1. Connect a PC or smartphone to kilo-ap
2. Open any web page in a browser
3. Confirm that communication is available
Configure the Kilo network settings only after confirming that a PC or smartphone can communicate through the AP.
2. Configure the Intelligent Edge Kilo Network
2.1. Enter Setting Mode
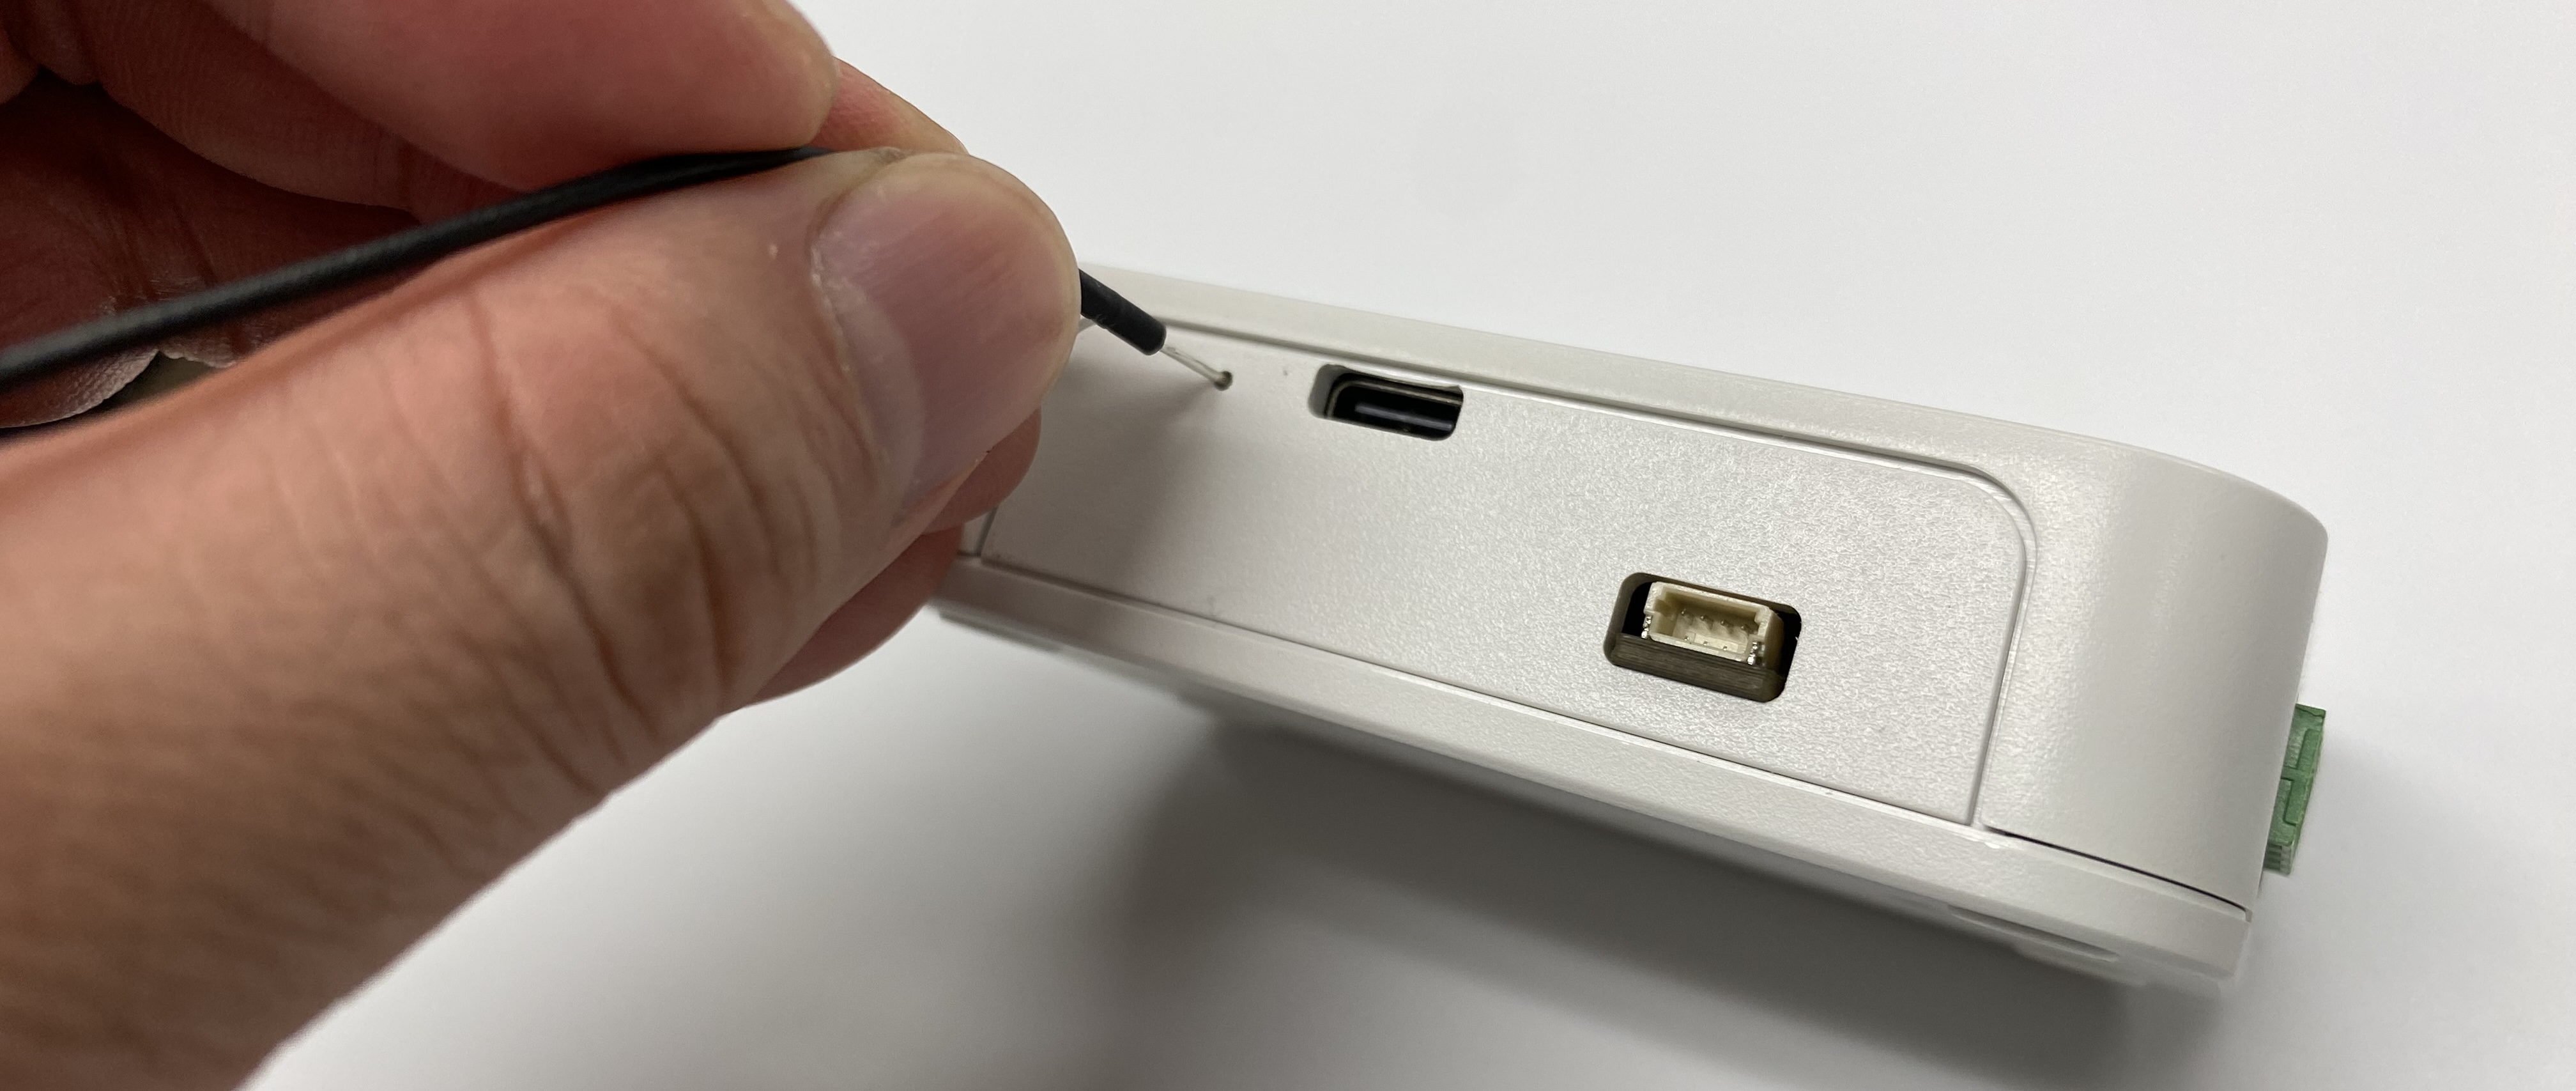
With the Kilo powered on, press and hold the setting button for 3 seconds or longer. The button is in a recessed location, so use a thin pin to press it.
When the Kilo enters setting mode, the white LED blinks slowly.
2.2. Connect to the Wi-Fi Broadcast by the Kilo
In setting mode, the Kilo broadcasts a Wi-Fi network with an SSID like obniz-xxxxxxxx (where x is the obnizID).
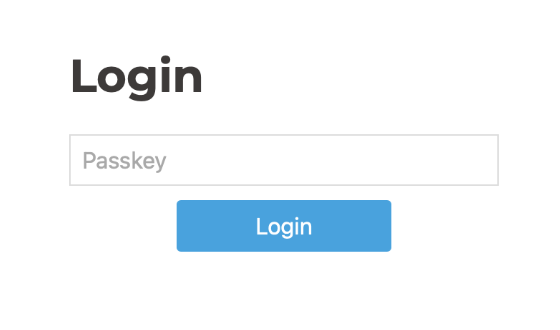
Connect a PC or smartphone to this Wi-Fi. When the login screen appears, enter obniz as the passkey.
💡
If the login screen does not appear automatically, openhttp://192.168.254.1/in a browser.
2.3. Clear Existing Network Settings
When the settings screen opens, clear the existing network settings.
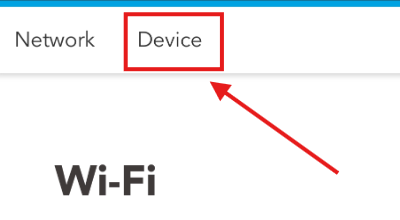
- Open the
Devicetab. - Select
Clear All Network SettingunderResets. - Press
Execute.
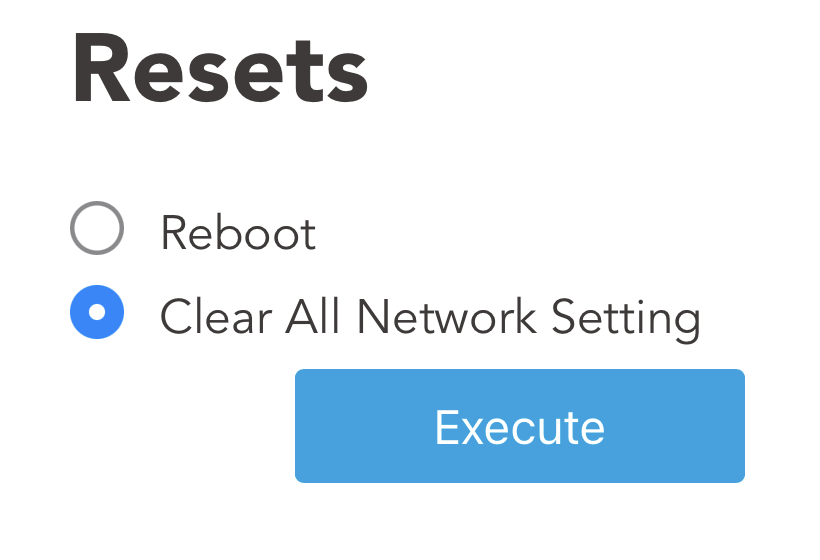
This clears previously configured network settings such as LTE, Ethernet, and Wi-Fi.
2.4. Open the Wi-Fi Settings Screen
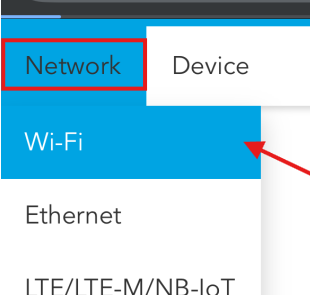
From the Network tab, select Wi-Fi.
2.5. Select the SSID Configured on the Buffalo Wi-Fi Router
From the Wi-Fi list, select the SSID created on the Buffalo Wi-Fi router and enter the password.
Example:
SSID: kilo-ap
Password: configured password
If the SSID is not shown in the list, select Other Network and enter the SSID manually.
2.6. Configure Static IP if Required
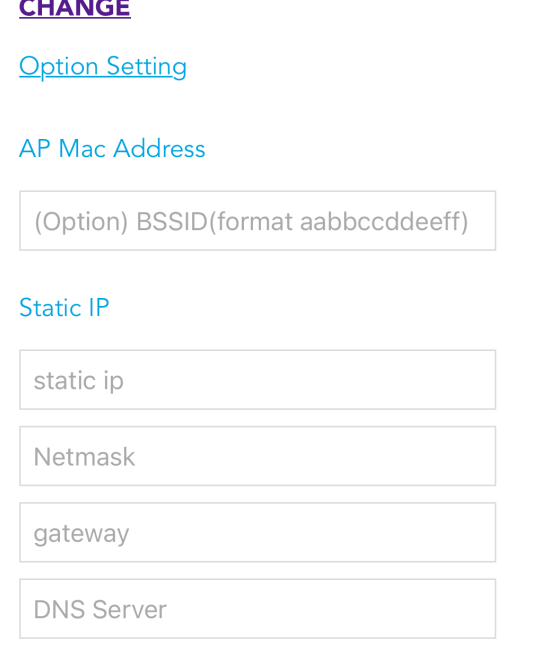
If the network requires a fixed IP address, open Option Setting and enter the Static IP values. Use the values provided by the network administrator.
Example:
static ip: 192.168.0.101
Netmask: 255.255.255.0
gateway: 192.168.0.1
DNS Server: 192.168.0.1
When using DHCP, Static IP values are not required.
2.7. Connect
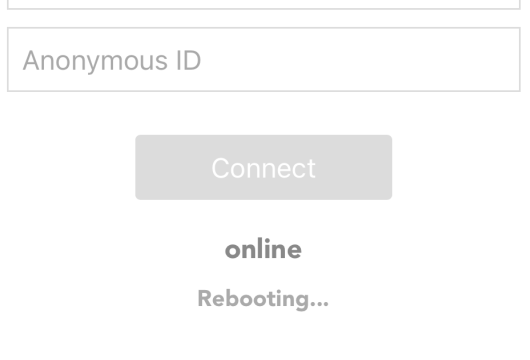
Press Connect at the bottom of the screen.
If online is displayed at the end, the connection is successful. The Kilo restarts after saving the settings.
3. Operation Check
After configuration, confirm that the Kilo can connect to the network.
| Check item | Expected result |
|---|---|
| A PC or smartphone can connect to the AP | It can connect to the changed SSID |
| Communication through the AP works | A web page opens, or the upstream network is reachable |
| The Kilo settings screen shows the connection result | online is displayed |
| Restart the Kilo | It reconnects to the same SSID and the LED becomes solid |
After power-on, the white LED next to ONLINE indicates the connection status.
| State | Meaning |
|---|---|
| Off | No power supply (check power and wiring) |
| Blinking | Connection in progress (check network and settings) |
| Solid | Connected to the internet and the cloud service obniz Now |
Troubleshooting
| State | What to check |
|---|---|
| Cannot open the AP settings screen | Check whether the settings screen IP address changed after switching to AP mode. Check the IP address assigned by the upstream router or DHCP server. |
| The changed SSID is not shown | Restart the Wi-Fi router and check SSID settings and whether wireless is enabled. Use a 2.4GHz SSID that the Kilo can connect to. |
| PC or smartphone can connect, but Kilo cannot | Check SSID, password, Static IP, gateway, and DNS Server values. |
The Kilo does not become online |
Check upstream DHCP, duplicate fixed IP addresses, DNS settings, and whether 443/TCP communication is allowed. |
| Communication fails after switching to AP mode | Check that AP mode is enabled, existing Ethernet is connected to the INTERNET / WAN port, and there are no model-specific port requirements. |
References
- Buffalo: How to use a Wi-Fi router in AP mode (bridge mode) without using router functions
- Buffalo: How to open the Wi-Fi router settings screen
- Buffalo: Wi-Fi router manual list