
🎯
Goal
Connect to the internet via Ethernet.
How to Wire the Ethernet Cable
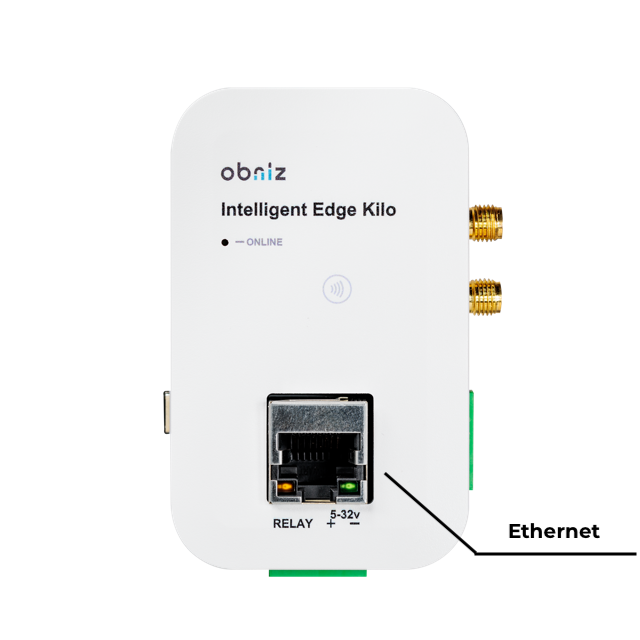
Connect the Ethernet cable to the RJ45 port on the surface of the Kilo.
❗
There is no automatic cable type detection (straight-through / crossover). Choose the appropriate cable according to what you are connecting to.
- Straight-through: switching hubs, routers, etc.
- Crossover: direct connection to devices such as PCs or PLCs
The LED on the connector (ONLINE) indicates the status of the internet connection and lights up independently of the software status.
The Kilo is not PoE. Since it cannot be powered or receive power from Ethernet, be sure to provide a separate power source.
Attaching the Power Source
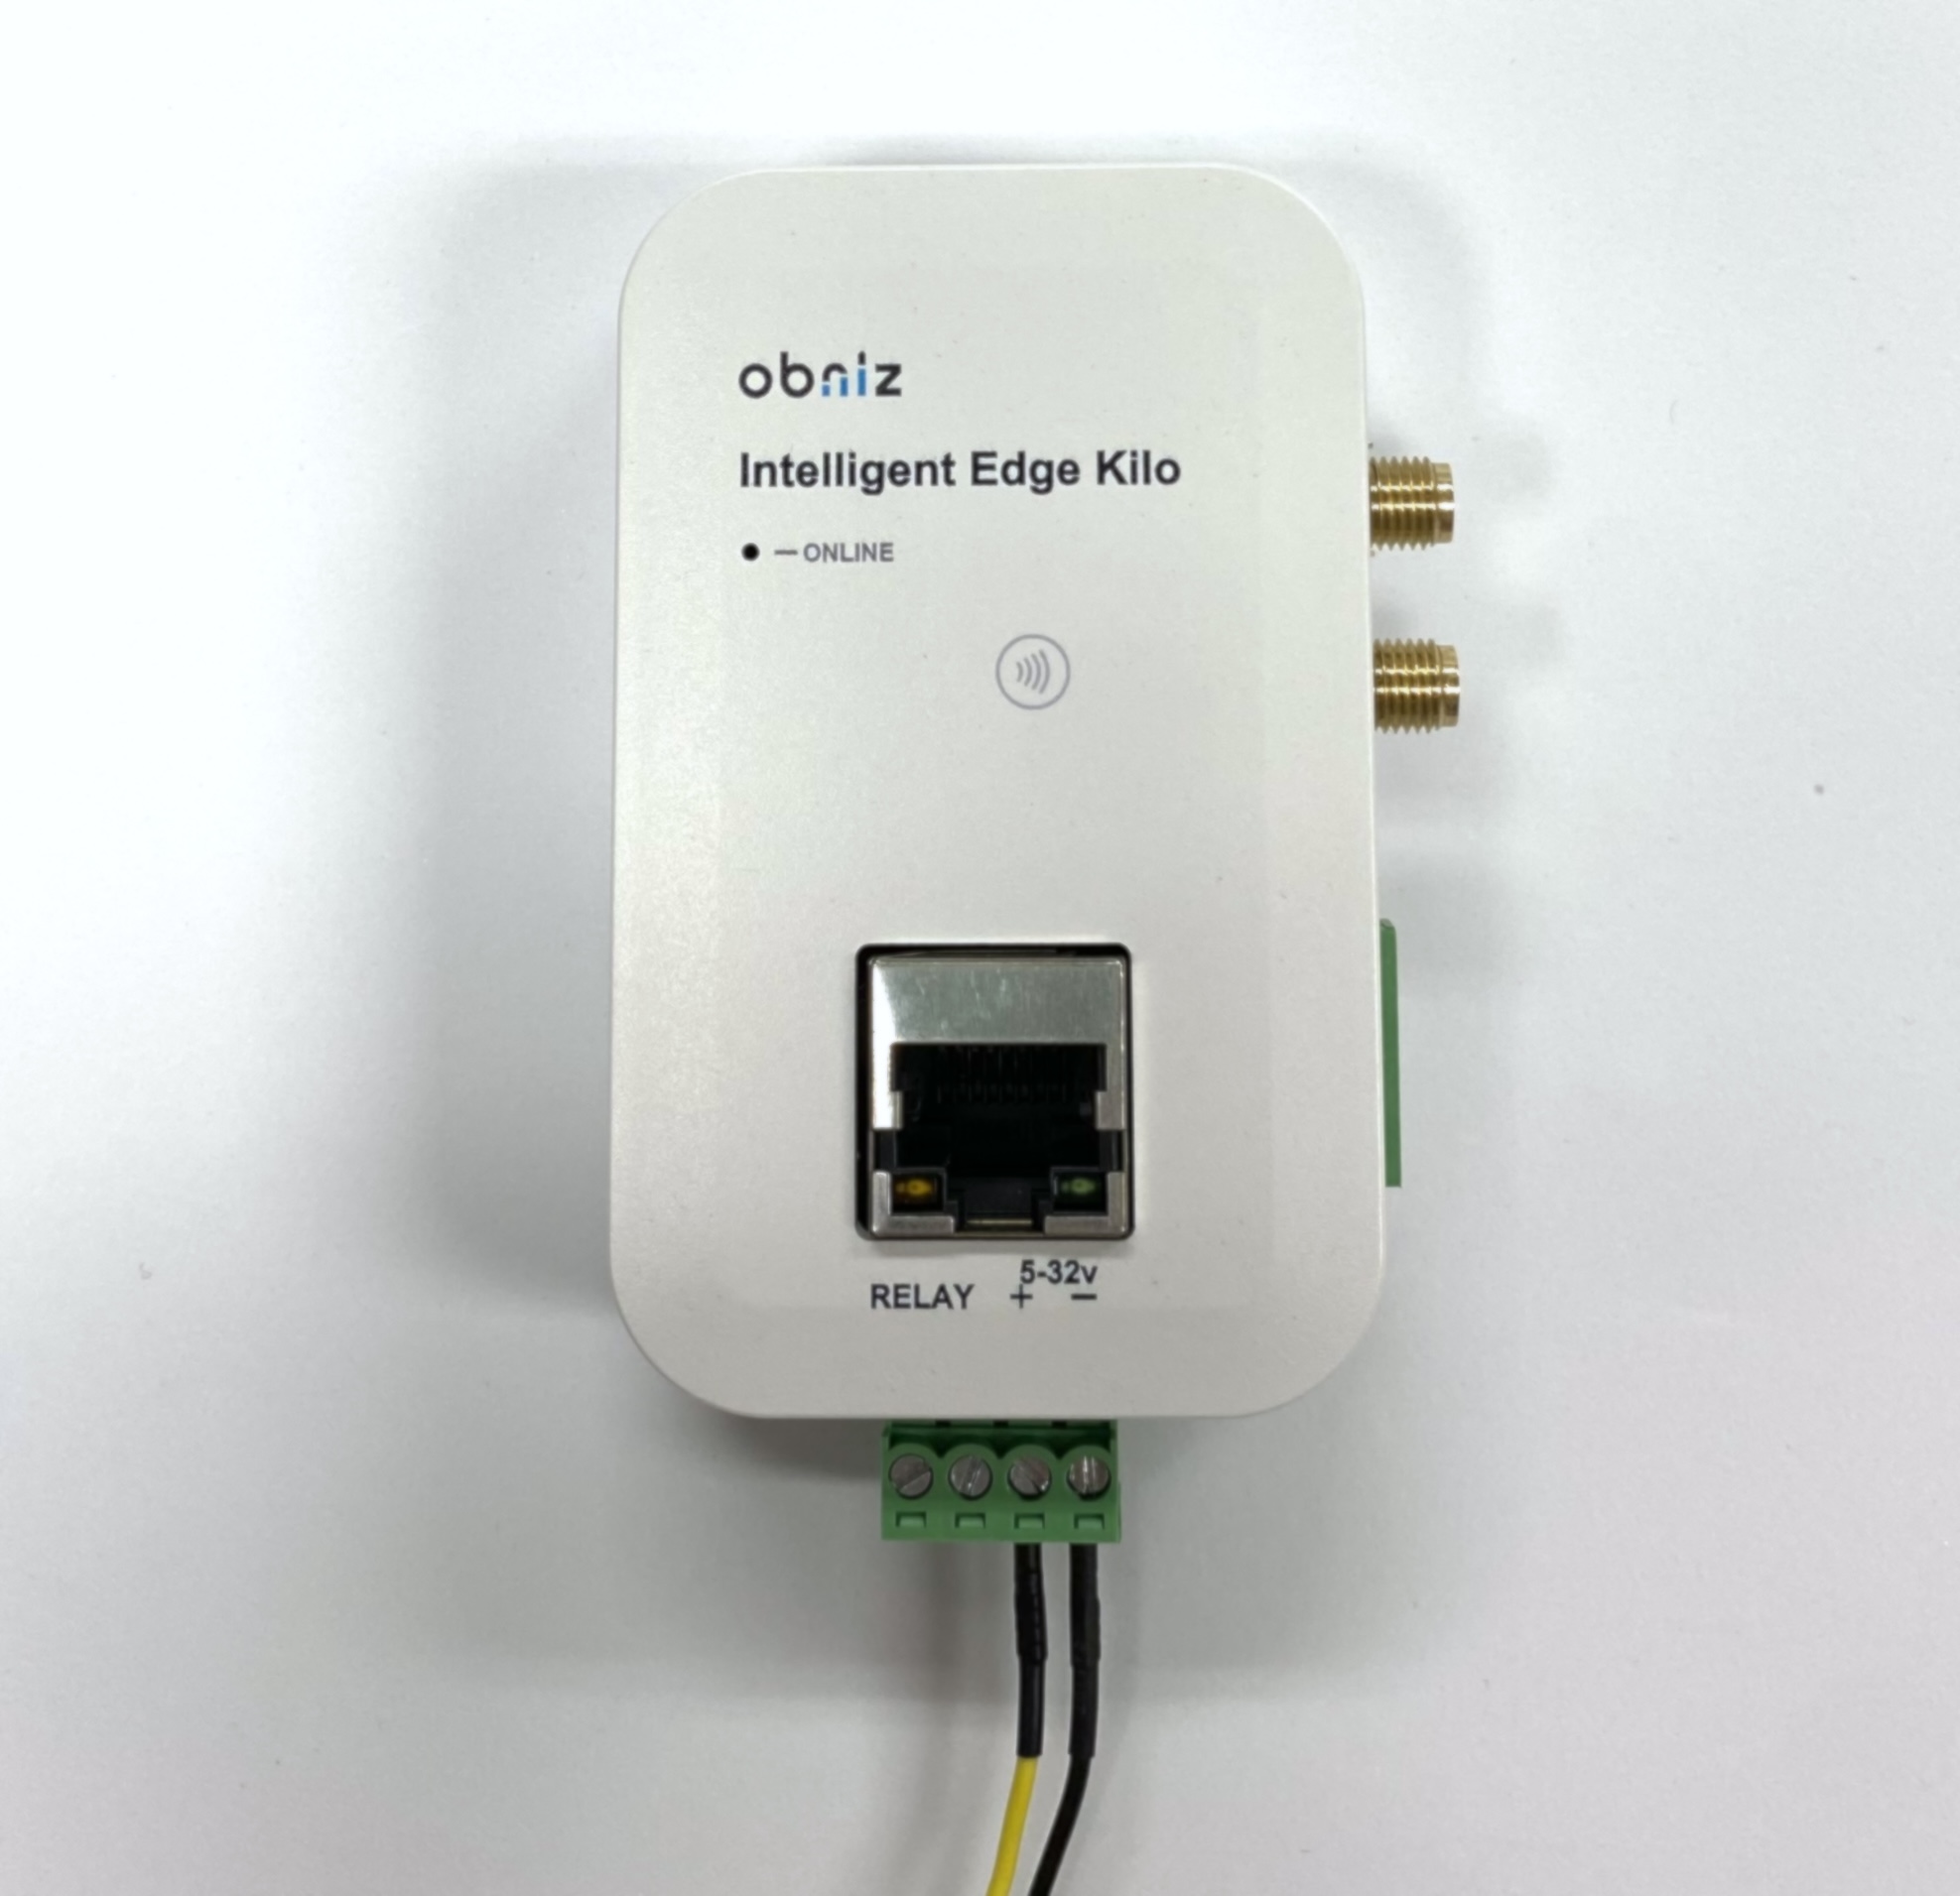
We recommend using the connector on the bottom of the Kilo for power.
Using a flathead screwdriver, wire and fix a 5 to 32 V DC power source (such as an AC adapter or batteries), and attach the connector to the Kilo.
👉 A force about as tight as a jam jar lid is enough (avoid over-tightening).
👉 In addition to the connector, you can also supply power via USB. For details, see here (TBD).
Configuring obnizOS
To connect to the internet using Ethernet (wired LAN), you need to enable Ethernet in the obnizOS network settings.
This setting can be made by switching the Kilo unit into setting mode.
Entering Setting Mode
With the power on, press and hold the setting button for 3 seconds or more.
The button is in a hard-to-press location, so press the recessed button with a thin pin or similar.
👉 Tip: Since it is a small button, the trick is to press and hold it gently rather than pressing too hard.
When the unit enters setting mode, the white LED on the unit blinks slowly.
⚠️
During normal operation (while communicating via LTE, etc.), the unit does not enter setting mode automatically.
Switch to setting mode manually only when you want to change the Wi-Fi or Ethernet settings.
Automatic Broadcast of Its Own Wi-Fi
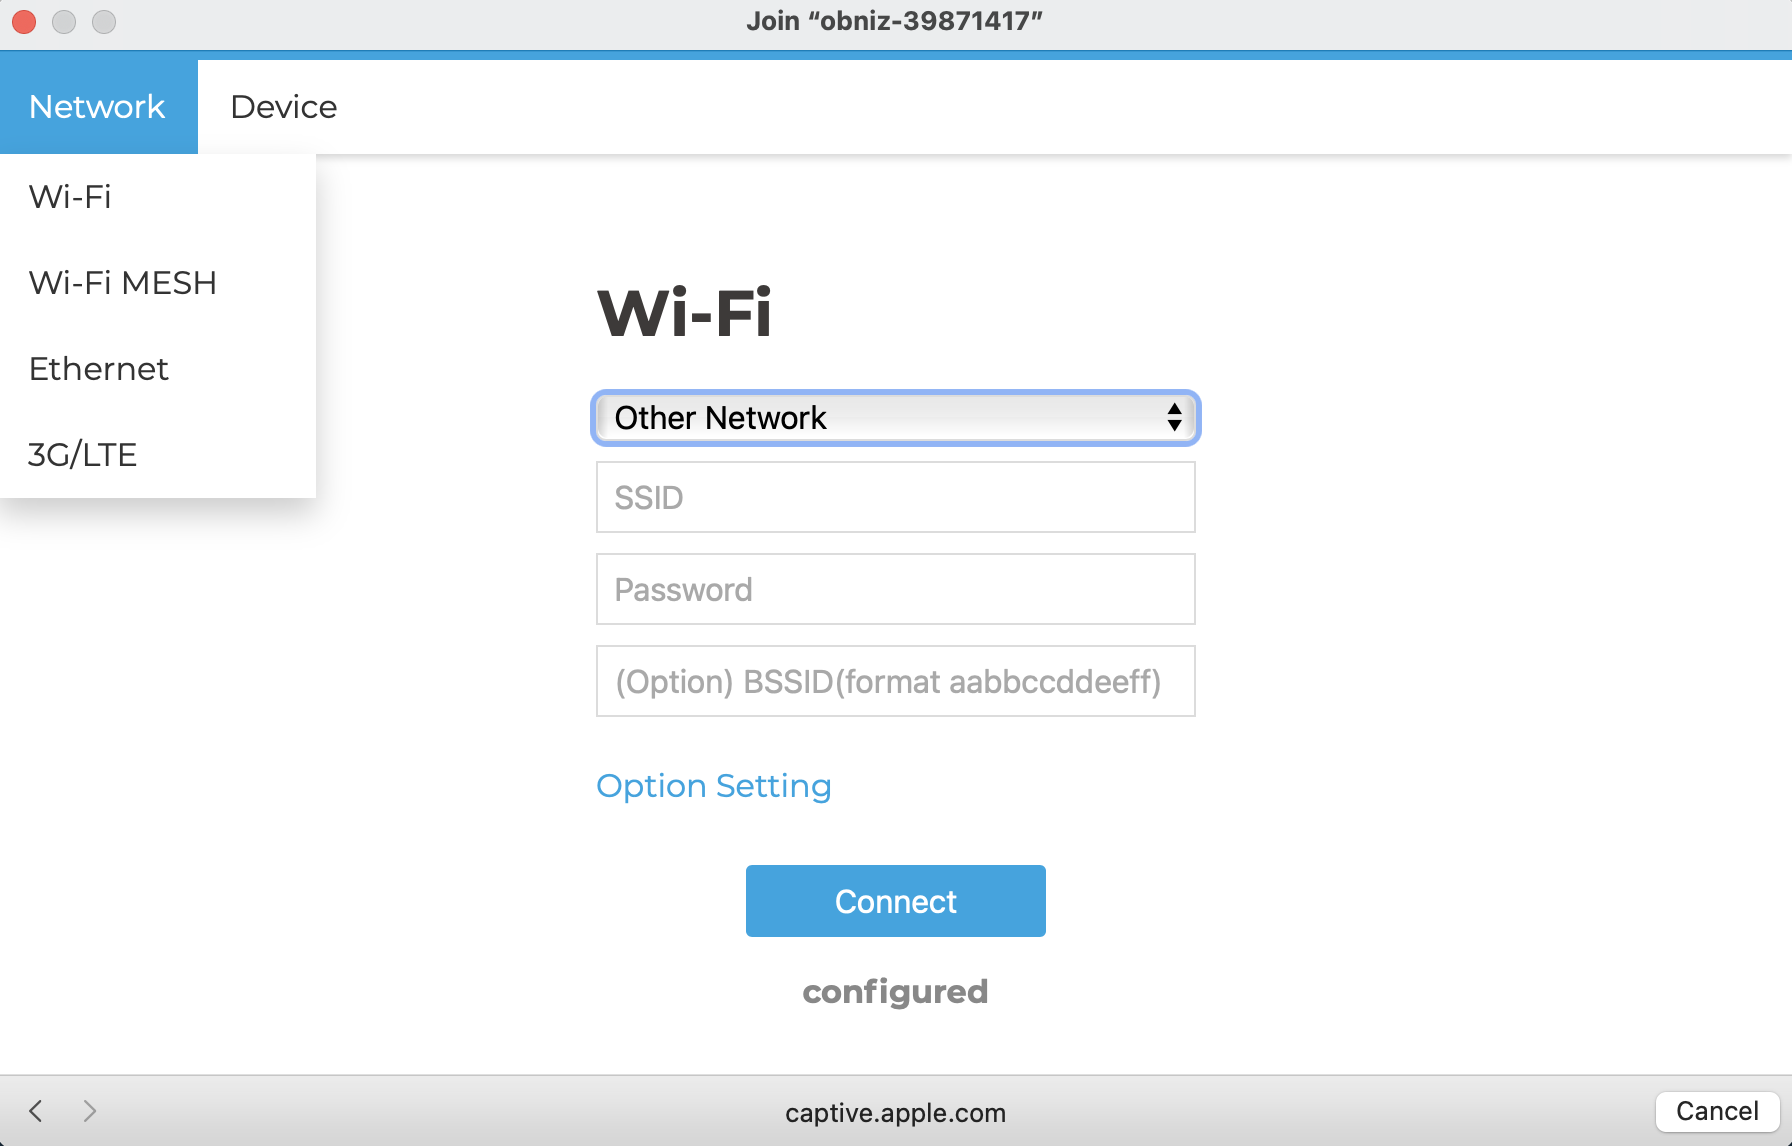
When the unit enters setting mode, the Kilo automatically broadcasts its own Wi-Fi with the ID name "obniz-xxxxxxxx" (x is the obnizID).
When you connect to this Wi-Fi, you can access the settings screen from a browser.
You can connect to the Wi-Fi broadcast by the obniz device from a PC or smartphone and make settings from a browser.
Enabling Ethernet
Once the settings screen opens, select "Network" → "Ethernet" from the menu, enter the necessary settings, and click "Connect".
Restart to Apply the Settings
When you press the button, the settings are saved and the Kilo restarts.
After the restart, it begins connecting to Ethernet.
If the white LED begins to blink quickly after startup, communication via Ethernet has started, and a steady light indicates the connection status with the cloud.
⚠️
If you still cannot communicate after configuring, check the Ethernet cable connection, the LAN link LED, and the IP address settings.
In environments where DHCP is disabled, you need to enter the static IP correctly.
| Communication method | HTTPS (TLS 1.2) WebSocket |
|---|---|
| Static IP | Supported |
| Number of connections | 1 |
| Communication direction | Requests from the device side only (the server does not connect to the device) |
| Proxy | Configurable (HTTP or HTTPS) |
| Connection destination domains | obniz.io, *.obniz.io, obniz.com, *.obniz.com (there may be multiple *) |
| Ethernet settings that can be stored | Only 1 |
Checking the LED After Power-On
After power-on, the white LED next to "ONLINE" indicates the connection status.
| State | Meaning |
|---|---|
| Off | No power supply (check the power and wiring) |
| Blinking | Connection in progress (check the network and settings) |
| Steady on | Connection to the internet and the cloud service obniz Now complete |
Troubleshooting Based on the LED State
| Condition (LED) | Possible cause | How to respond |
|---|---|---|
| The white LED does not light up (off) | ・No power supplied / insufficient voltage (outside 5 to 32 V) ・Power connector or USB not connected or loose ・Ethernet (internet) is not configured ・LINK not established (cable type / disconnection / port failure) ・DHCP not working / static IP mismatch |
Check the power, wiring, and USB, and try a different power source or a different cable. Re-secure the connector with appropriate force (just enough, lightly tightened). Enable Ethernet in the network settings. Check the cable type and that it is plugged in, and retry with a different port / different cable. Confirm that DHCP is running. For static IP, review the IP / GW / DNS. |
| The white LED does not stay steadily on (keeps blinking) | ・Outbound restriction / 443/TCP blocked by the firewall ・DNS resolution not possible (name resolution of the obniz domain fails) ・Incorrect proxy settings (method / host / authentication) |
Allow communication to obniz.io / obniz.com (and *.obniz.io, *.obniz.com) over 443/TCP. Review the DNS server settings. Verify with the proxy disabled if it is not required; when using it, reconfigure the method, host, and authentication. |