Configuration via serial communication (UART) is possible for devices equipped with the necessary terminals.
Connection
Connect the serial communication as follows:
| Key | Value |
|---|---|
| Terminal | Depends on device and configration. See a manual for each products |
| Baud Rate | 115200 bps |
| Flow Control | None |
| Parity | None |
Note: Some ESP32 devices include automatic flash circuits using DTR and RTS. In such cases, communication may fail upon connection. Try toggling DTR/RTS ON and OFF (in most cases, setting both to OFF allows normal communication).
In OS7 and later, the console can be disabled. If disabled, console functions will not be available upon connection.
If the console is disabled, you can re-enable it by manually entering Setting Mode using button operations.
Mode Switching
You can switch to Setting Mode by sending a command via serial communication.
| OS Version | Method to Change to Setting Mode |
|---|---|
| OS 3.5.0 or later | Send the four-character string menu at any time after startup. No newline is required. |
| Older than 3.5.0 | Send the single character s during (or immediately after) startup. No newline is required. |
Main Menu
After entering menu to switch modes, the Main Menu will appear.
You will be prompted to enter a Passkey (OS6 or later). Please enter the appropriate key. The factory default is obniz.
Passkey
Input text >>
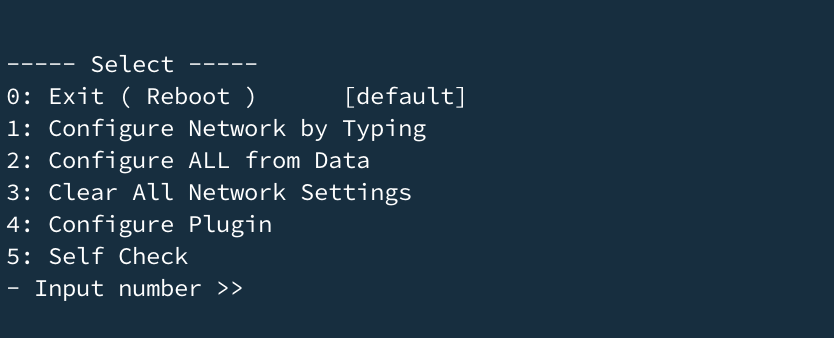
The menu items displayed vary depending on the OS version.
----- Select -----
0: Exit ( Reboot )    [default]
1: Configure Network by Typing
2: Configure ALL from Data
3: Clear All Network Settings
4: Configure Plugin
5: Self Check
- Input number >>
| Setting | Min. OS Version | Description |
|---|---|---|
| 0: Exit ( Reboot ) | 3.0.0 | Simply reboots the device. This is selected if you press Enter without typing a number. |
| 1: Configure Network by Typing | 3.0.0 | Enter network settings via the console, save, and reboot. |
| 2: Configure ALL from Data | 3.0.0 | Perform bulk configuration of components and network using Configuration JSON. This replaces all internal settings with the provided JSON. |
| 3: Clear All Settings | 3.0.0 | Clears all saved settings. |
| 4: Configure Plugin | 7.0.0 | Overwrites the Lua plugin. |
| 5: Self Check | 7.0.0 | Runs the self-check diagnostic program. |
Console Operation
- When presented with numbered options, enter the number (half-width) and press Enter.
- When string input is required, type the text directly.
- The console does not accept
\r\n(CRLF) sequences. If your terminal's newline setting is set to CRLF, please switch it to\r(CR) or\n(LF).
While you can configure Wi-Fi and other settings, selecting "Complete" or "Clear Settings" in the console will save the changes and trigger a reboot.
1. Configure Network by Typing
You can configure various network settings. Entered settings are saved. Like browser-based configuration, if multiple settings are saved, the most recent one takes priority.
Note: Saved settings cannot be read back via any method.
MAC Address (BSSID) Specification
Supported from obnizOS 3.5.0.
You can specify a target Access Point by entering its 12-digit alphanumeric MAC address (lowercase). Press Enter without typing anything to leave it unspecified.
Connecting to Stealth SSIDs
Supported from obnizOS 3.2.0.
You can connect by entering the SSID and Password regardless of whether the SSID is broadcasted or hidden.
Static IP Configuration
For Static IP, you will be asked for four required items in sequence:
For a static IP, you will be asked a series of questions about the items required for configuration.
All four of the following are required to use a static IP.
--- IP Address
Input address >> 192.168.0.10
--- Default Gateway --- Input address >> 192.168.0.10
Input address >> 192.168.0.1
--- Subnet Mask --- Input address >> 255.255.255.0
Input address >> 255.255.255.0
--- DNS Address --- Input address >> 192.168.0.1
Input address >> 192.168.0.1
Enter the required values for each, and press enter to move to the next item.
How to set up Proxy
To configure Proxy, you will need the address and port information of your proxy server.
--- Proxy Config ---
Proxy Address
Input text >> 192.168.8.11

--- Proxy Port --- Port Area:0-65535
Port Area:0-65535
Input number >> 8080
Input text
Enter the required values in each field and press Enter to move to the next item.
WPA2 Enterprise
If WPA2 Enterprise is enabled, Username, Password, and AnonymousID can be set.
2. Configure ALL from Data
Allows configuration using Configuration JSON. You can write all network and hardware settings at once.
Note: Lua scripts for Plugins cannot be written here; use the specific Plugin menu instead.
3. Clear All Network Settings
Deletes all saved network and hardware settings. Plugins are not deleted here; use the specific Plugin menu to clear them.
4. Configure Plugin
Overwrites the Lua Plugin.
Since newlines are part of the script, you cannot use Enter to save. Press Control + D to save and exit.
To delete the plugin entirely, save with no text entered. If you enter this menu by mistake, simply reboot the device without saving.
Warning: For long scripts, the buffer may overflow and cause data loss. Please split your input into 1kb chunks.
5. Self Check
Launches the self-check program. This executes:
- The default diagnostic program provided for each terminal by obnizOS.
- Any self-check programs defined in the Lua Plugin.
Recommended Factory Settings
In OS7 and later, the device no longer reboots automatically after entering individual settings. This allows you to perform multiple configurations in one session:
- Enter the menu with
menu. - Enter the Passkey.
- Use option
2to write Network and Hardware settings via JSON. - Use option
4to set the Lua Plugin. - Use option
5to run the Self Check and diagnose the circuit. - Use option
0to reboot.