The gateway's Wi-Fi settings can be configured either by connecting from a terminal such as a smartphone or PC, or by connecting via WPS.
Method1:Connection using PC or smartphone
Requirements:
- Smartphone or PC that can be connected to internet
- Wi-Fi (SSID, password) *2.4GHz band
(1) Power ON the gateway
The obniz BLE gateway can be turned ON by inserting the device in the consent.
When the LED turns green, press and hold the side touch button. The LED then turns purple and it starts normally and is waiting for the settings.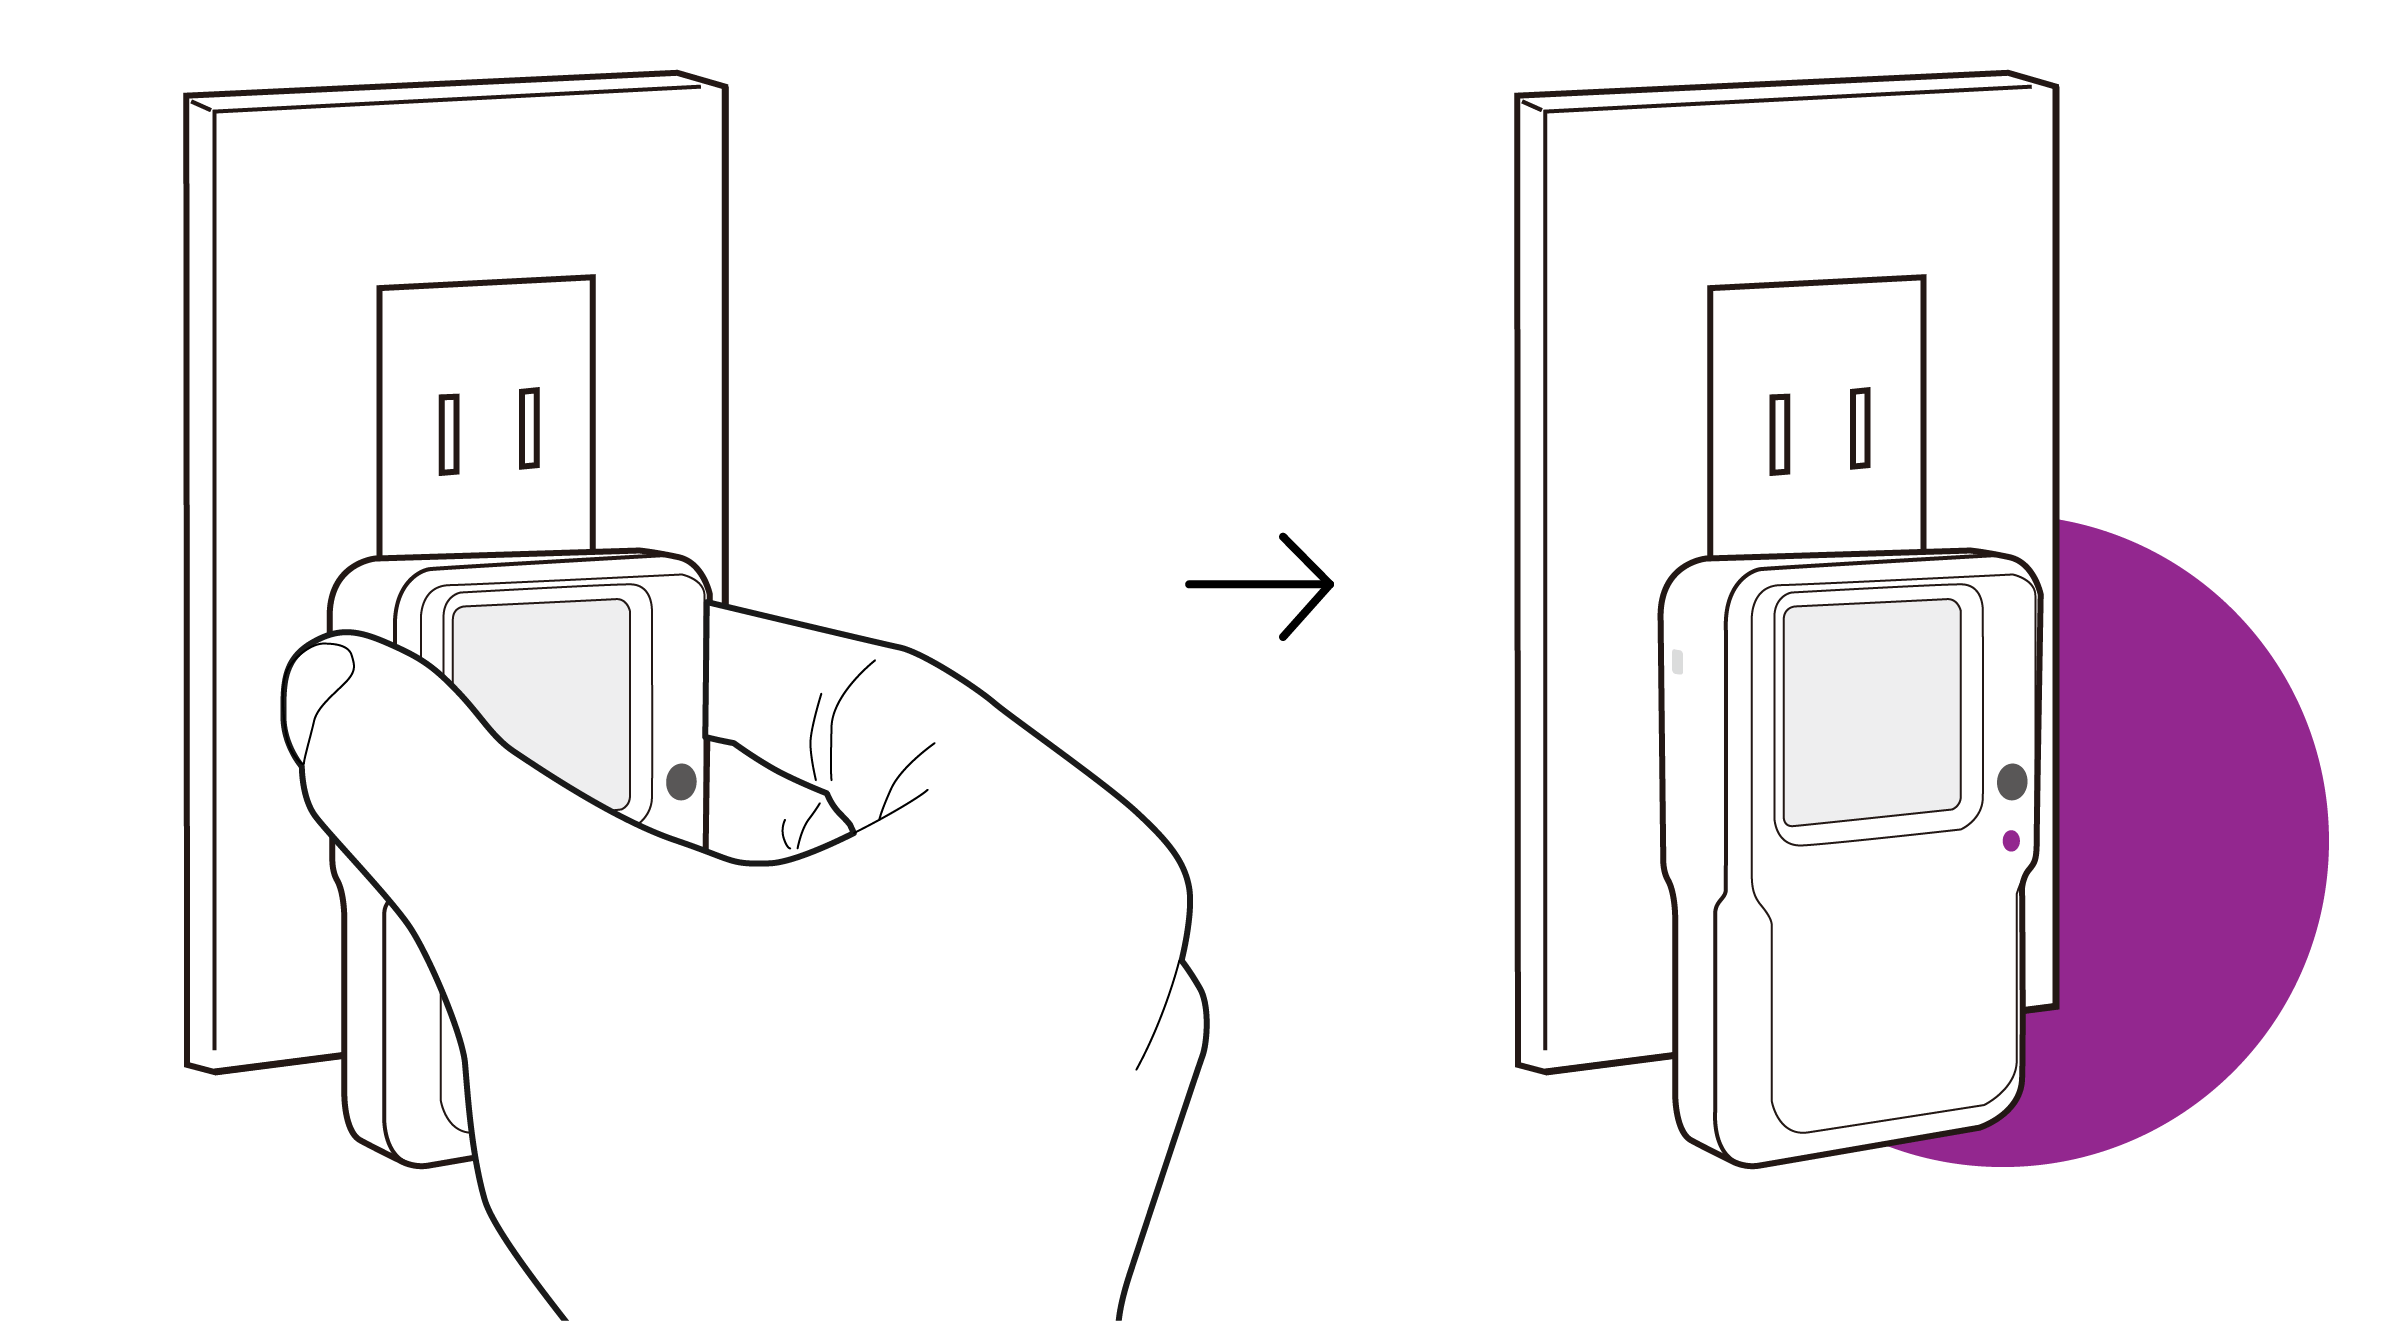
(2) Wi-Fi Settings / Cloud (Internet) Settings
Check whether the LED is blinking purple and proceed as follows:
See more about settings at obnizOS Browser Setting .
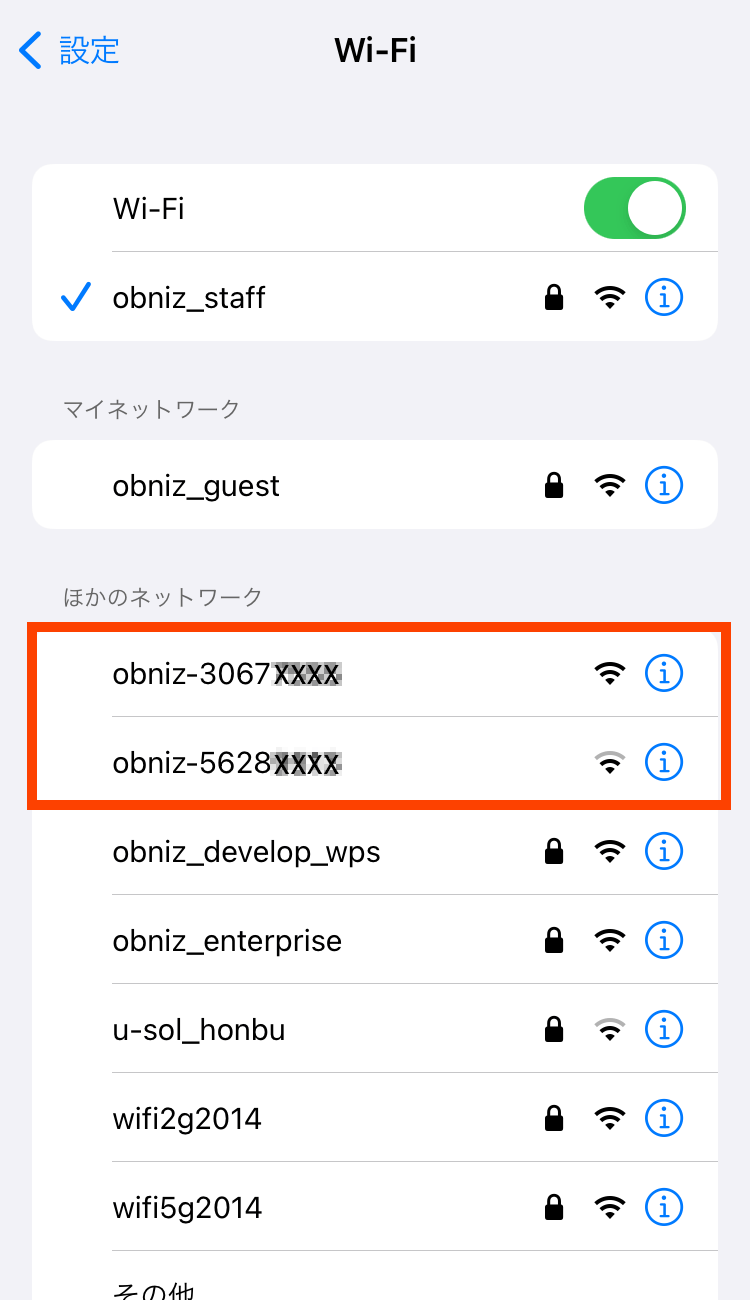
1. Connect to the Wi-Fi of the gateway
When the LED is blinking purple, it is possible to connect to the Wi-Fi of the gateway.
Use a smartphone or a PC to connect to the Wi-Fi named obniz-XXXXXXXX (8 digits obnizID).
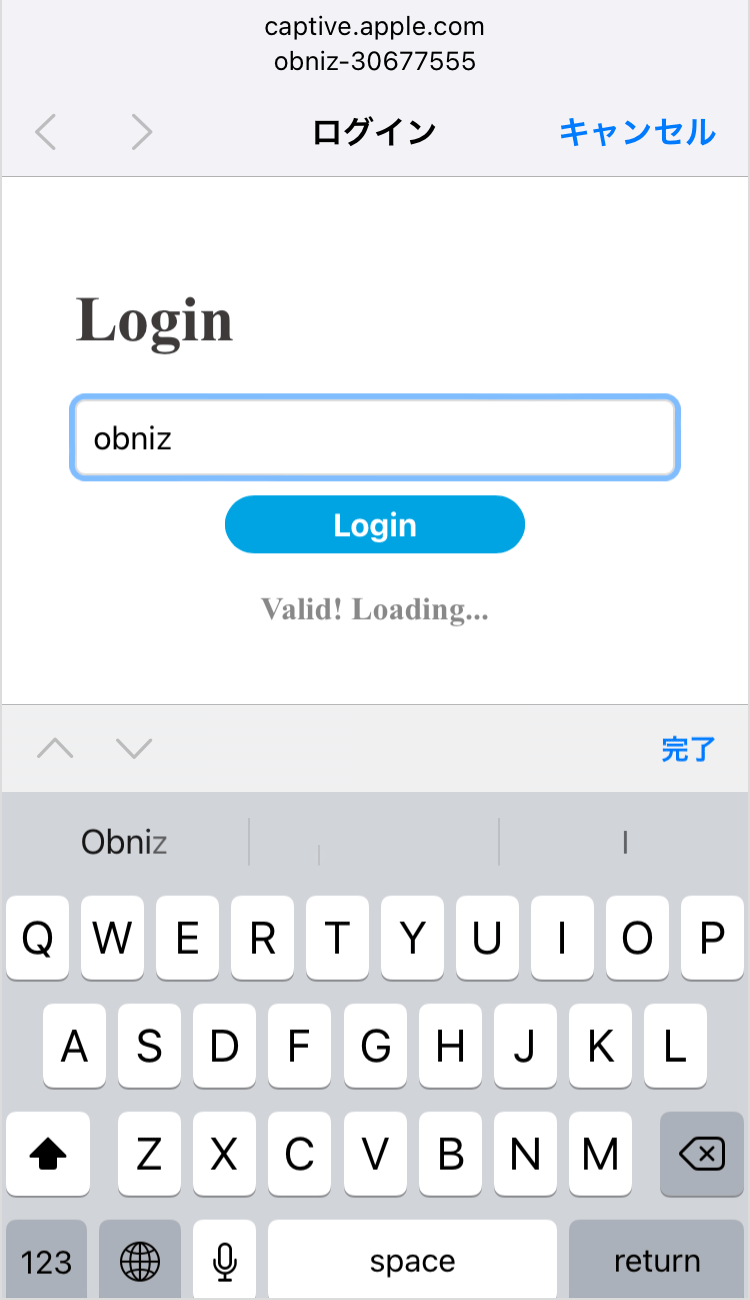
2. Login to the Settings screen
When connected to the Wi-Fi of the gateway, a pop-up browser window appears displaying a login page.
*The first time login passkey is “obniz”.
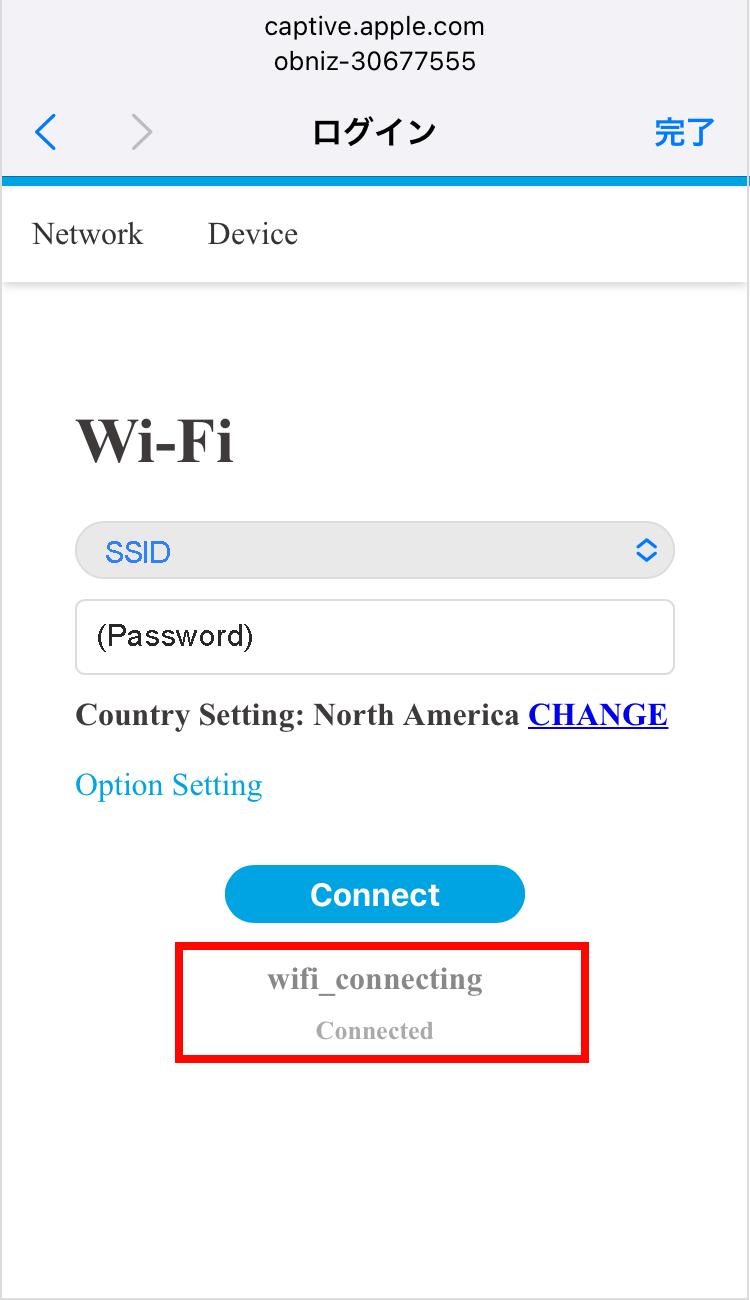
3. Wi-Fi Settings
After logging in, ‘Wi-Fi Settings’ page gets displayed. Enter the SSID and password of the Wi-Fi you wish to connect to.

4. Click on the “Connect” button
Press “Connect” to save the network credentials and to start the connection.
*The network connection status is displayed below the “Connect” button. On successful completion of the connection, “Online” is displayed.
The connection status is also reflected by the LED and is displayed on the display of the gateway.
The behavior of the settings screen may differ depending on the browser specifications.
(3)Network Settings Completion
You have successfully connected to the cloud if the LED turns blue and obnizID, SSID and OS ver. are displayed on the gateway display.
Method1:Setting by WPS
Using WPS, the device can automatically receive SSID and Password from the access point (Wi-Fi router).
Requirements:
- Router that supports WPS (2.4GHz band)
Flow:
- Set the device to the purple flashing setting mode.
- Press the WPS button on your Wi-Fi router or access point to complete the Wi-Fi setup.
- press and hold the button for 3 seconds. The purple light will blink faster.
- SSID and Password are automatically set and Wi-Fi setup is complete.
- the device will reboot once completed, and the blue light will turn on when it connects to Wi-Fi and comes online successfully
Other Method
- Using the "obniz Device Setting App" smartphone application to set up the device by holding up the smartphone *facility/operation function is required
- Batch configuration of peripheral gateways using the CLI application "obniz-cli"
Please refer to Settings for available settings in obnizOS.