まずはLEDをobnizにつないで、LEDをスマホからON・OFFしてみましょう。
接続
まずは、obnizの電源を入れてQRが表示されることを確認します。
Wi-Fiの設定がまだできていない方はQuickStartで設定して下さい。
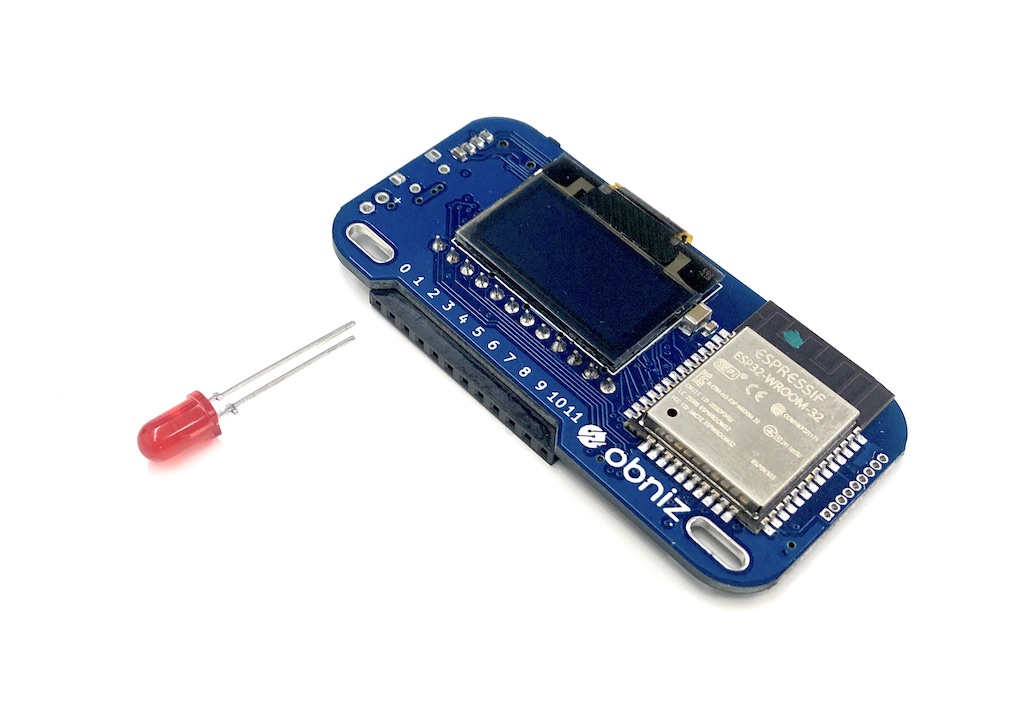
LEDとは電気を流すことで光る部品です。
アノードとカソードという2本の足があり、アノードにプラス、カソードにマイナスを繋ぐと光ります。
少し足が長いほうがアノードです。
アノードをobnizのio0に、カソードをio1にさします。
(ここで使用しているLEDは抵抗入りのLEDですが、もし抵抗入りではないLEDを繋ぐときは抵抗を繋いで下さい。)
LEDを点灯
プログラム画面を開きます。
まずは単純にLEDをONにしてみましょう。
下にあるのがそのためのプログラムです。まるごとコピーして自分のプログラム画面に貼り付けてください。
<!-- HTML Example -->
<html>
<head>
  <meta name="viewport" content="width=device-width, initial-scale=1">
  <script src="https://obniz.com/js/jquery-3.2.1.min.js"></script>
  <script src="https://unpkg.com/[email protected]/obniz.js"></script>
</head>
<body>

<div id="obniz-debug"></div>
<h1>LED</h1>

<script>
  var obniz = new Obniz("OBNIZ_ID_HERE");
  obniz.onconnect = async function () {
    var led = obniz.wired("LED", {anode:0, cathode:1});
    led.on();
  }
</script>
</body>
</html>
そしてプログラムの中で
var obniz = new Obniz("OBNIZ_ID_HERE");
のOBNIZ_ID_HEREをあなたのobnizのidにします。例えば1234-5678なら
var obniz = new Obniz("1234-5678");
とします。
そして「実行」ボタンを押してこのページを開いてみましょう。
ページを開いた時にledが点灯したら成功です!
ボタンを押してLEDをON OFF
次にホームページに「ON」と「OFF」のボタンを追加しそれに合わせてLEDをON・OFFさせてみましょう。
やることは
- ホームページ上にボタンを2つ追加
- ボタンが押されたらledの状態を変える
です。この順番にやってみましょう。
まずはホームページ上にボタンを2つ追加します。<body>タグの中に以下の2つを追加します。
<button id="on">ON</button>
<button id="off">OFF</button>
これで画面にボタンが2つ出てくるはずです。
次に、このボタンが押された時にledのon・offを変えてみます。
jQueryを使って、on・offが押された時の処理を追加します。
例えば、ONと書いたボタンのidはonとしてあります。
jQueryでは、onというidが押された時に何かしたい時は、以下のように書くことができます。
$("#on").on("click",function(){
  // on pressed
})
これを使って、ボタンのonが押されたらledをonに、offが押されたらledをoffにするプログラムは以下のように書けます。
$("#on").on("click",function(){
  led.on();
})
$("#off").on("click",function(){
  led.off();
})
これで全て完了です。
まとめると以下のようになります。
これをプログラム画面に貼り付けてOBNIZ_ID_HERE の部分を自分のobniz idに変えて実行すると、ボタンが2つ出てきます。
そしてONを押すとLEDが点灯し、OFFなら消灯すると思います。
<!-- HTML Example -->
<html>
<head>
  <meta name="viewport" content="width=device-width, initial-scale=1">
  <script src="https://obniz.com/js/jquery-3.2.1.min.js"></script>
  <script src="https://unpkg.com/[email protected]/obniz.js"></script>
</head>
<body>

<div id="obniz-debug"></div>
<h1>LED Switch</h1>
<button id="on">ON</button>
<button id="off">OFF</button>

<script>
  var obniz = new Obniz("OBNIZ_ID_HERE");
  obniz.onconnect = async function () {
    var led = obniz.wired("LED", {anode:0, cathode:1});
    $("#on").on("click",function(){
      led.on();
    });
    $("#off").on("click",function(){
      led.off();
    });
  };

</script>
</body>
</html>
簡単でしょう?
これで、あなたは"Web"と"モノ"の連携ができる人になりました!
次のレッスンに行きましょう!
詳しく
今回使用したLEDというパーツは詳しくはここで確認することができます:https://obniz.com/sdk/parts/LEDon()、off()以外にも点滅などの関数も用意されています。
jQueryについてもっと知ることのできるページはこちら:http://learn.jquery.com/about-jquery/how-jquery-works/