This Lessons show how to start using obniz Board from HTML/JavaScript.
How to start obniz Board?: Check the Quickstart
Remote Control obniz Board from the SDK through obniz Cloud
An onlined obniz can be controlled from the SDK we provide for some programming languages.
obniz.js is javascript one. It's opensource on Github. It will be installed by script tag in HTML or npm in nodejs.
It's documet can be seen this website /sdk/README。 IO and Peripheral usages.
This lessons explain integration hardwares with HTML UI on Online HTML Editor.
Let's try!
Let's use obniz from the Web.
Let's try below to check if your obniz Board is connected to the internet.
<!-- HTML Example -->
<html>
<head>
  <meta charset="utf-8">
  <meta name="viewport" content="width=device-width, initial-scale=1">
  <link rel="stylesheet" href="https://stackpath.bootstrapcdn.com/bootstrap/4.3.1/css/bootstrap.min.css">
  <link rel="stylesheet" href="/css/starter-sample.css">
  <script src="https://obniz.com/js/jquery-3.2.1.min.js"></script>
  <script src="https://unpkg.com/obniz@3.3.0/obniz.js"></script>
</head>
<body>

<div id="obniz-debug"></div>

<div class="wrap">
  <div class="print">
    <h3 class="text-center">Print words on obniz</h3>
    <div>
      <input type="text" id="text" value="Hello World" placeholder="Input in freely">
      <button class="btn btn-primary" id="showtime">Print on obniz</button>
    </div>
  </div>

  <div class="switch">
    <h3 class="text-center"> Swtich </h3>
    <span id="print">undefined</span>
  </div>

  <div class="led">
    <h3 class="text-center">Turning on a LED</h3>
    <button class="btn btn-primary" id="on">LED ON</button>
    <button class="btn btn-outline-primary" id="off">LED OFF</button>
    <dl>
      <dt>Demo Pin assign</dt>
      <dd>- io0:LED anode</dd>
      <dd>- io0:LED cthode</dd>
      <dd>- Switch state will be printed on browser</dd>
    </dl>
  </div>

</div>

<script>
  var obniz = new Obniz("OBNIZ_ID_HERE");
  obniz.onconnect = async function () {
    var led = obniz.wired("LED", {anode: 0, cathode: 1});
    obniz.display.clear();
    obniz.display.print("Hello World");

    obniz.switch.onchange = function (state) {
      $('#print').text(state);
      obniz.display.clear();
      obniz.display.print(state);
    };

    $("#showtime").on("click", function () {
      obniz.display.clear();
      obniz.display.print($("#text").val());
    });

    $('#on').click(function () {
      led.on();
      obniz.display.clear();
      obniz.display.print("ON");
    });

    $('#off').click(function () {
      led.off();
      obniz.display.clear();
      obniz.display.print("OFF");
    });
  };
</script>
</body>
</html>
By running with your obniz id, your browser will be connected to your obniz Board.
After establish, green bar will be displayed. It mean you can control it from your program.
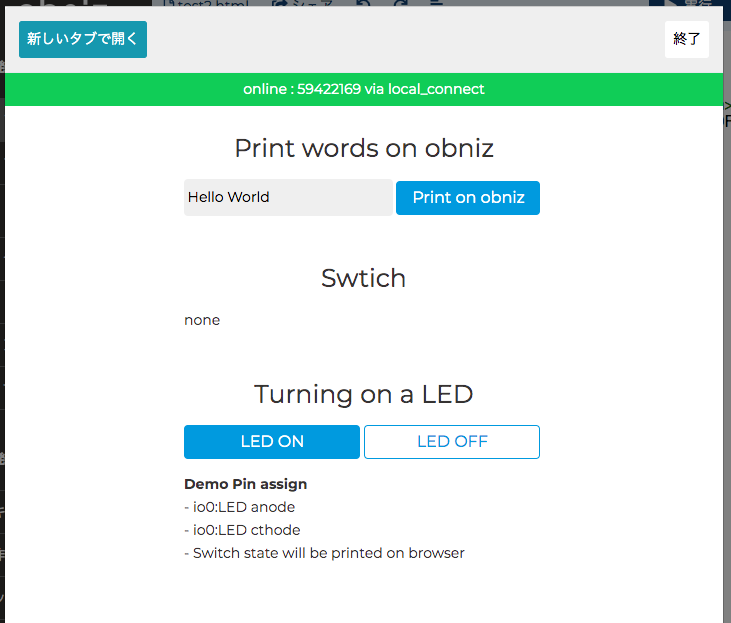
This program display text what you input at form.
Input text then press the button "Print on obniz". The text will be displayed on your obniz Board display.
And swtich state is printed on the browser.
Toggle the switch on your obniz Board. It is used at Wi-Fi Password typing.
The state will be printed at "Switch: unknown" area at realtime.
Program will be terminated by closing the page.
It's easy to integrate internet and electronics.
If you know about HTML, you may imagine more fun things. Not only this site. Copy this HTML into your local HTML file. Then open it on your browser. It works.
Start writing your program
Let's proceed to next Lesson First Program.
Use obniz from your program!