This time, let's actually line up the blocks and program them by yourself.
Let's do it while seeing how to line up the blocks.
Where are the blocks?
There are blocks that can be used in the screen.
First, let's open the block program editor like we were doing in Quick Start.
Then you can see the icons on the left side of the screen.
As you can see in the image below, on a large horizontal display, such as a computer, you can see the letters that make sense of the icons. There are all the blocks in this.
You can click on each one to see the blocks associated with it.
For example, if you open a "loop", you'll see a block to repeat something.
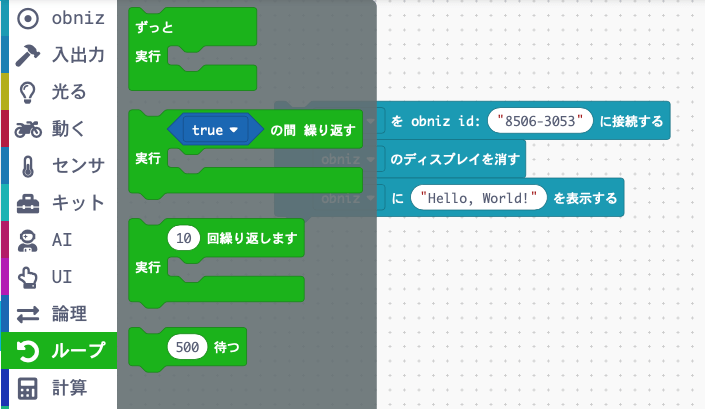
In the case of a mobile phone, there is no text to explain, just an icon.
The loop becomes an icon that looks like it is spinning. If you tap with your finger, the related blocks will appear.
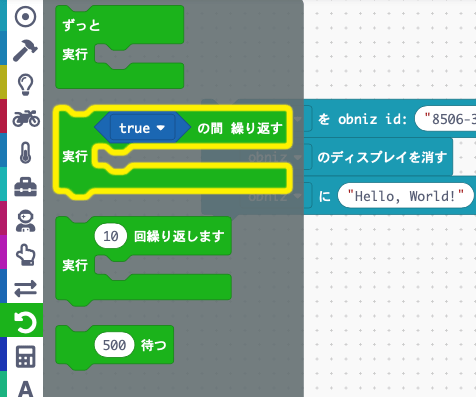
As you can see, the blocks on the left side are divided by type.
The top one is obniz, then there are other blocks that are electronic parts, parts on the screen, and other blocks that determine the flow of the program that are not parts, such as "loops".
By dragging the blocks you want to use from here, you can actually program them.
Place blocks and lay them out.
Now, let's actually lay them out.
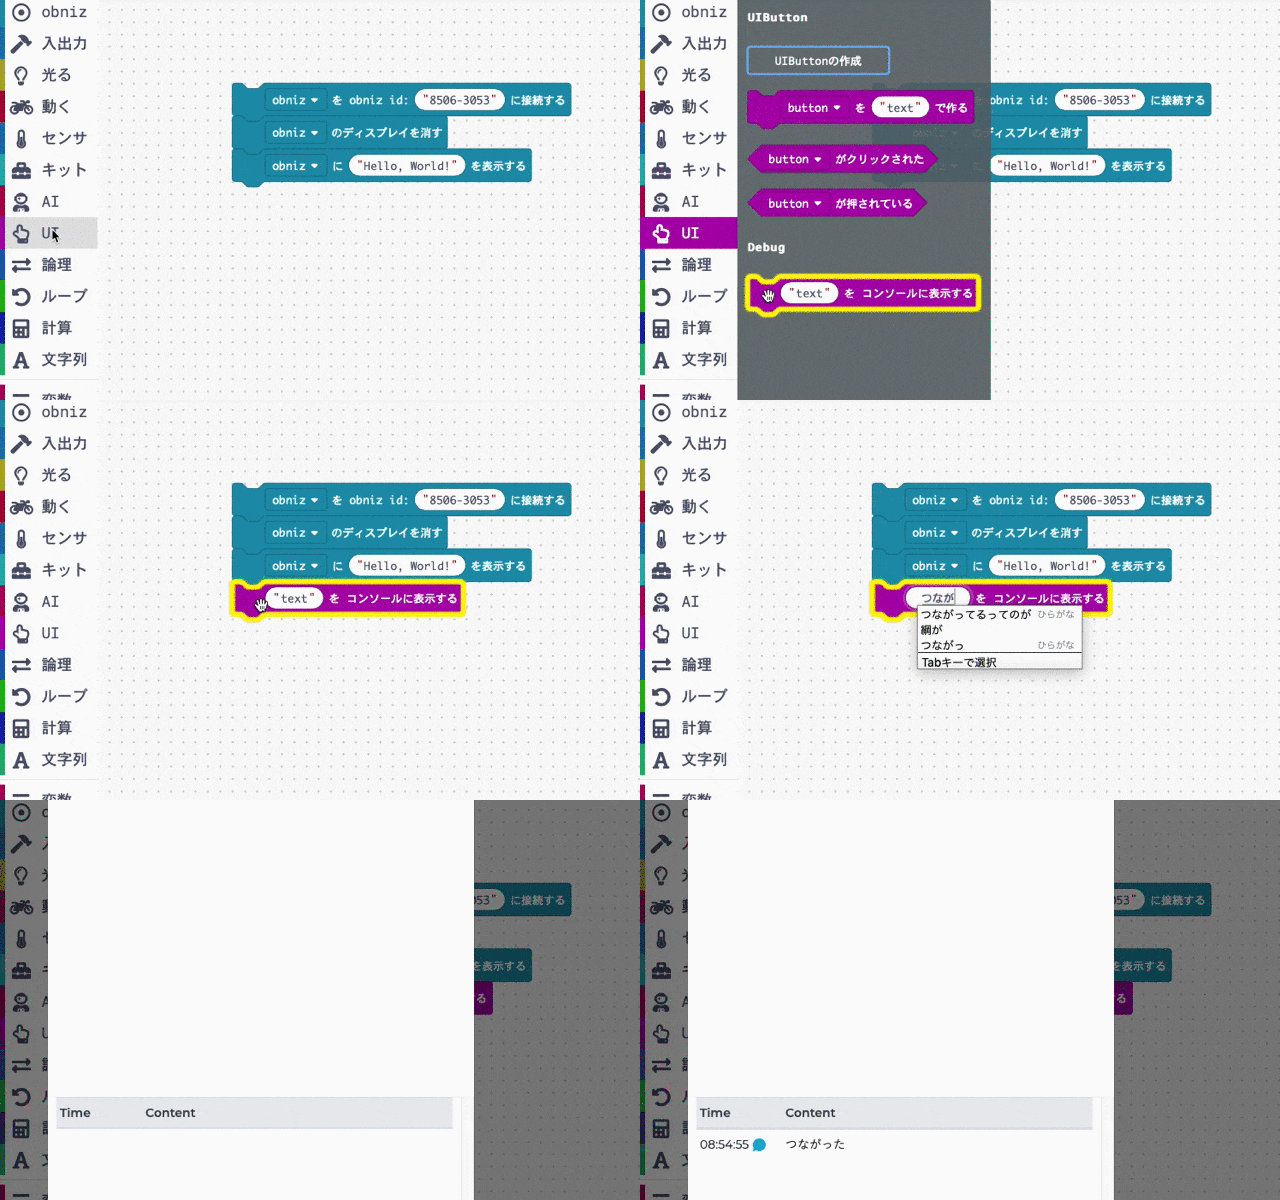
In the "UI" section, I'll try to connect "Show text in console" to the last of the three blocks that are already on the screen.
If you press the "UI (finger icon)" on the left, you'll see "Show text in console".
If you click and hold it, or if you're on a smartphone, hold it down with your finger and move it, it will follow you.
Let's connect to the bottom of the three blocks.
Then, the "text" part of the block is changed to "connected".
If obniz is online, let's just run it.
Then you will see "Hello World" on obniz and "Connected" on the screen where you are programming.
Block program flow
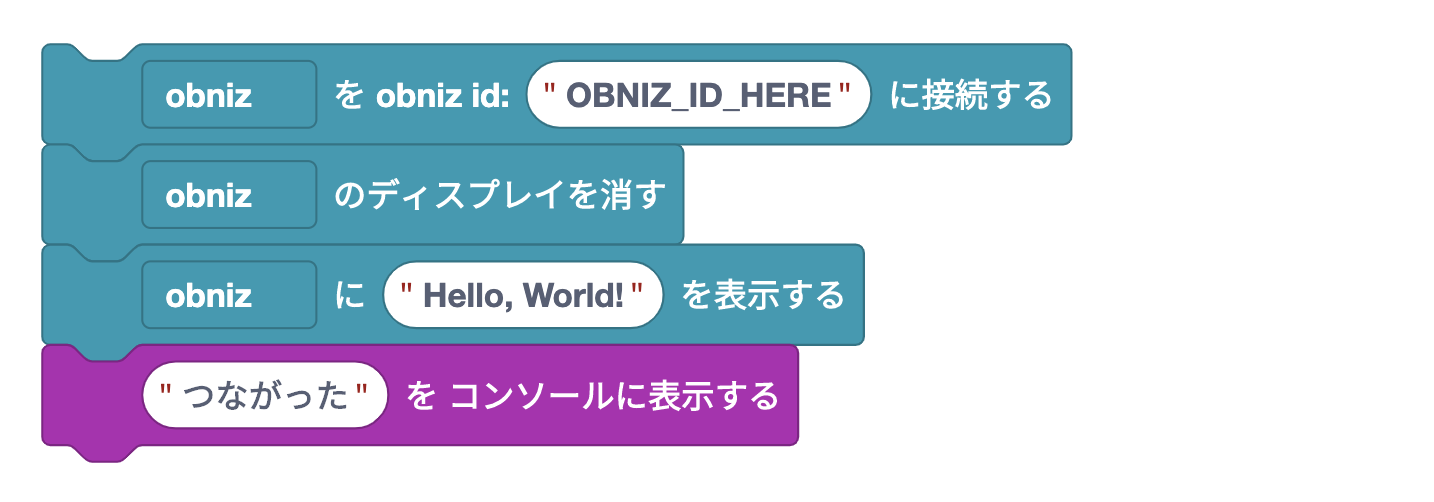
In a block program, the programs are executed in the order in which they are connected.
Here are the four that are lined up in the editor right now.
In a block program, the programs are executed in the order in which they are connected.
Here are the four that are lined up in the editor right now.
First, your PC/smartphone is connected to the obniz ID.
(Of course, obniz IDs vary from person to person.)
It won't go to the block below it until the connection is complete.
In other words, "turn off the display" is underneath it, but it won't disappear until it connects to obniz.
The next thing to do after connecting with obniz is to "turn off the display".
This display refers to the screen that is on obniz.
It will be erased, so everything that is displayed will disappear and become black.
Next is "Show Hello, World!". This will cause this character to appear in the display.
Finally, "Connected" will be displayed on the screen where the program is currently running by clicking "Display "Connected" on the console.
It's a boring program on its own, but it's still my first block program!
How to remove and erase blocks
It's a way to remove, replace, and erase lined blocks.
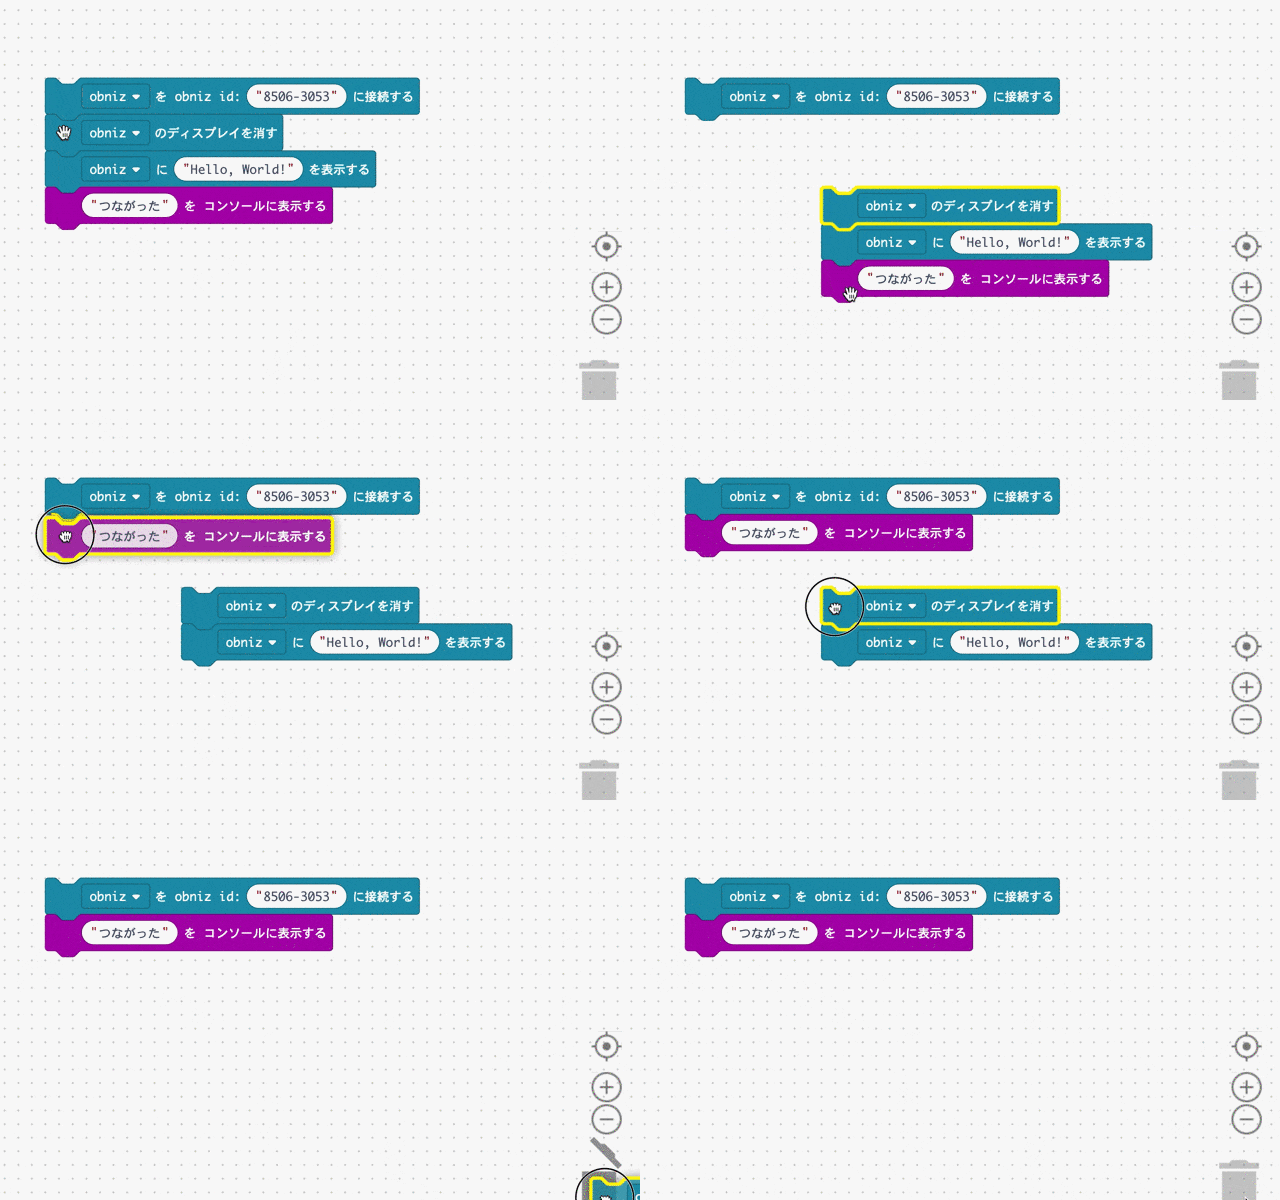
Let's remove the two in the center, the part that moves the obniz display.
There are many ways to do it, but let's try to do it the most carefully.
In this block program editor, when a block you grab is removed, the block underneath it is also attached to it.
First, take "Turn off the display of obniz" and remove it.
Next, grab "Show "Connected" in console" and connect under "Connect to obniz id "".
Now I can do what I want to do! However, I don't need "Turn off display" and "Show Hello World" anymore, so I want to turn them off.
There are two ways to turn it off. The block will disappear if you press the "Delete" button while the PC is selected.
If you are using a smartphone, you can remove the block by taking it to the trash can icon at the bottom right of the screen and releasing it.
Make the block smaller or larger
If the block is too small or too big for your convenience, you can use
You can change the overall size by using the + and - buttons on the trash can in the lower right corner of the screen.