Just moving forward is boring.
Let's make it a remote radio control by increasing the number of buttons so that it can be rotated.
Add button
You can add two or more UI buttons. Let's make a back button that backs up when pressed.
But how do you distinguish between two or more buttons?
Button 1 or Button 2?
In the block program, each button is given a name and distinguished by the name.
Make a button with a name and check "Is button XX pressed?" To check if it is pressed.
It's easy to add more buttons. Press "Add UI Button" from the UI.
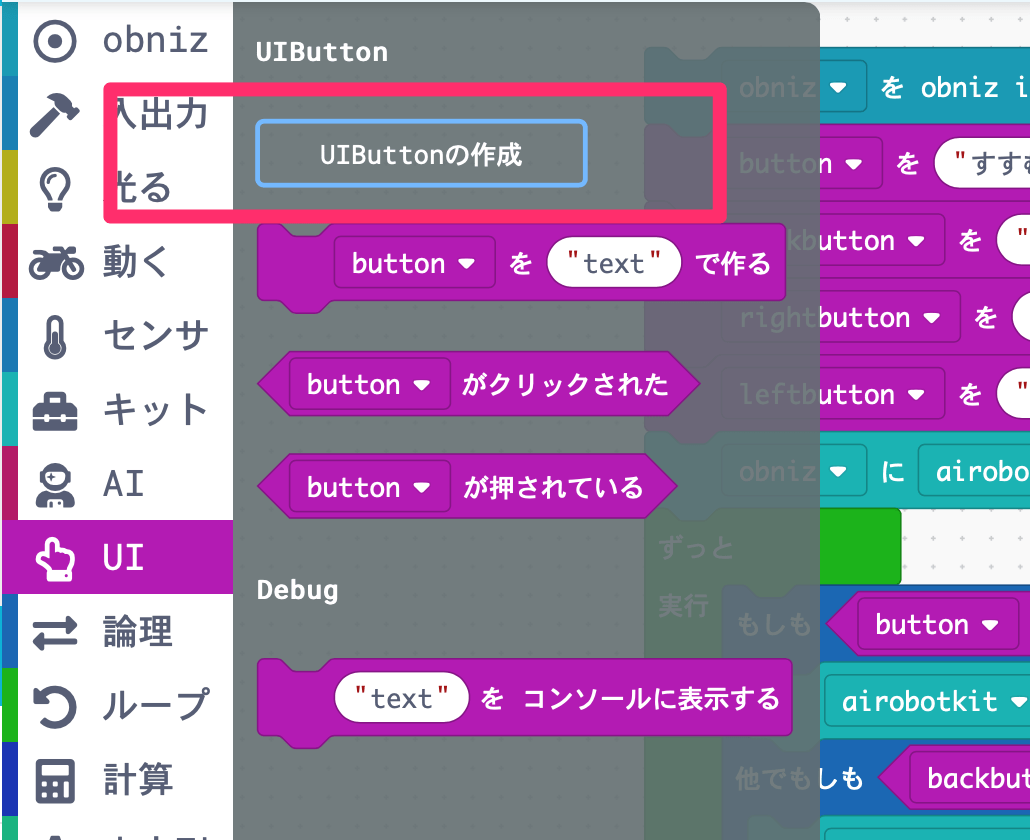
Then you will be asked for name.
Before you make a button, you will set a name for the button. (Since the button is managed as a variable, you will decide the name of the variable.)
Give an appropriate name in half-width alphanumeric characters. We want to go back in the opposite direction of going forward, so we'll name it "backbutton". Then press OK.
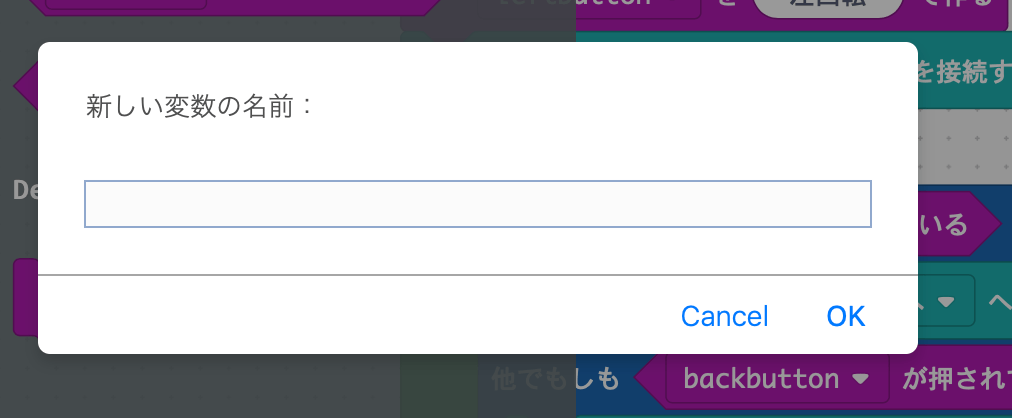
Pressing OK does not change anything on the screen. we just increased the names that can be used.
However, if you put 「Create button with "text"」 in another block program and select the place called "button", the "backbutton" you created earlier will appear, so by selecting this, this The button is created with the name "backbutton".
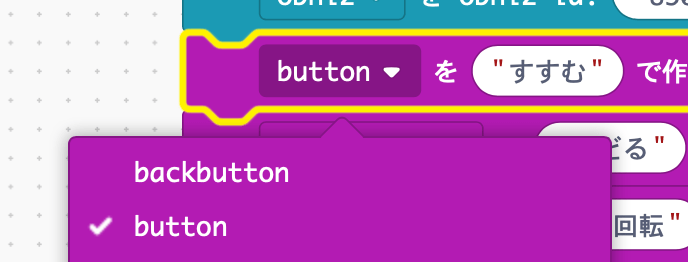
Now let's go back if this is pressed.
You can increase the "what if" condition in the loop.
There is a plus button at the bottom left of if. You can add another condition by pressing this.
Bring another "button is pressed" from the UI and add it here.
Then select "button" and change it to "back button".
Bring "Move airobot kit" from "Kit" and switch the direction of movement to "Back" instead of "Forward".
With this, you can prepare three blocks, one you want to execute when "button" is pressed, the block you want to execute when "back button" is pressed, and the other block you want to execute when neither is pressed. It was. Will look like this
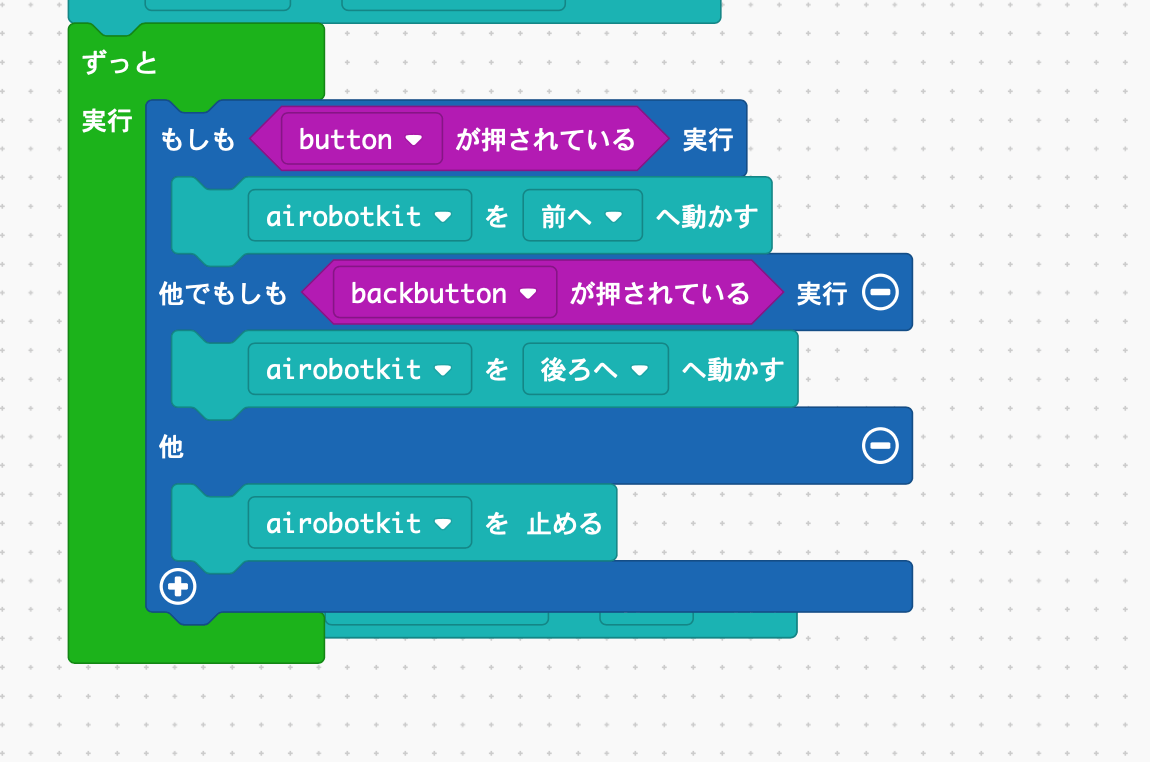
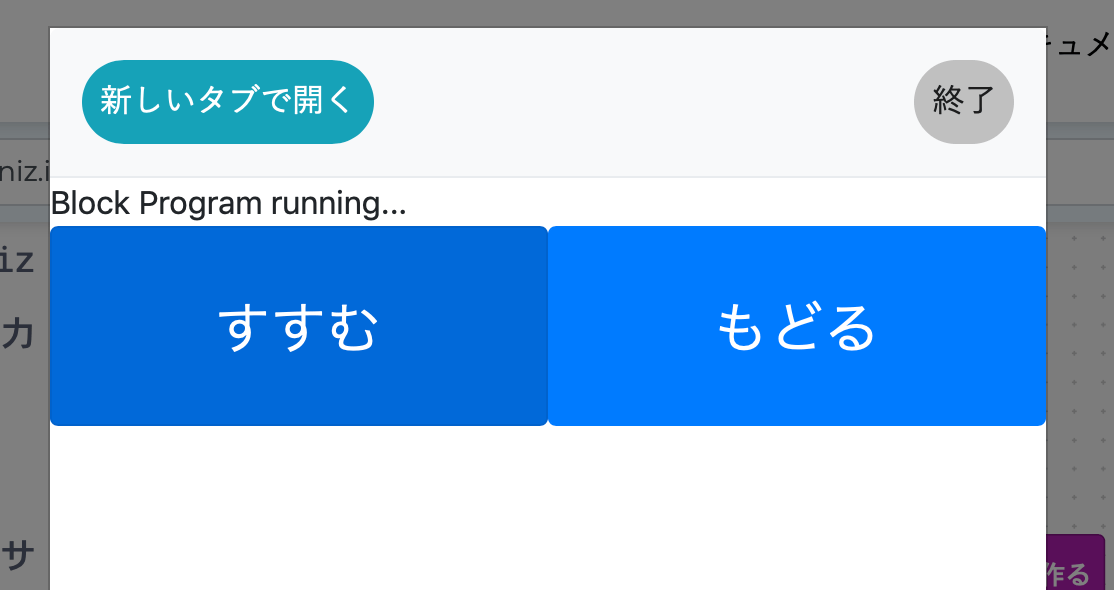
If you execute it, two buttons will appear like this.
And if you press "Proceed", the robot will advance, and if you press "Return", it will back.
4 buttons
Let's also rotate.
Add two more buttons in the same way.
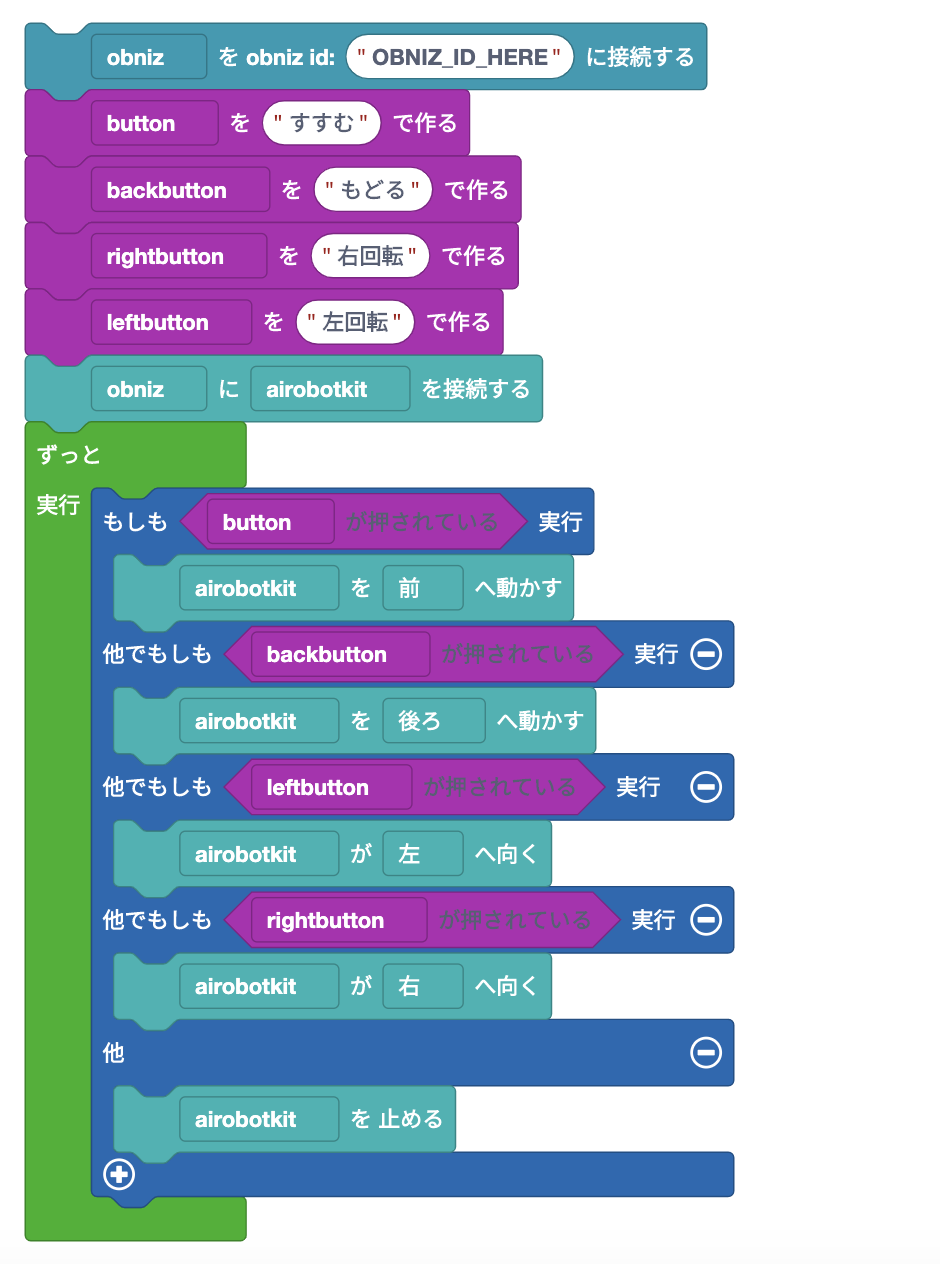
And make it rotate when each is pressed.
The "kit" has a block for rotation that says "airobot kit turns to the right".
Let's use this to rotate when the button is pressed.
This is the completed radio control program that can rotate front, back, left and right.
We also have a programmed video, so if you want to see where the blocks are and how to do it, take a look.
When you run this program, four buttons will appear on the screen.
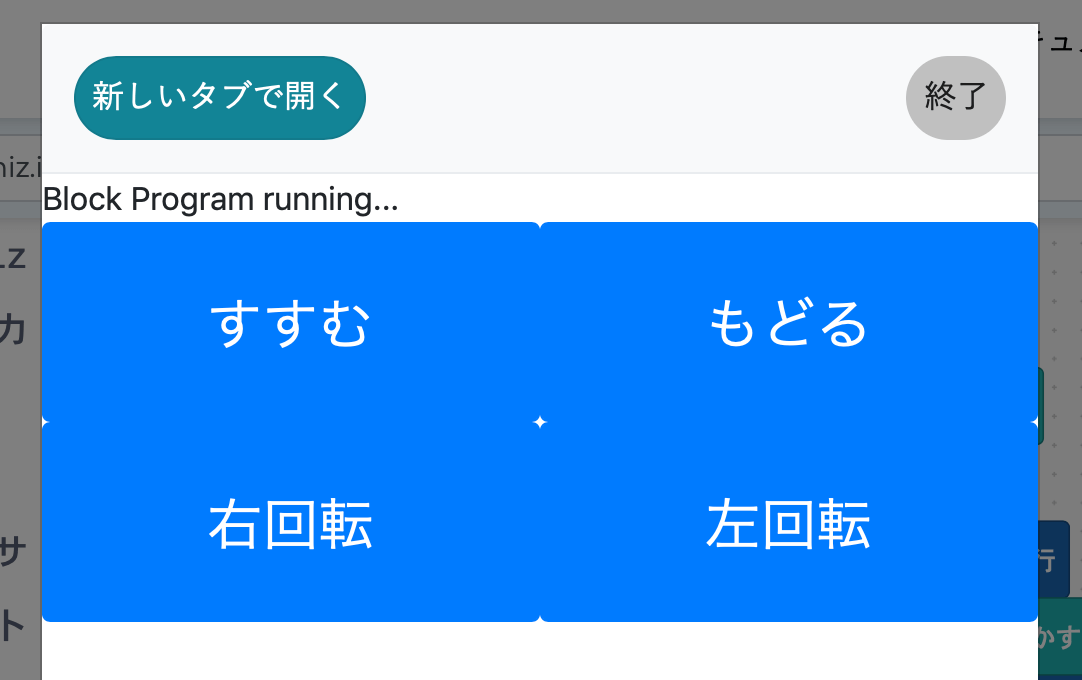
Let's remotely control the robot by pressing it!