Welcome to the world of AI robot kits!
The kit contains parts for assembling the robot.

Kit contents
- Cardboard x 3
- Motor x 2
- caster
- Tire x 2
- Tire x 2
- Distance sensor
- Distance sensor cable
- Micro USB cable (*)
- obniz Board(※)
* USB cable and obniz Board are not included in the Boardless Kit.
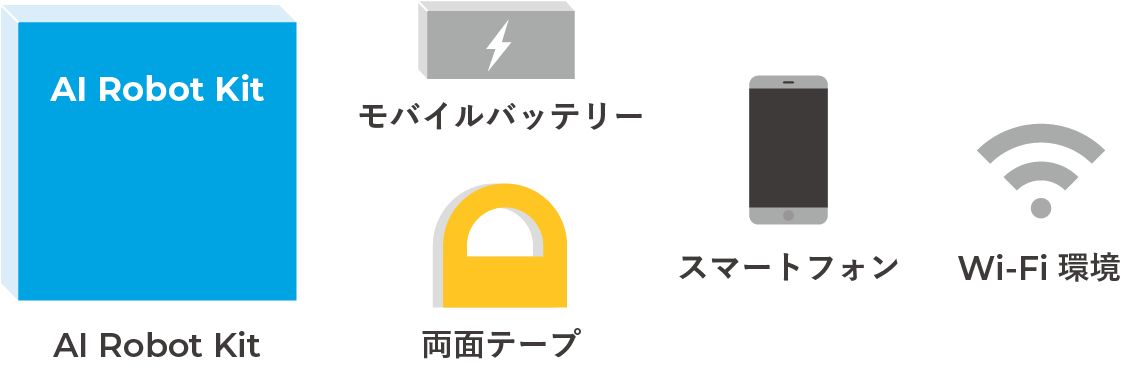
Other things that need to be prepared
In addition to the kit, a smartphone, mobile battery, and Wi-Fi environment are required.
Step0. Connect obniz Board to Wi-Fi
First, connect the obniz Board to Wi-Fi.
How to start obniz Board and how to set up connection to Wi-Fi is Please confirm.quick start
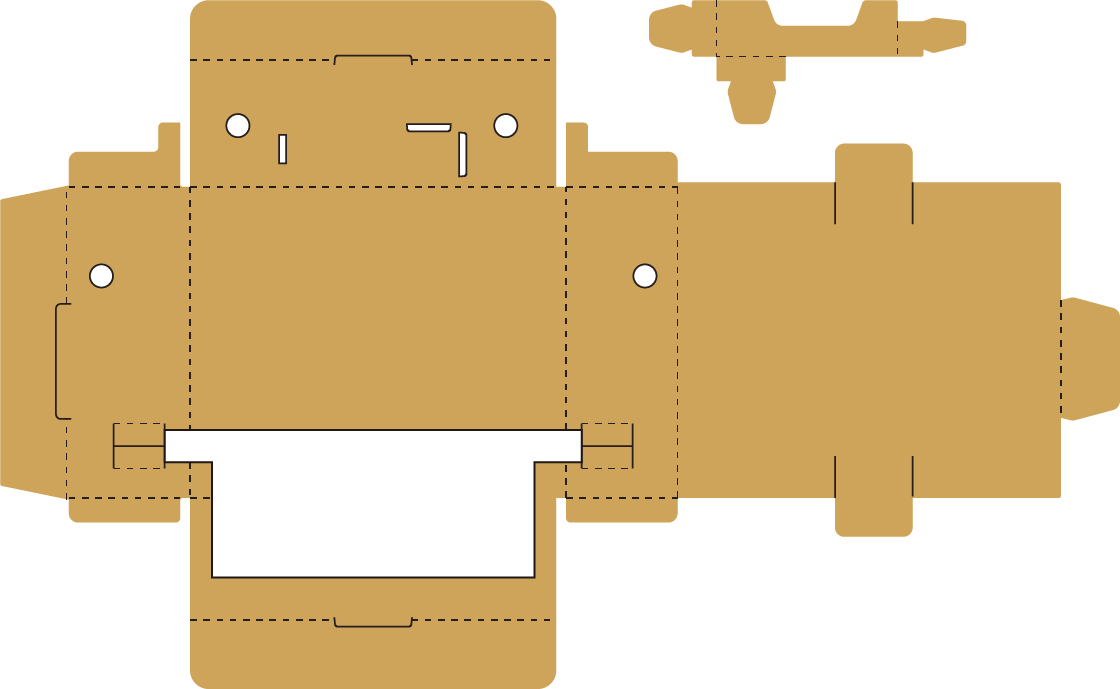
Step1.Remove unnecessary parts
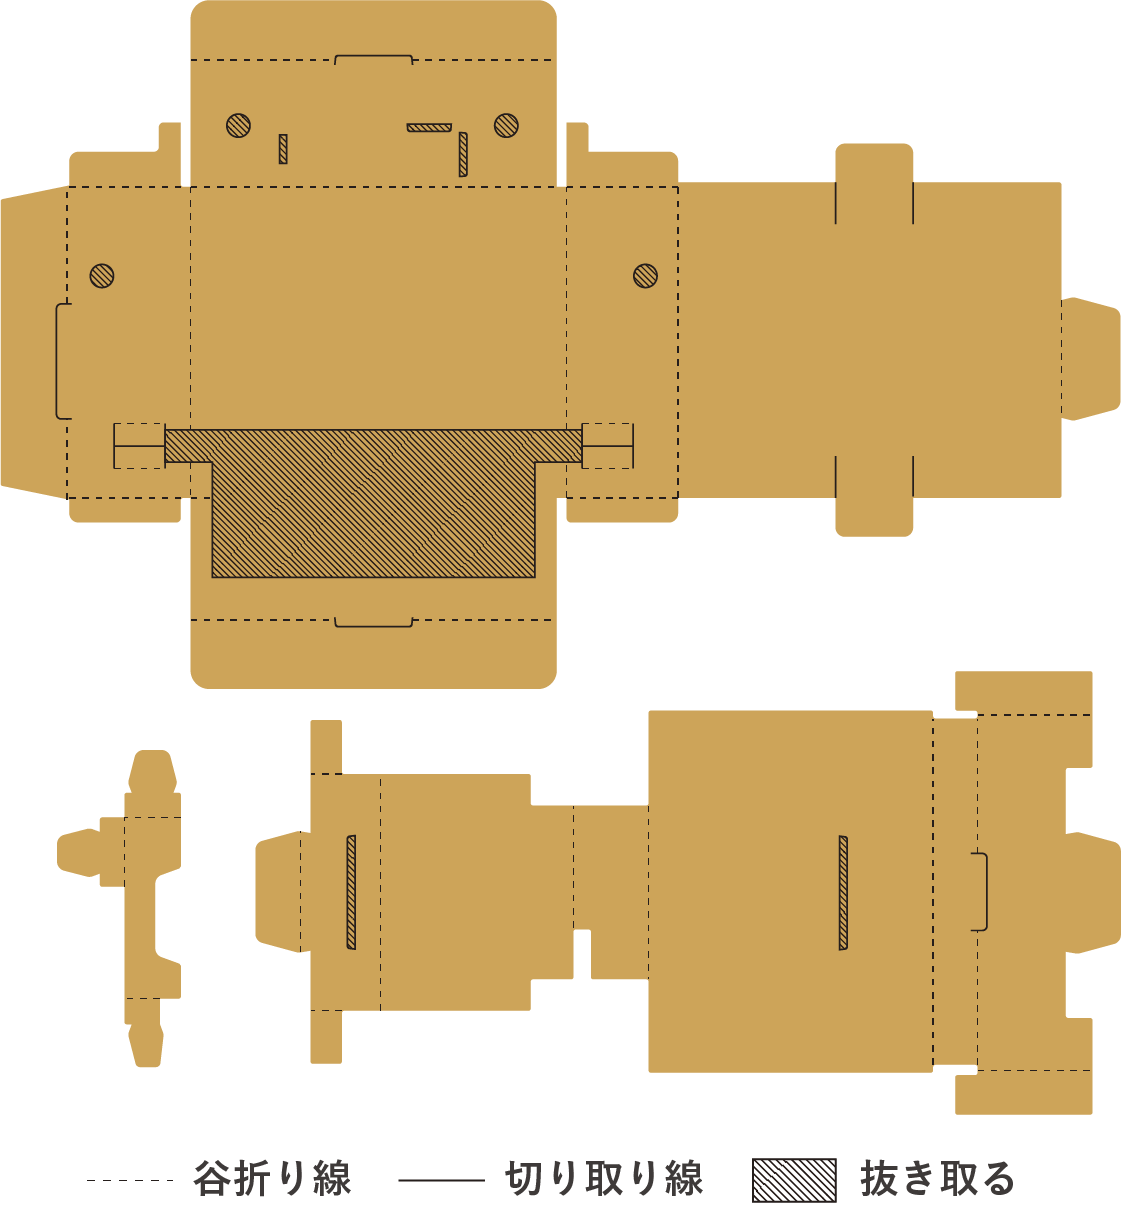
Step2. Assembling the inner part of the robot
We will assemble the second largest cardboard parts.
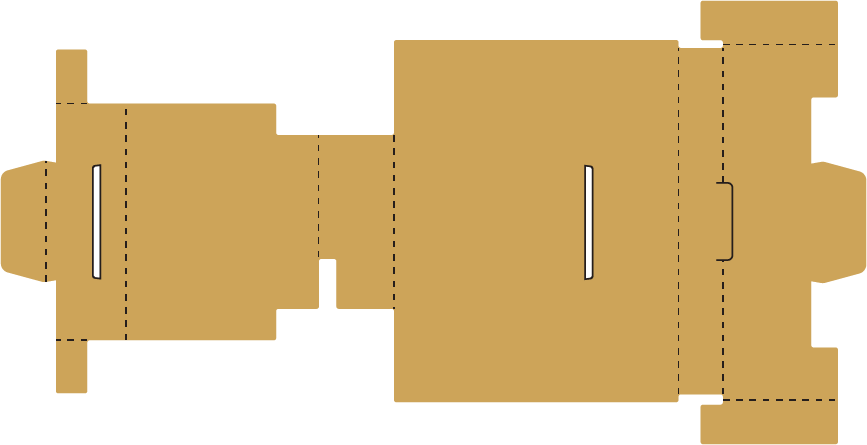
Step3. Assembling the outer part of the robot
Assemble the remaining two cardboard parts and combine them.
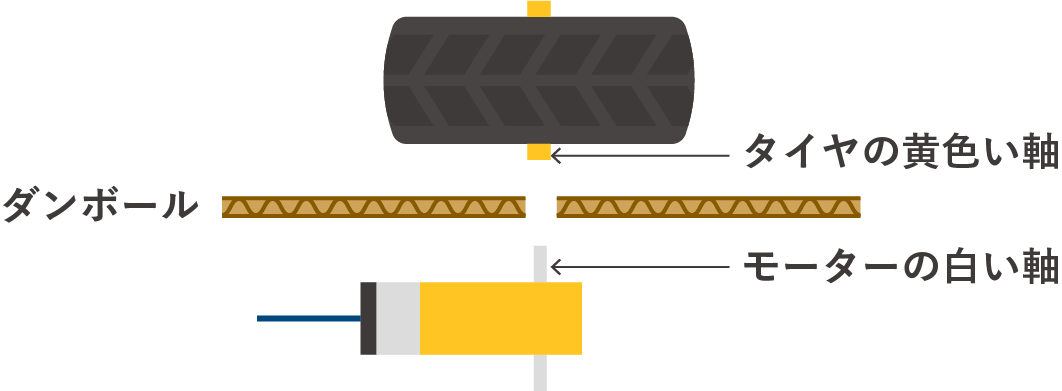
Next, attach the motor and tires. Insert so that the flat part of the shaft fits.
Insert until the white shaft of the motor disappears.
Step4. Combine the inner and outer parts of the robot
Combine the parts assembled in Step 2 and Step 3.
Step5. Attach castors and distance sensor
First, attach the casters. After sticking the velcro with a sticker, glue the casters.
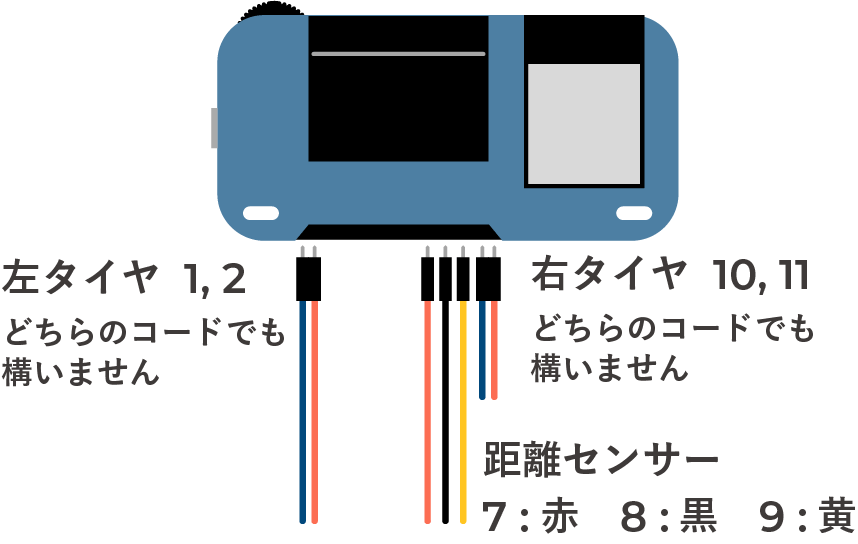
Next, attach the distance sensor with double-sided tape.
Step6. Attachment of obniz Board
After plugging the cord into the obniz Board, place it in your cardboard pocket.