First, let's check the values from the sensor using the App provided.
The configuration is as follows.
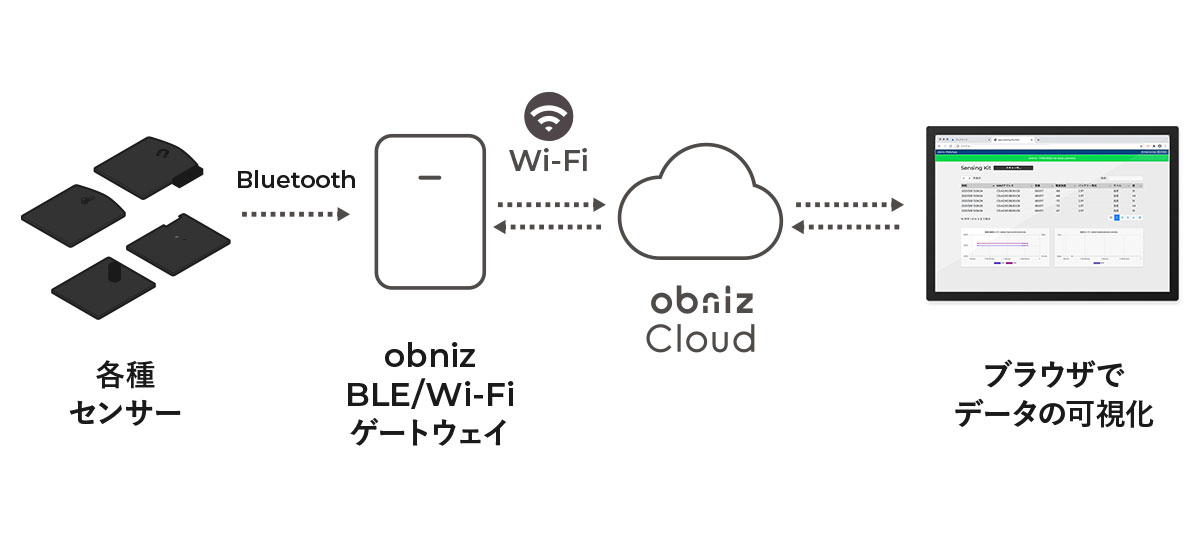
The visualization software operates the obniz BLE/Wi-Fi Gateway via obnizCloud to scan for BLE.
As a result, it picks up the signal emitted by the BLE sensors and the visualization software displays it on the browser.
Setup
- Connecting the obniz BLE/Wi-Fi Gateway to Wi-Fi
- Register an account in obniz Cloud and connect gateway to the account.
- Enter your obnizID in the application screen and run it.
1. Connecting the obniz BLE/Wi-Fi Gateway to Wi-Fi
First, turn on the gateway and connect it to Wi-Fi.
For detailed instructions, please click hereInternet Connection Setting.
2. Connect the gateway to your account.
Sign in to the Developer's Console (obniz Cloud)
From Developer's Console, connect the gateway to your account.
If you do not have an account, please sign up for one.
How to connect gateway
While signed in to the developer console, simply scan the QR code on the side of the obniz BLE/Wi-Fi Gateway unit to connect it to your account (only once).
For detailed instructions, please click Registration.
By registering the gateway to your account, you can check the online status, upgrade the OS, and install applications.
3. Use the App to check sensor values.
A browser application (HTML program) for the Sensing Kit is available.
Please refer to the following for actual use and instructions.
Software Developments
The program for the app is publicly available. You can view and copy it from the "View Code" page, so you can develop based on it.
Also, for BLE development using obniz, see BLE Reference.