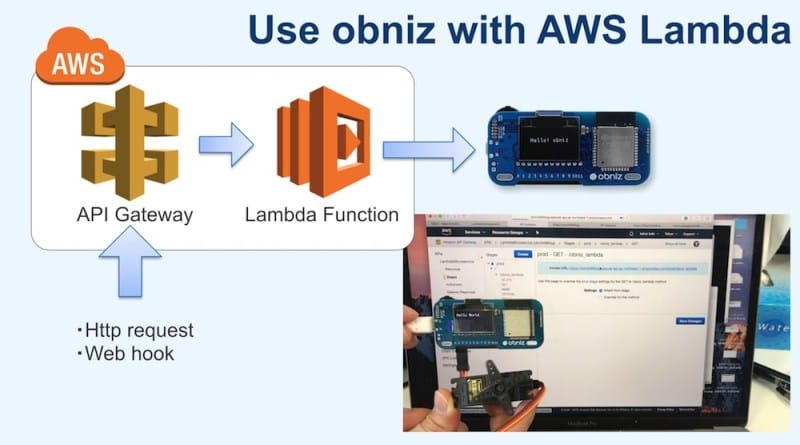
AWS Lamdaとは
AWSの提供するサーバーレスシステムです。サーバーレスとは、CPUやメモリといったプログラムを動かすマシンのことを意識せずにプログラムを動かすことができる思想のことです。これを利用することでサーバーのことを意識せずNodejsプログラムを動かすことができます。
特にイベントをきっかけにした実行に優れていて、webhookなどにも対応しやすくなり,最小限のコストでいろいろなものが作れます
ここではAWS Lambdaでobnizを使ってみます.
Nodeファイルの作成
まず,lambdaで動かすnode packageを作り,obnizをインストールします
mkdir obniz_lambda
cd obniz_lambda
npm install obniz
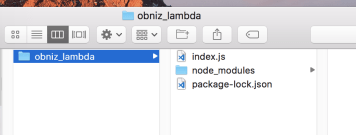
lambdaでは“index.js”が必要なので,それも作ります
touch index.js
そうすると,フォルダ構成はこのようになっています.
index.jsの中に動かしたいobnizコードを書きます.
たとえば,次のコードはディスプレイに“Hello World”を表示し,PIN0~2に繋がったサーボモータを動かすコードです.
var Obniz = require("obniz");

exports.handler = function(event, context, callback) {
  var obniz = new Obniz("YOUR OBNIZ_ID_HERE");
  obniz.onconnect = async function () {

    var servo = obniz.wired("ServoMotor", {gnd:0, vcc:1, signal:2});
    servo.angle(90.0);

    obniz.display.clear();
    obniz.display.print("Hello World");

    await obniz.wait(500)
    servo.angle(0.0);
    obniz.close();
    callback(null, "success");
  };
};
YOUR OBNIZ_ID_HERE のところは自分の持っているobnizIDに置き換えてください
コードのポイントはいくつかあります.
require(“obniz”) の中でobnizをロードしています.
exports.handler = function … のように書くことで,lambdaで使う関数を作成します.
何かイベント(Web hookやS3にファイルが作成されたなど)が起きたときにこの関数が呼ばれます.
どんなイベントのときに呼ばれるかは後ほど設定します.
callback(null, “success”); はコールバック関数です.Node.jsは非同期の言語なので,処理が終了したらコールバックを呼ぶ必要があります.
また,この際に注意する必要があるのが,WebSocketです.WebSocketのコネクションを切断しないとlambda関数が終了せず,タイムアウトになってしまうので,
きちんとobniz.close();を呼ぶ必要があります
AWS Lambdaの設定
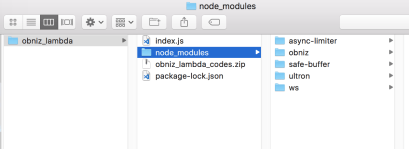
LambdaにはコードはZIPでアップロードするので,zipファイルを作成します.
このzipファイルは必要なnode_moduleを含み,index.jsがトップに来る必要があります.
間違えてフォルダごと圧縮しないように気をつけてください.(index.jsがobniz_lambda/index.jsなどの下位の階層に来てしまいます)
zip -r obniz_lambda_codes.zip index.js node_modules/ package-lock.json
ファイルの構成はこうなっています.
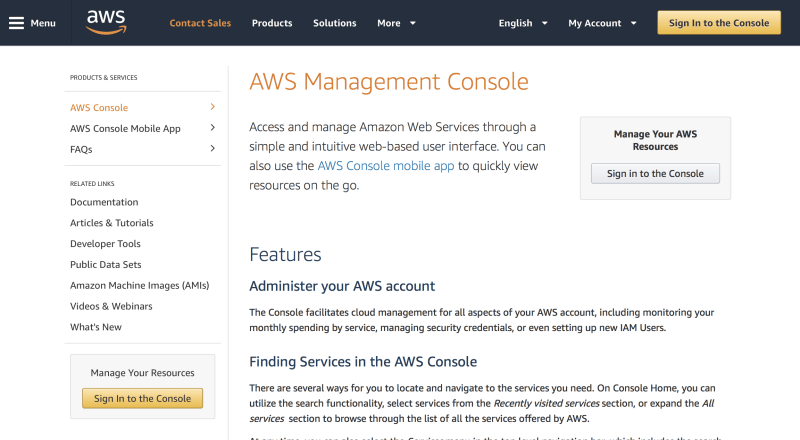
AWS Lambdaにアクセスしてログインします.
https://aws.amazon.com/console/?nc1=h_ls
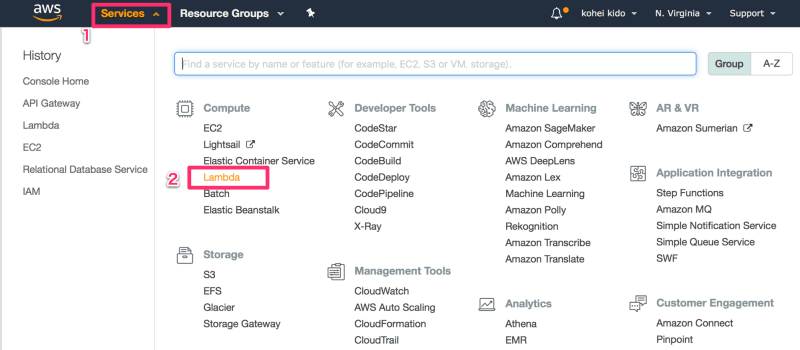
サービスからLambda を選んでください,リージョンも好きな場所変更します.(今回はTokyoにしています)
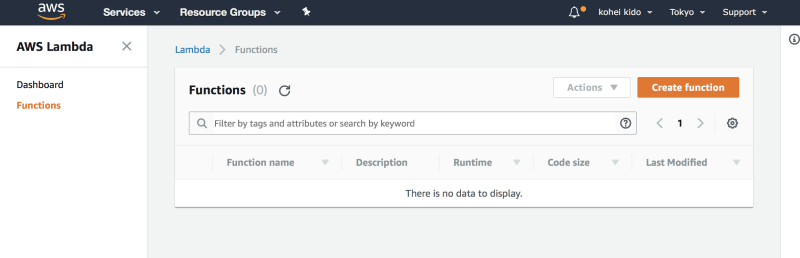
“Create Function”を押します
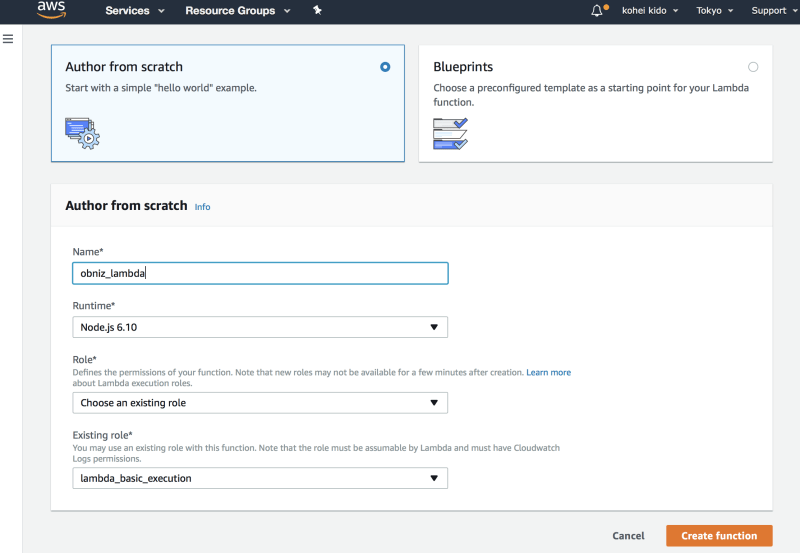
今回はまっさらな状態から作るので,“Author from scratch”を選び,項目を入力します.
Name : なんでもいいです. 私は“obniz_lambda”にしました
Runtime : Node.js 8.10
Role : Choose an existing role
Existing role : lambda_basic_execution
入力が終わったら “Create Function” を押します.
Function code のセクションで,ZIPにしたコードをアップロードします.
code entry type を “Upload a .ZIP file” にして, “obniz_lambda_codes.zip” をアップロードします.

右上のSaveボタンを忘れずに押します.
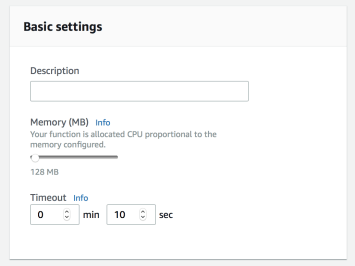
もし,3秒以上のコードが動く可能性がある場合は,“Basic setting”でタイムアウト時間を延長して保存します.
それではテストをしてみましょう
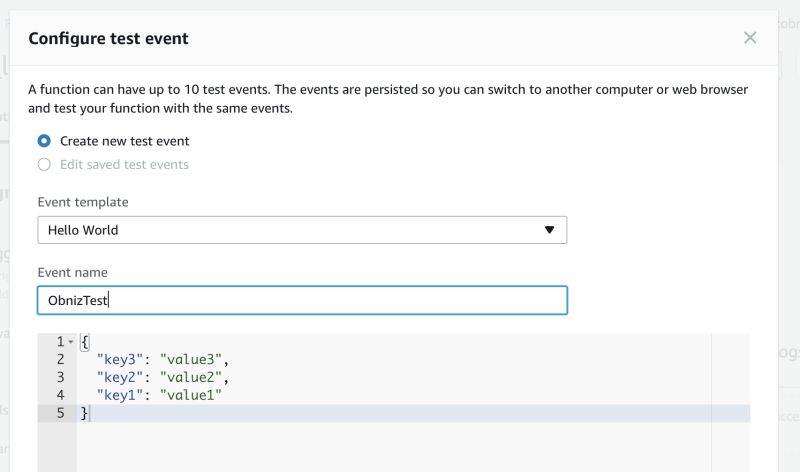
“select a test event” の部分から,“Configure test events”を選択肢ます
イベントの名前をつけたら,作成します. 他のフィールドはそのままで大丈夫です.
テストをするために, obnizを電源につなげ,モータをつなげ,Wi-Fiにも接続します.
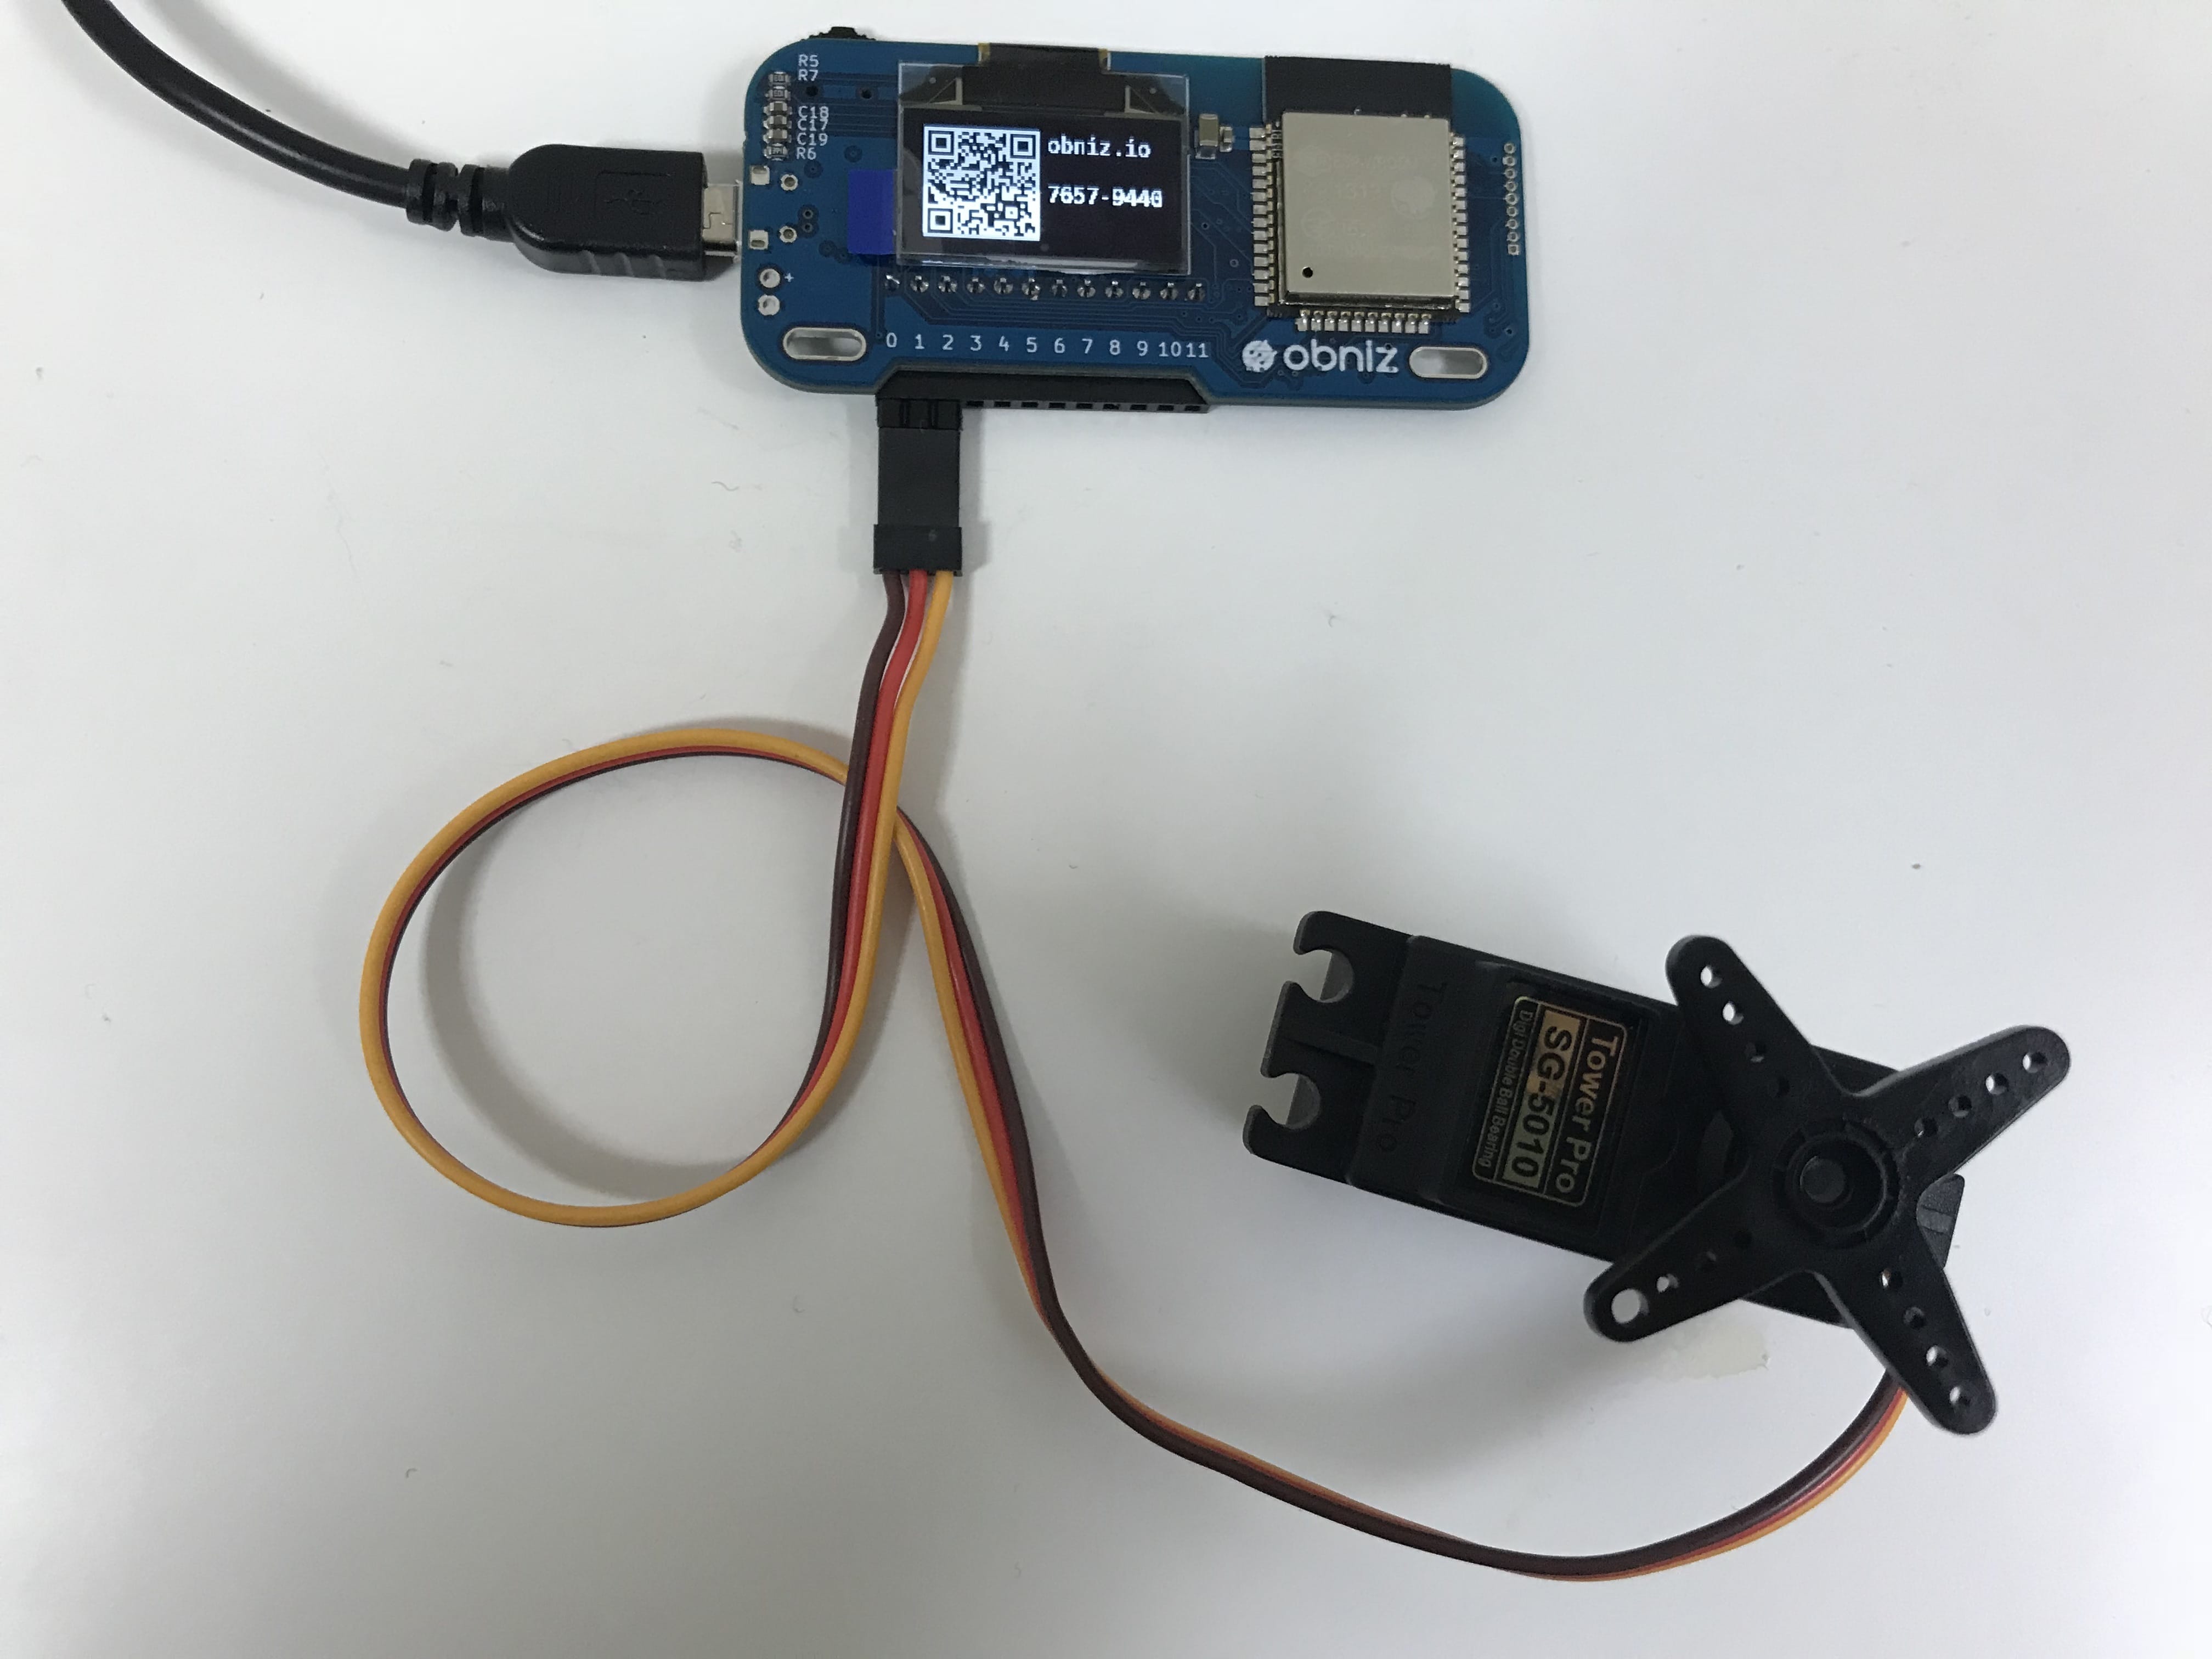
testボタンを押してテストを開始します.obnizに一瞬だけ"Hello World"が表示され,サーボモータが動いたと思います.
画面では "Execution result : successed."が表示されます.
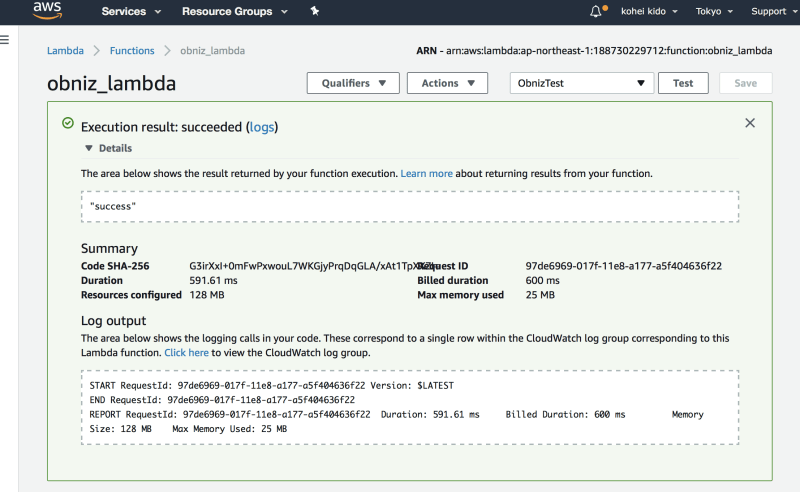
もし失敗したら,コードや設定を見直してみてください.
とくに, “YOUR OBNIZ CODE”を変更したか,timeoutが適切になっているかが注意点です.
AWS API Gatewayの設定
lambdaのイベントはいろいろなものがありますが,今回は外部のWebからアクセスできるように,API Gatewayの設定をします
Designerの中で“API Gateway”を選択肢ます,
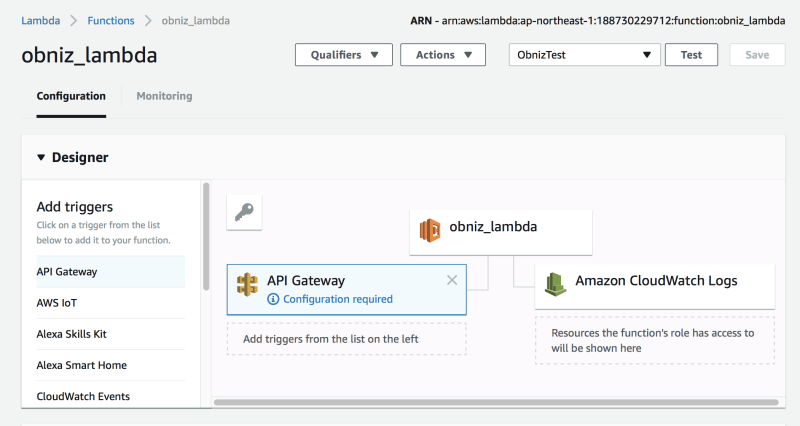
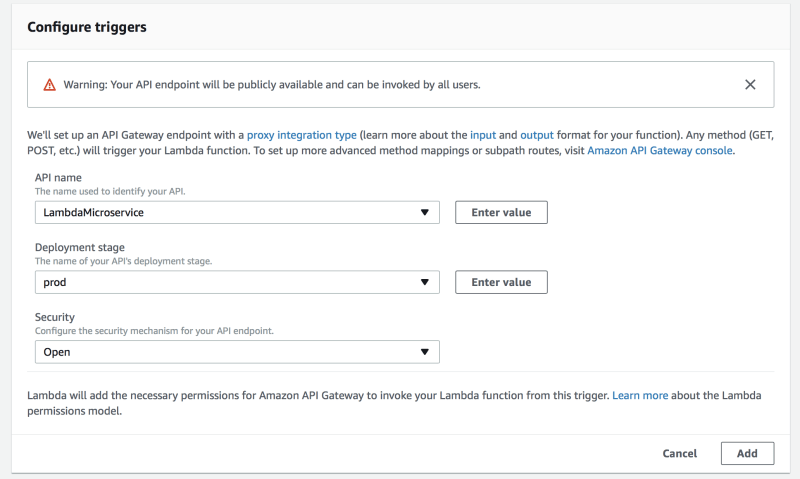
“Configure triggers”が出てくるので,記入します.
API name: なんでもいいです.“LambdaMicroservice”のデフォルトのままで大丈夫です
Deployment stage : なんでもいいです.“prod” のデフォルトのままで大丈夫です
Security : “Open” にします.セキュリティなしのどこからでの接続できる設定です.
保存するとこういう表示になります
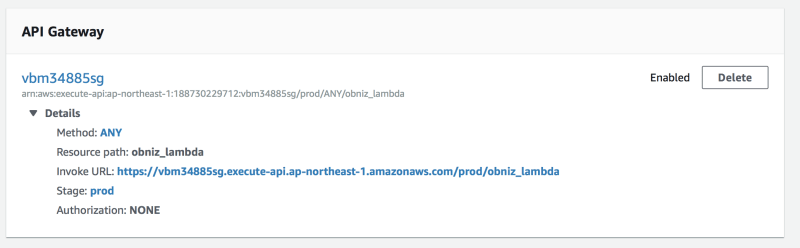
API Gatewayの名前の部分(画像では“vbm34885sg”)をクリックしてAPI Gatewayの設定ページに行きます.
とはいっても,設定は全て自動でされています.
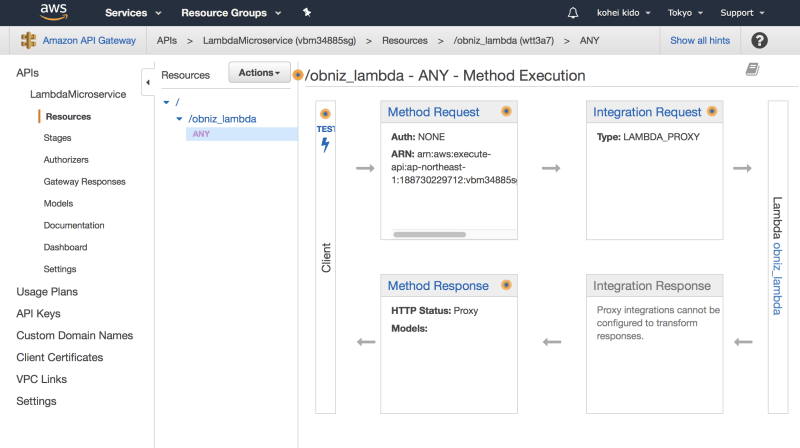
この状態では非公開API担っているので,デプロイして後悔します.
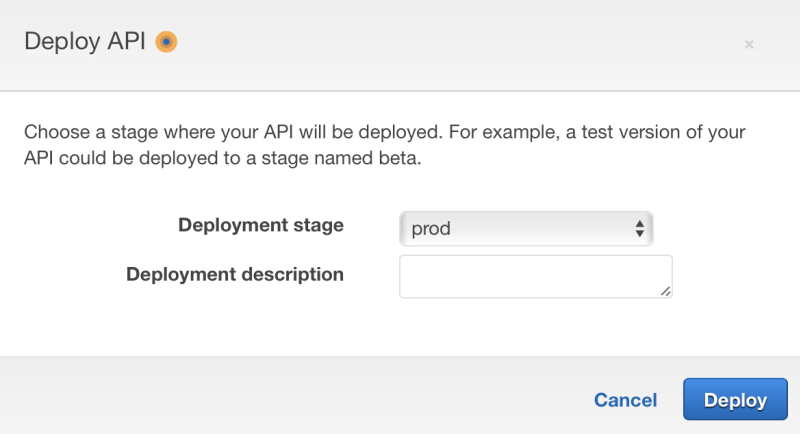
Actions → Deploy API を押します.
モーダルビューが出てくるので,Deployment stageを “prod” にしてデプロイします.
ブラウザから試す
デプロイすると自動で“prod Stage Editor”に移動します.
Invoke URL(日本語だと URL の呼び出し)の横に書かれているのがAPI全体のベースアドレスです.
lambdaと紐付けたURLは prod → / → /obniz_lambda → GETのページに有ります
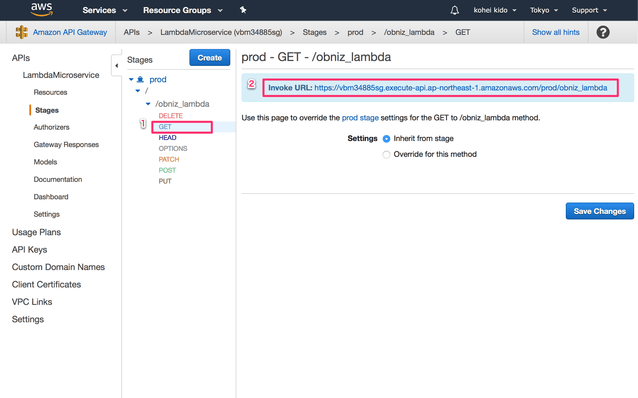
Invoke URL(日本語だと URL の呼び出し)の横のURLがAPIのアドレスです.
GETでアクセスすればlambdaが呼ばれる設定になっているので,そのままクリックすればobnizが動きます