Runkit is a free Nodejs execution service. You can write Nodejs from your browser and run it right away. You can also publish your own URLs, and you can create APIs and things like that in no time It's a great way to get started with Node.js+obniz.
So, if you want to try Node.js+obniz right away or as part of the REST API, you can use This is a great way to use obniz.
I'm going to try running it on runkit first.
Runkit embeds a Nodejs program written on Runkit into the home page The following can be edited and run from this website with the built-in Runkit. The following can also be edited and run from this website with built-in Runkit
// Runkit Example

const Obniz = require("obniz");
const yourObnizId = "OBNIZ\_ID\_HERE";  // write your obniz id

let obniz = new Obniz(yourObnizId);

let connected = await obniz.connectWait({timeout:10});

if(connected){
  obniz.display.clear();
  obniz.display.print("Hello obniz!");

  await obniz.wait(1000);
  obniz.close();
}
Let's try it out, and put your obniz id in the OBNIZ_ID_HERE field and add it to In the above code, click on OBNIZ_ID_HERE and rewrite it.
Click on OBNIZ_ID_HERE in the above code to rewrite it.
For example: const yourObnizId = "1234-5678";.
When you finish writing, click the green run button at the bottom right to run it
You will see "running" next to the run button and "Hello" on your obniz for one second. If you see the message "obniz!
About the code for serverless operation
If you want to run obniz in a serverless environment, such as runkit or AWS Lambda, you can use
You can write a program almost the same way as you use obniz in HTML, but
A few things that would be useful to change are the connection and disconnection to obniz.
- About the connection
If you wrote it in HTML or Node.js, you could wait for a connection.
However, in the case of serverless systems, the response often needs to be returned immediately, so it is necessary to set a timeout for the obniz connection.
Therefore, instead of writing obniz.onconnect = function(){} let connected = await obniz.connectWait({ timeout:10}).
This is the process of trying to connect to obniz for 10 seconds and putting the connection into a connected variable to see if it works
.
After that, use the if statement to determine if the connection has been made, and if so, start processing.
- About the cutting part
When running in HTML, close the browser and exit.
When running in Node.js, the connection will be broken after the app is closed.
Therefore, we can use it naturally without thinking about the connection.
However, in serverless systems, it is not always possible for us to specify the end timing of the program.
Such a situation is annoying, so it is necessary to explicitly disconnect by writing obniz. close(); to explicitly close the connection.
Also, if that's all you have, the connection is cut off immediately, and you can't see what's on the display. We don't have time to read, so we have to use await obniz.wait(1000); to put in a wait time to.
Run it in your account on Runkit
I just pressed the run button on this page to run it, but in order to write various code by myself, I had to use
Let's write it in runkit
// Runkit Example

const Obniz = require("obniz"); const yourObnizId = "OBNIZ\_ID\_HERE"; // write your obniz id

let obniz = new Obniz(yourObnizId);

let connected = await obniz.connectWait({timeout:10});

if(connected){ obniz.display.clear(); obniz.display.print("Hello obniz!");

await obniz.wait(1000); obniz.close(); }
First, open the runkit
If you are not logged in, please sign in at the top right corner.
After logging in, you will be able to write the code.
![]()
You can write and run the code directly here.
Let's copy this code and run it on runkit
Is the message "Hello obniz!" displayed in the same way?
If you try it a second time, the retry button appears on the right instead of the run button.
You can press that button to execute it.

Leave the LEDs shining.
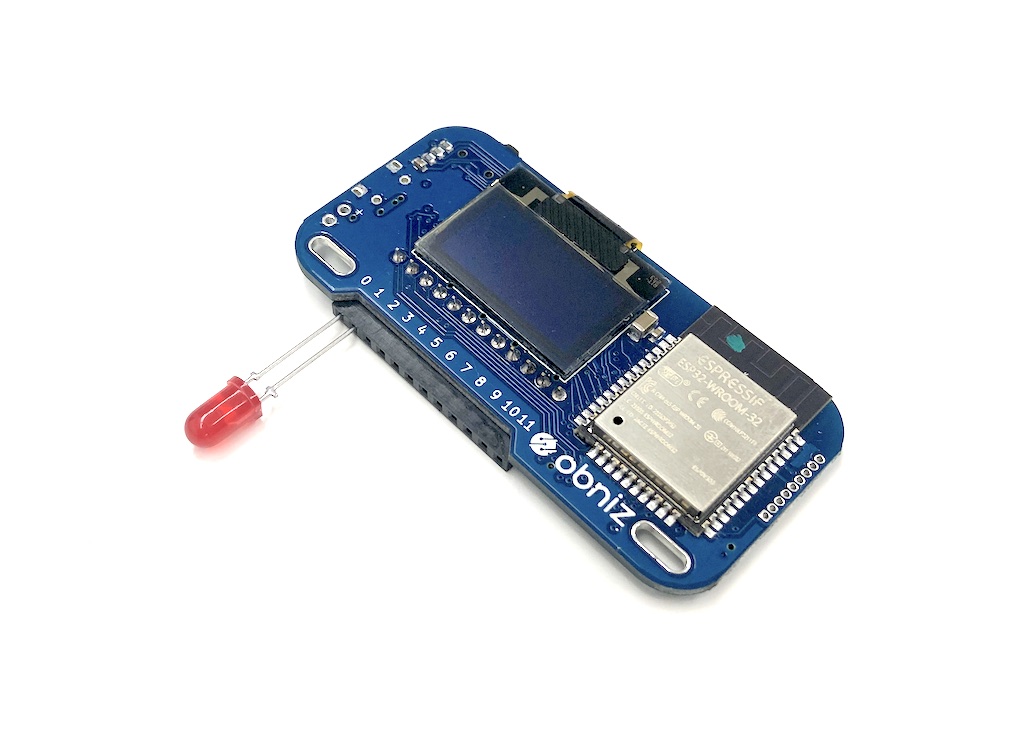
Now, let's try to light up the LEDs with a serverless system.
When you connect the LED to pin 0 and pin 1, you can use the part's LED to write
// Runkit Example

const Obniz = require("obniz");
const yourObnizId = "OBNIZ\_ID\_HERE";  // write your obniz id

let obniz = new Obniz(yourObnizId);

let connected = await obniz.connectWait({timeout:10});

if(connected){
  obniz.display.clear();
  obniz.display.print("Hello obniz!");

  await obniz.wait(1000);
  obniz.close();
}
Now you can turn on the LED for 1 second and then turn it off.
Let's try it out. Did it work properly?
Now, there are times when you want to shine for more than just one second.
In that case, what should I do?
obniz has a resetOnDisconnect function.
This is a function that maintains the state of the communication even if it is lost.
Try this instead of await obniz.wait(1000);
// Runkit Example

const Obniz = require("obniz");
const yourObnizId = "OBNIZ\_ID\_HERE";  // write your obniz id

let obniz = new Obniz(yourObnizId);

let connected = await obniz.connectWait({timeout:10});

if(connected){
     let led = obniz.wired("LED", {anode:0, cathode:1});
     led.on();

     obniz.resetOnDisconnect(false);
     obniz.close();
}
Let's run the program.
Did the LEDs stay on all the time?
If you want to turn off the LED, you need to write a program to turn it off in the same way.
// Runkit Example

const Obniz = require("obniz");
const yourObnizId = "OBNIZ\_ID\_HERE";  // write your obniz id

let obniz = new Obniz(yourObnizId);

let connected = await obniz.connectWait({timeout:10});

if(connected){
     let led = obniz.wired("LED", {anode:0, cathode:1});
     led.off();

     obniz.resetOnDisconnect(false);
     obniz.close();
}